|
|
|
|
|
DETECT EARTHQUAKES!
1 Hz - 10 Hz
| MMAG-1 | $ 20.00 + $ 10.00 s/h. |
The following photos show how to build the seismograph from common parts:
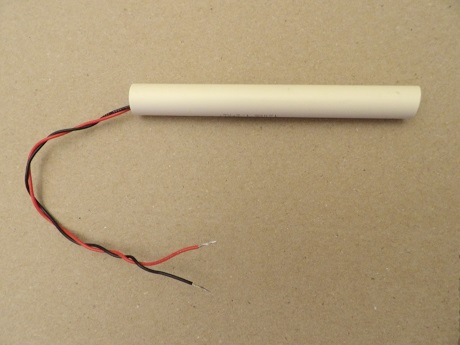
The photos show part # SPU-1. The Video above shows part MMAG-1 for even higher sensitivity.
BUILD THE 'PITCHER SEISMOGRAPH'! ITS EASY!
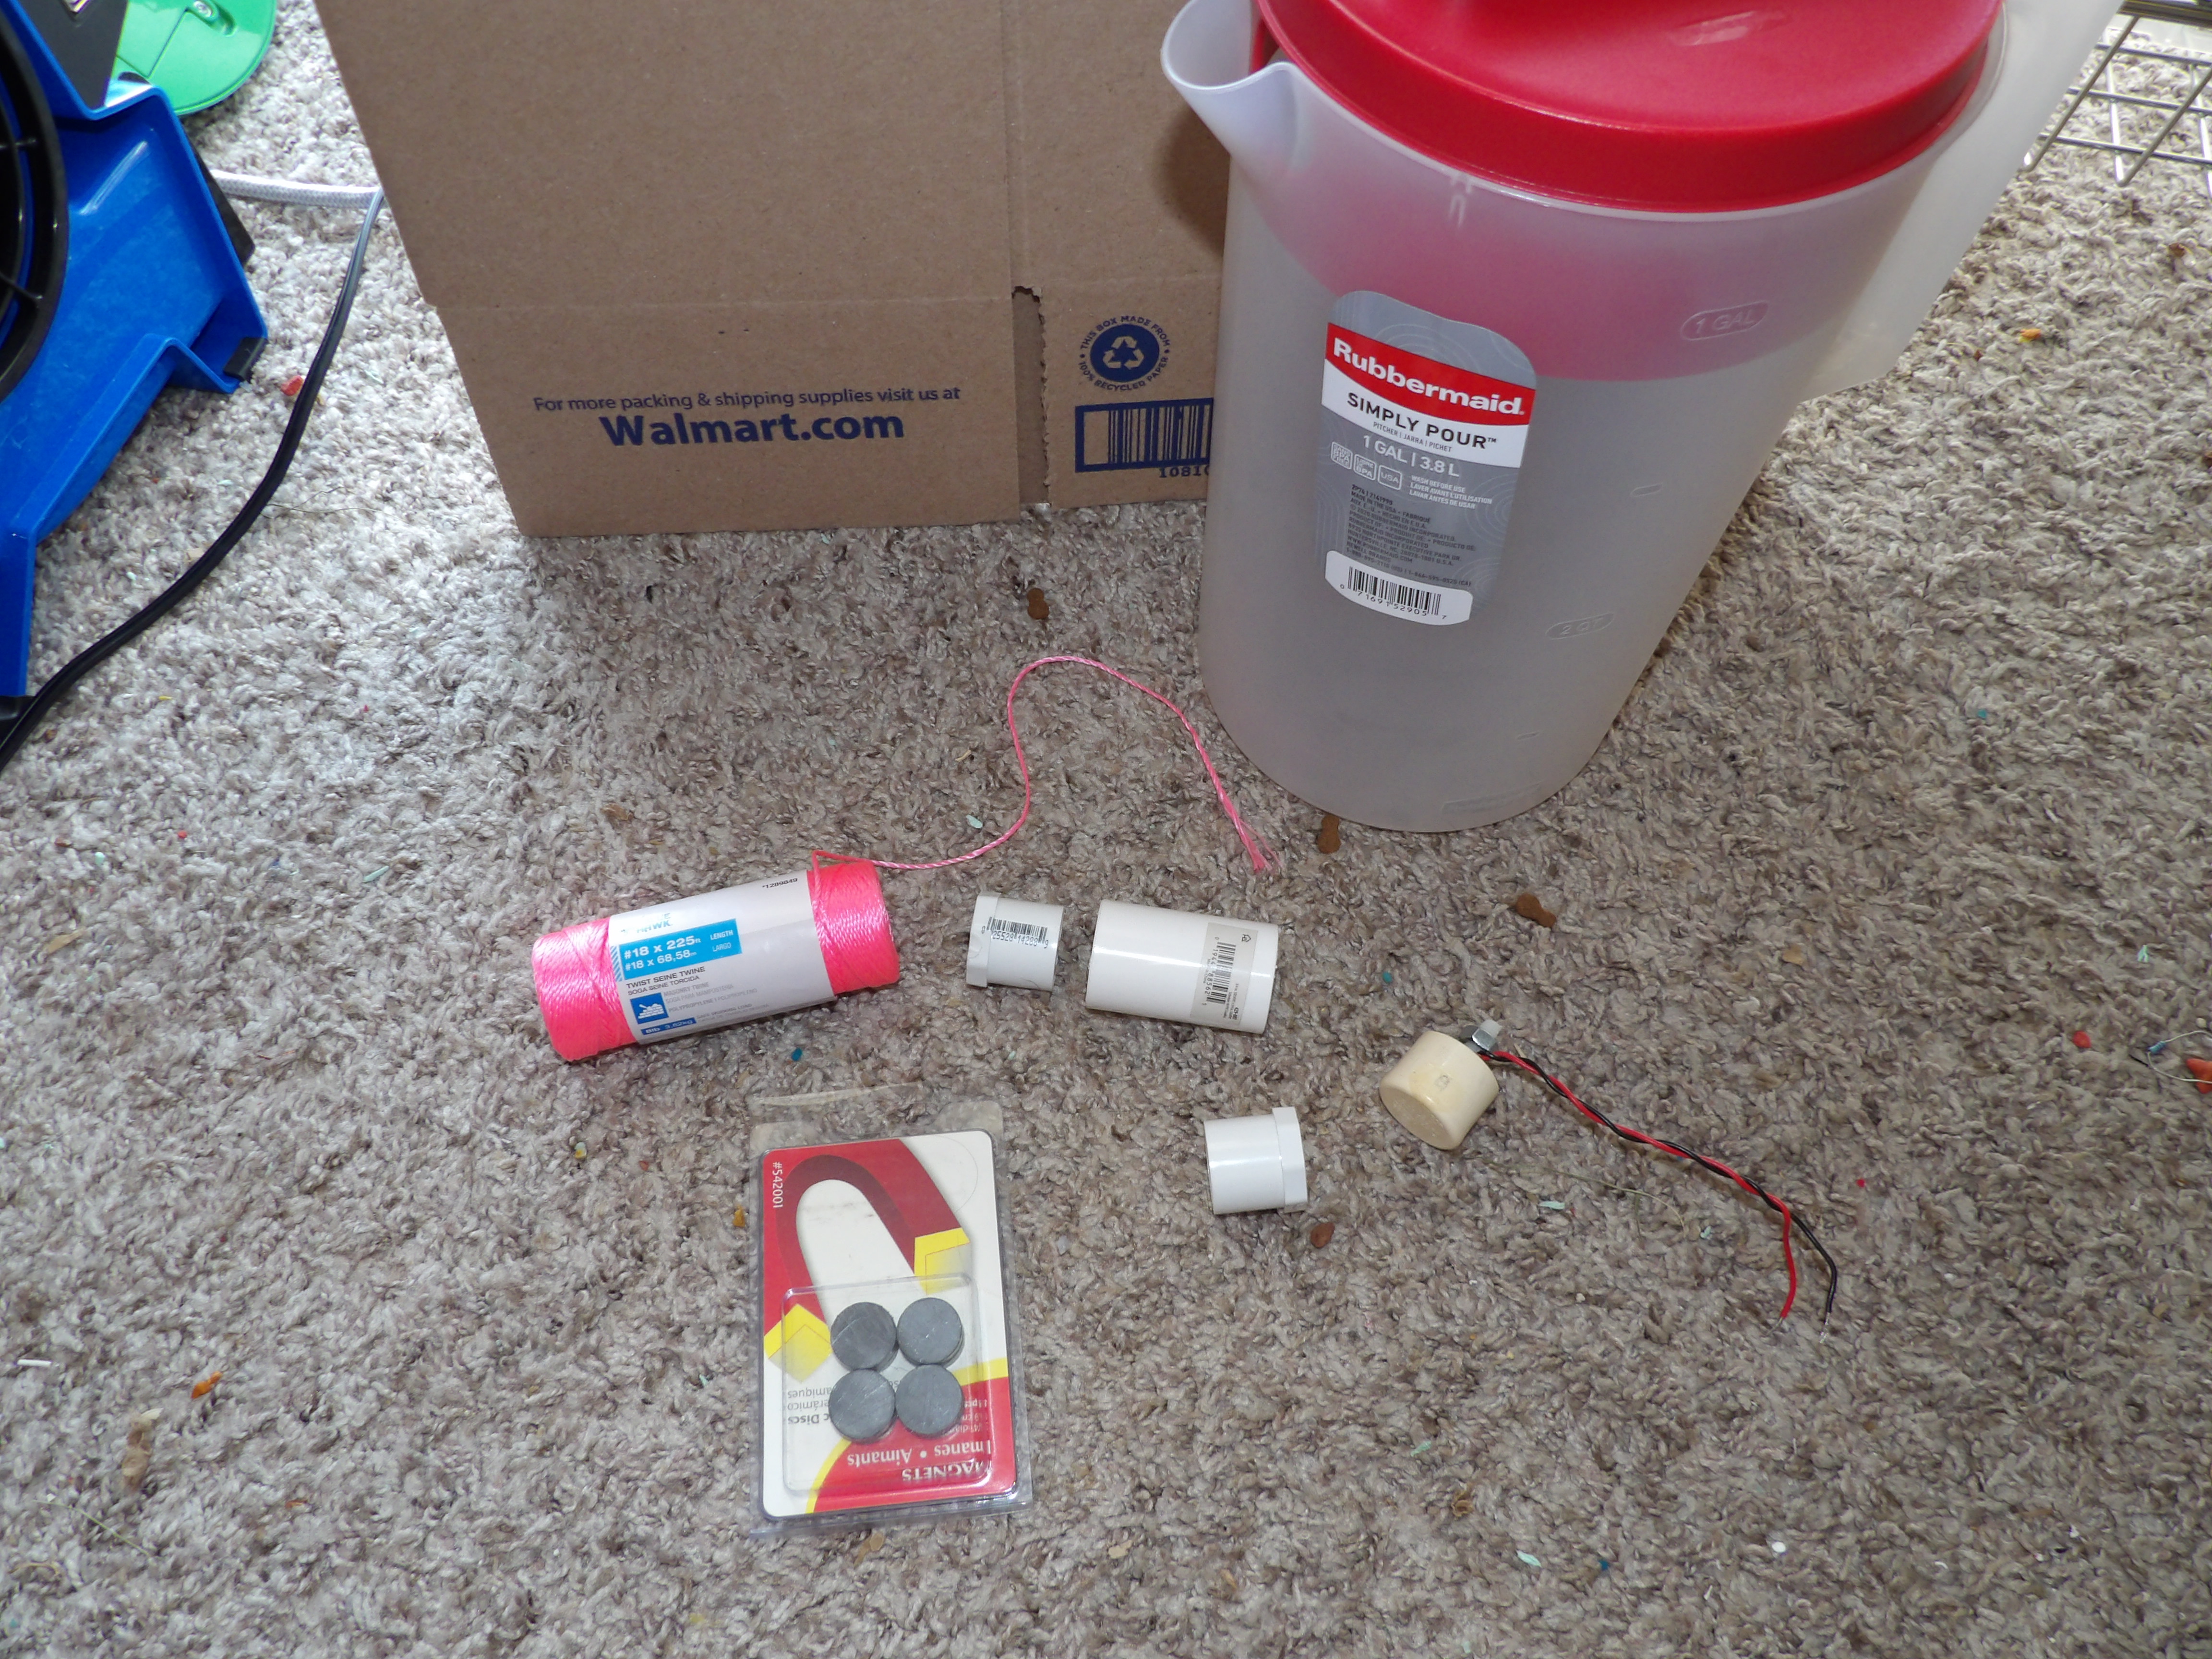
The seismograph can be assembled from common parts. It is highly sensitive and operates at a frequency of 1 Hz.
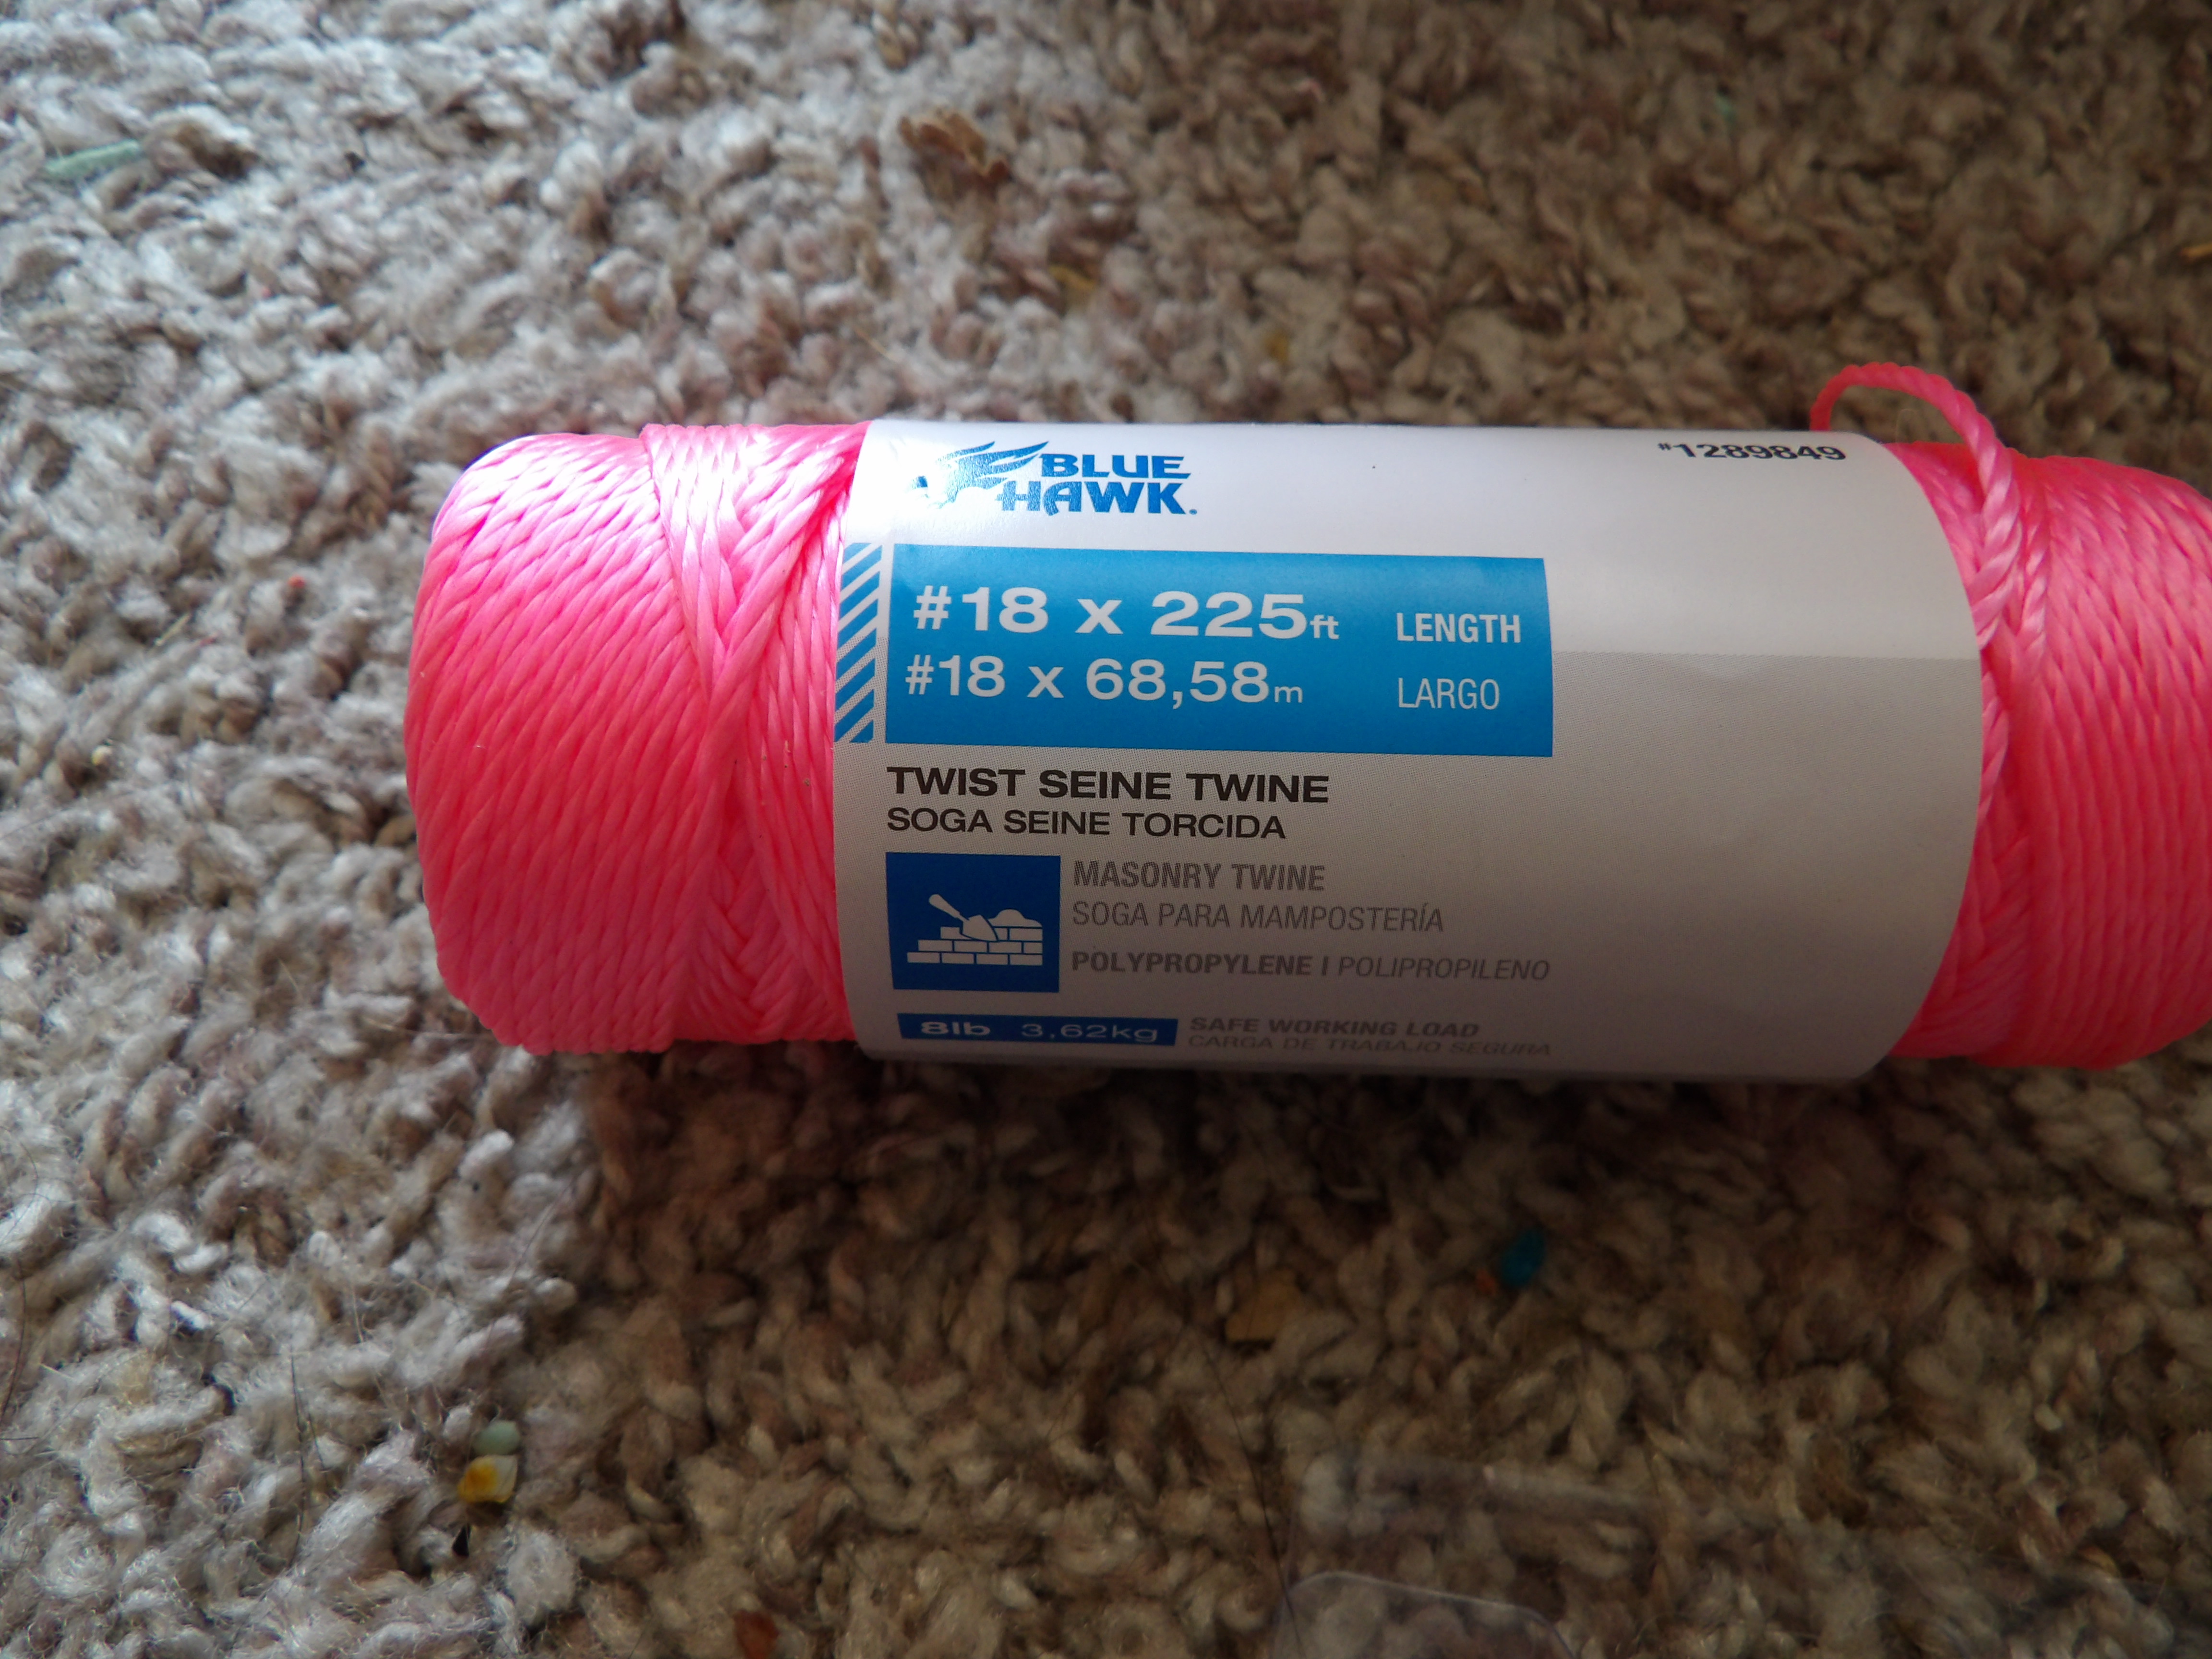
Some twine can be used to suspend the mass weight containing the magnets.
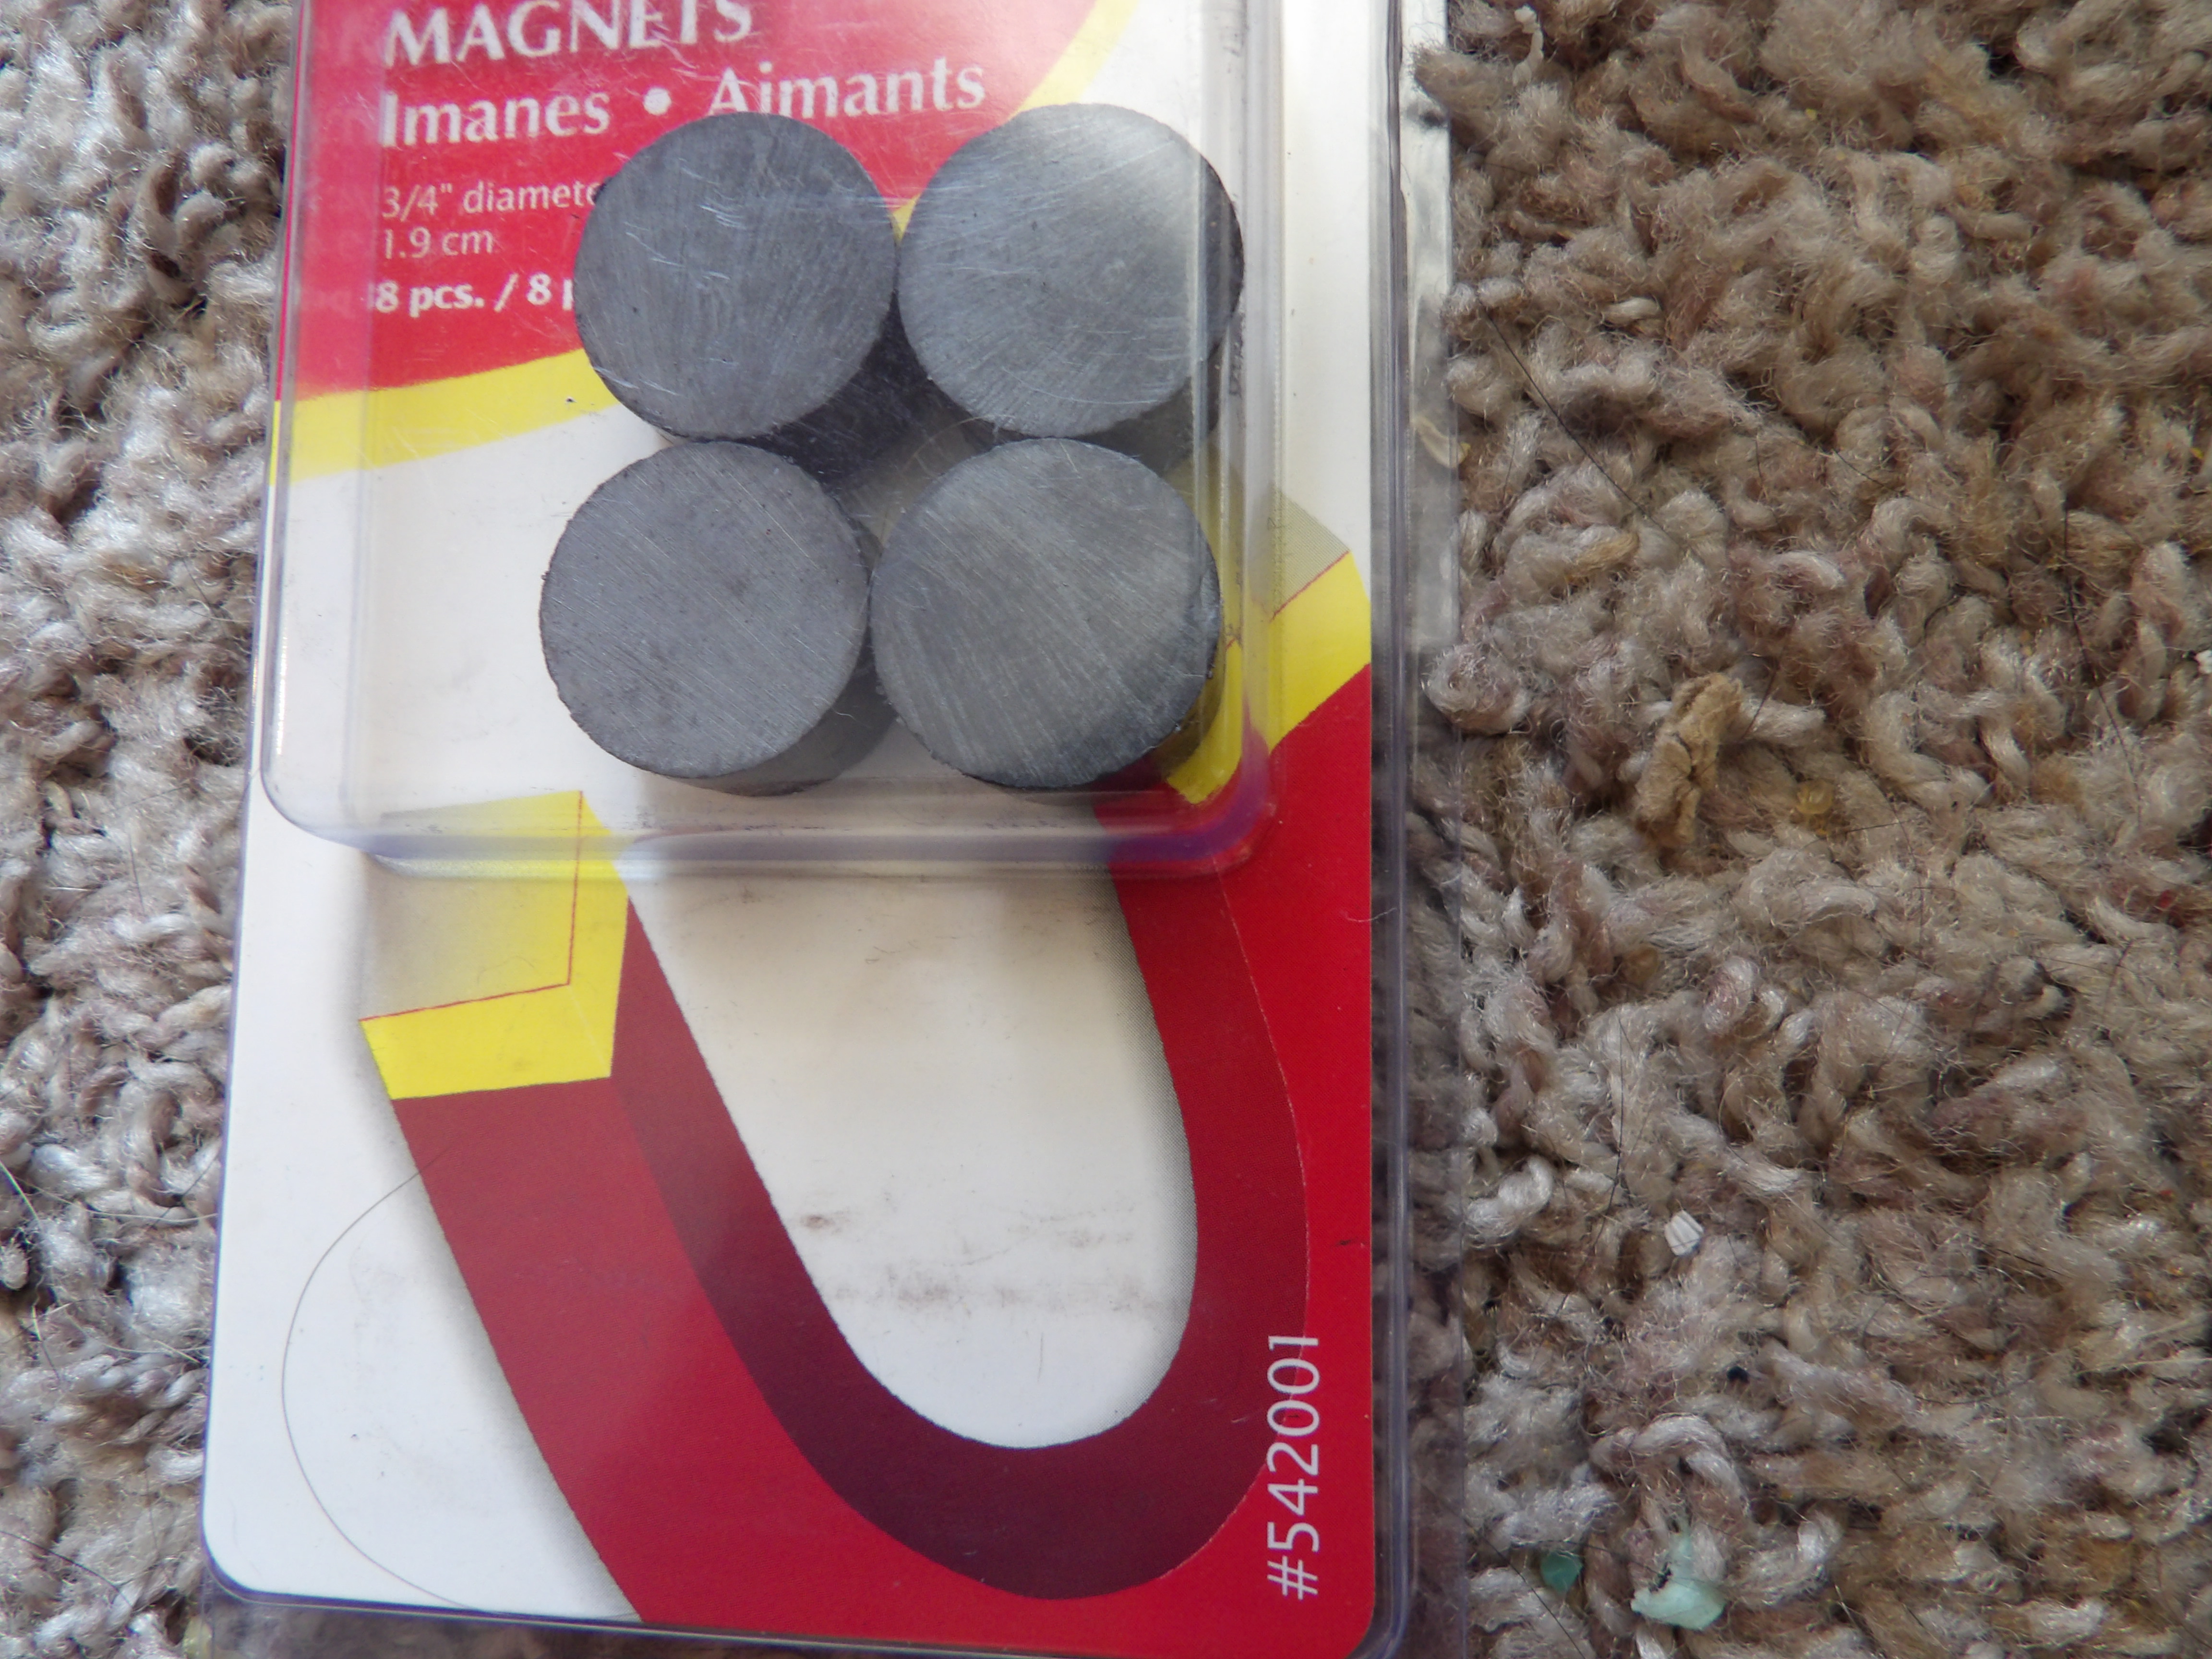
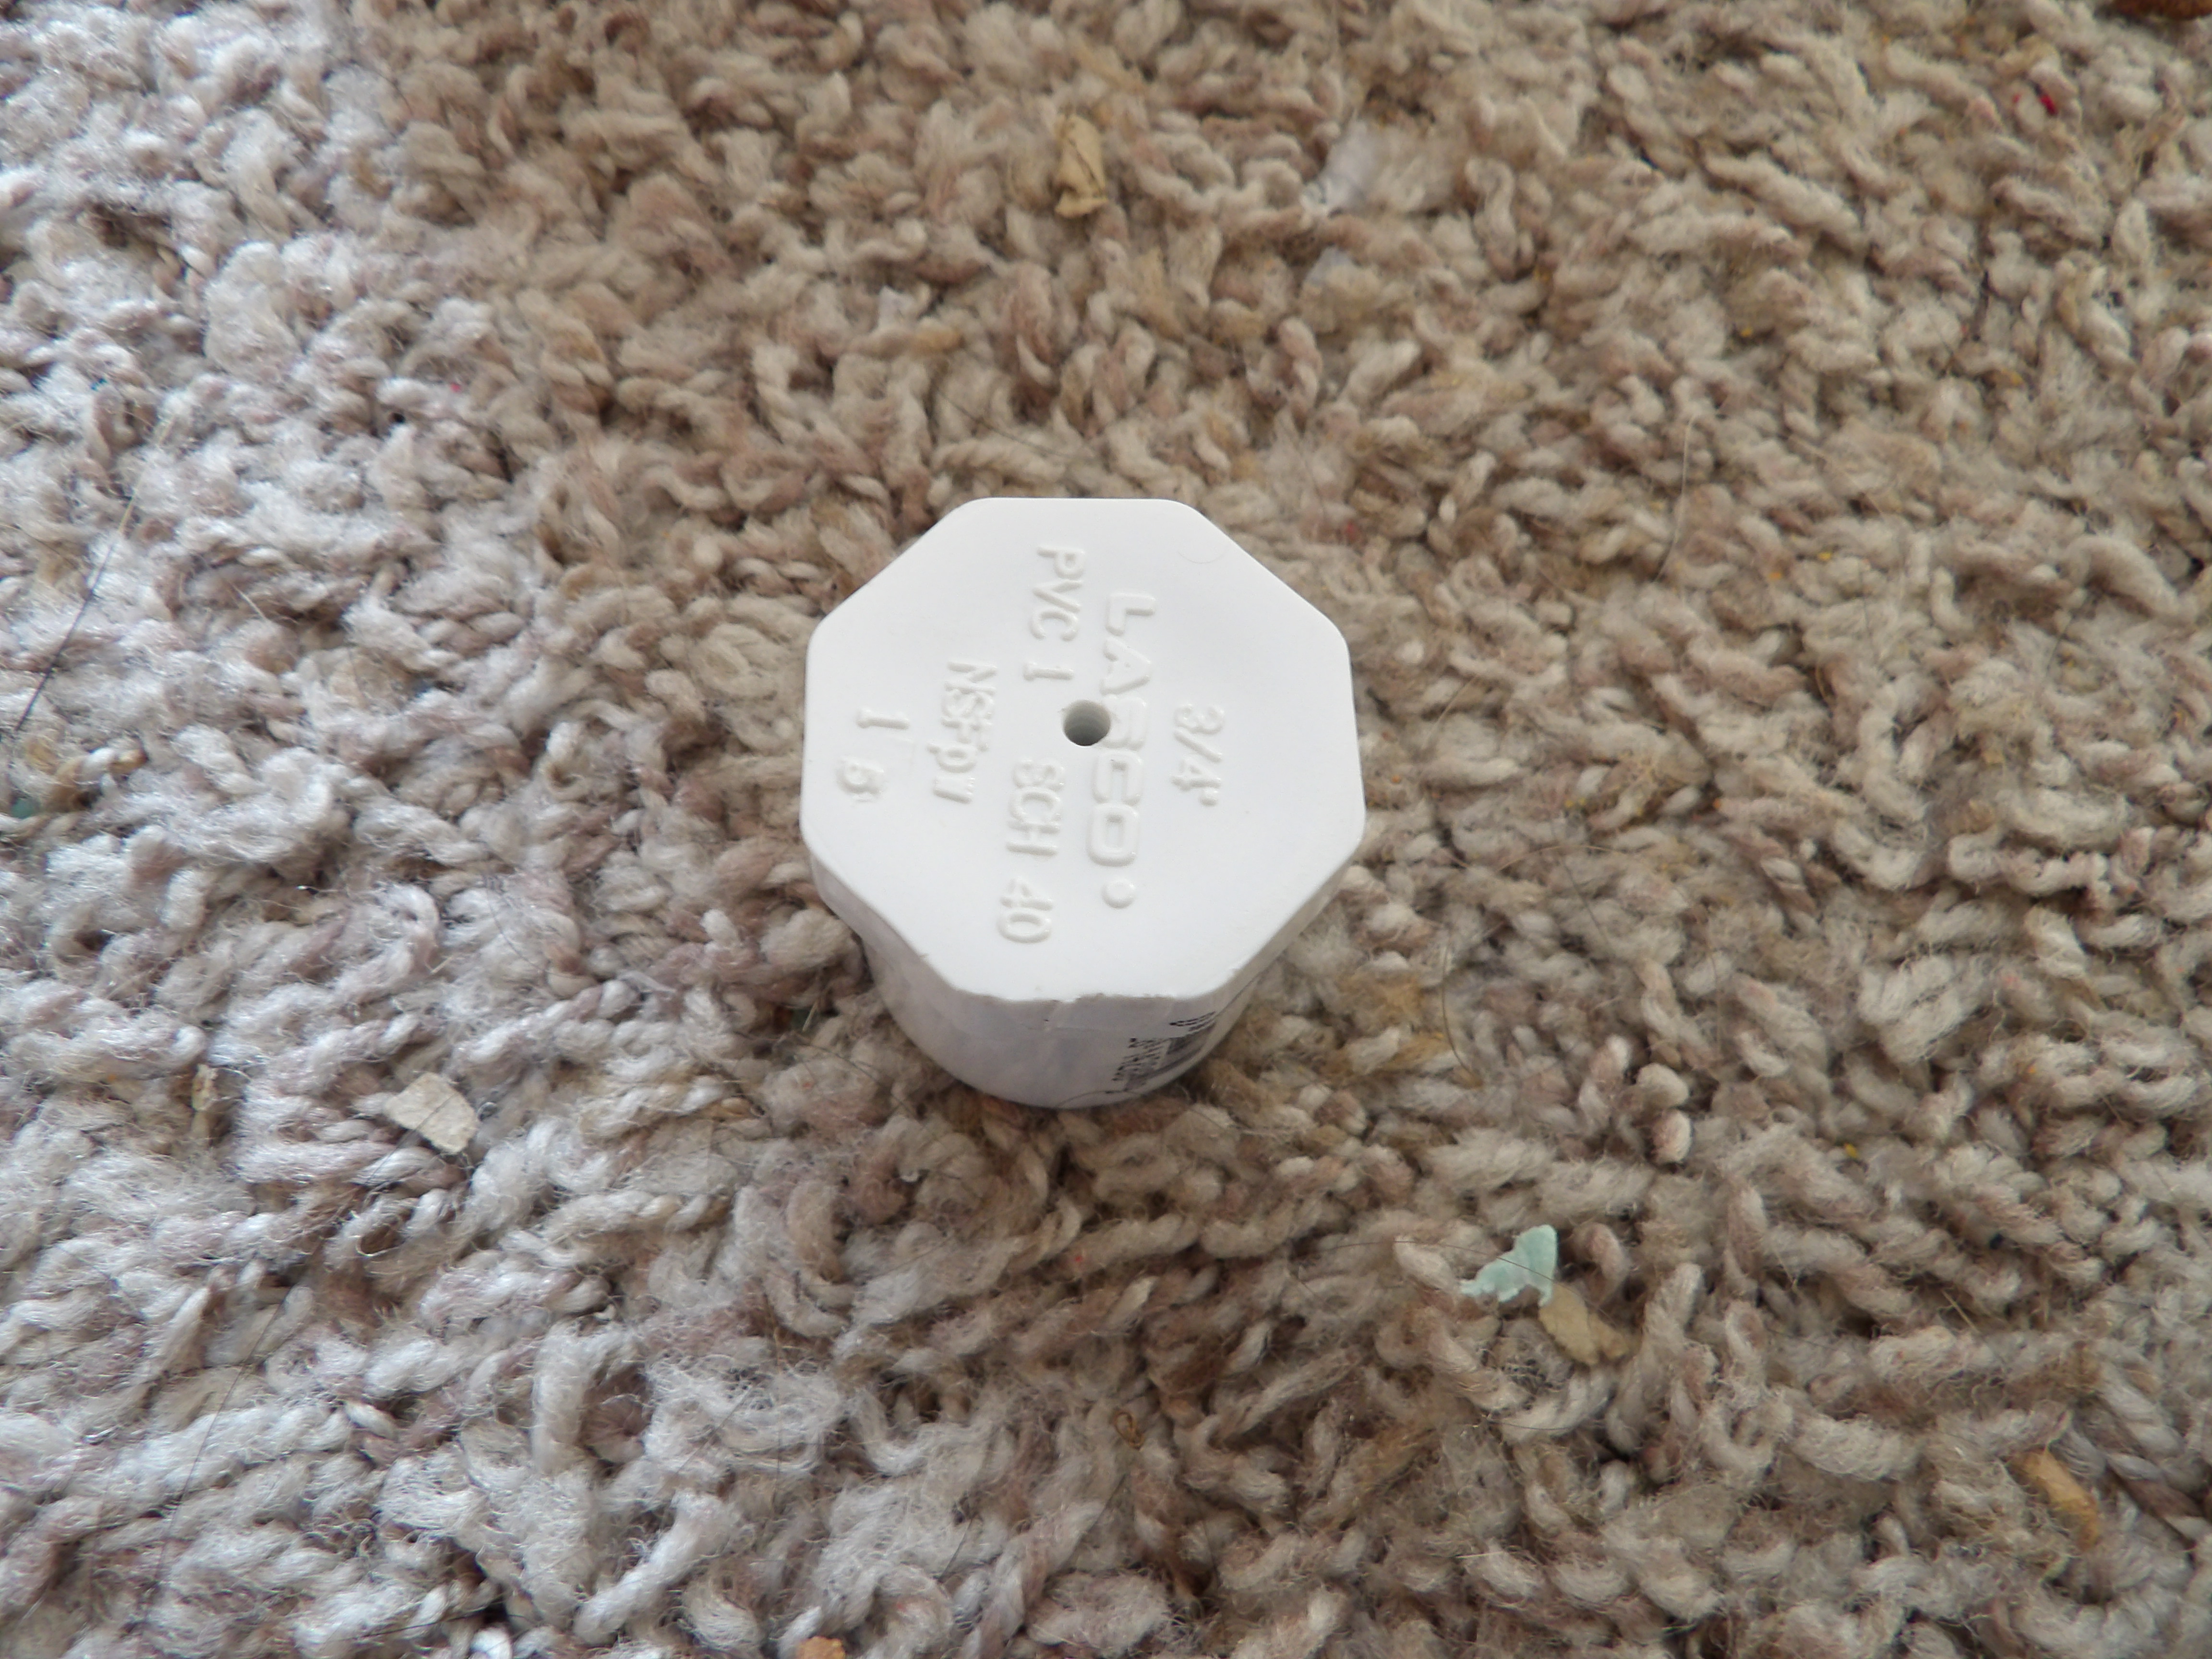
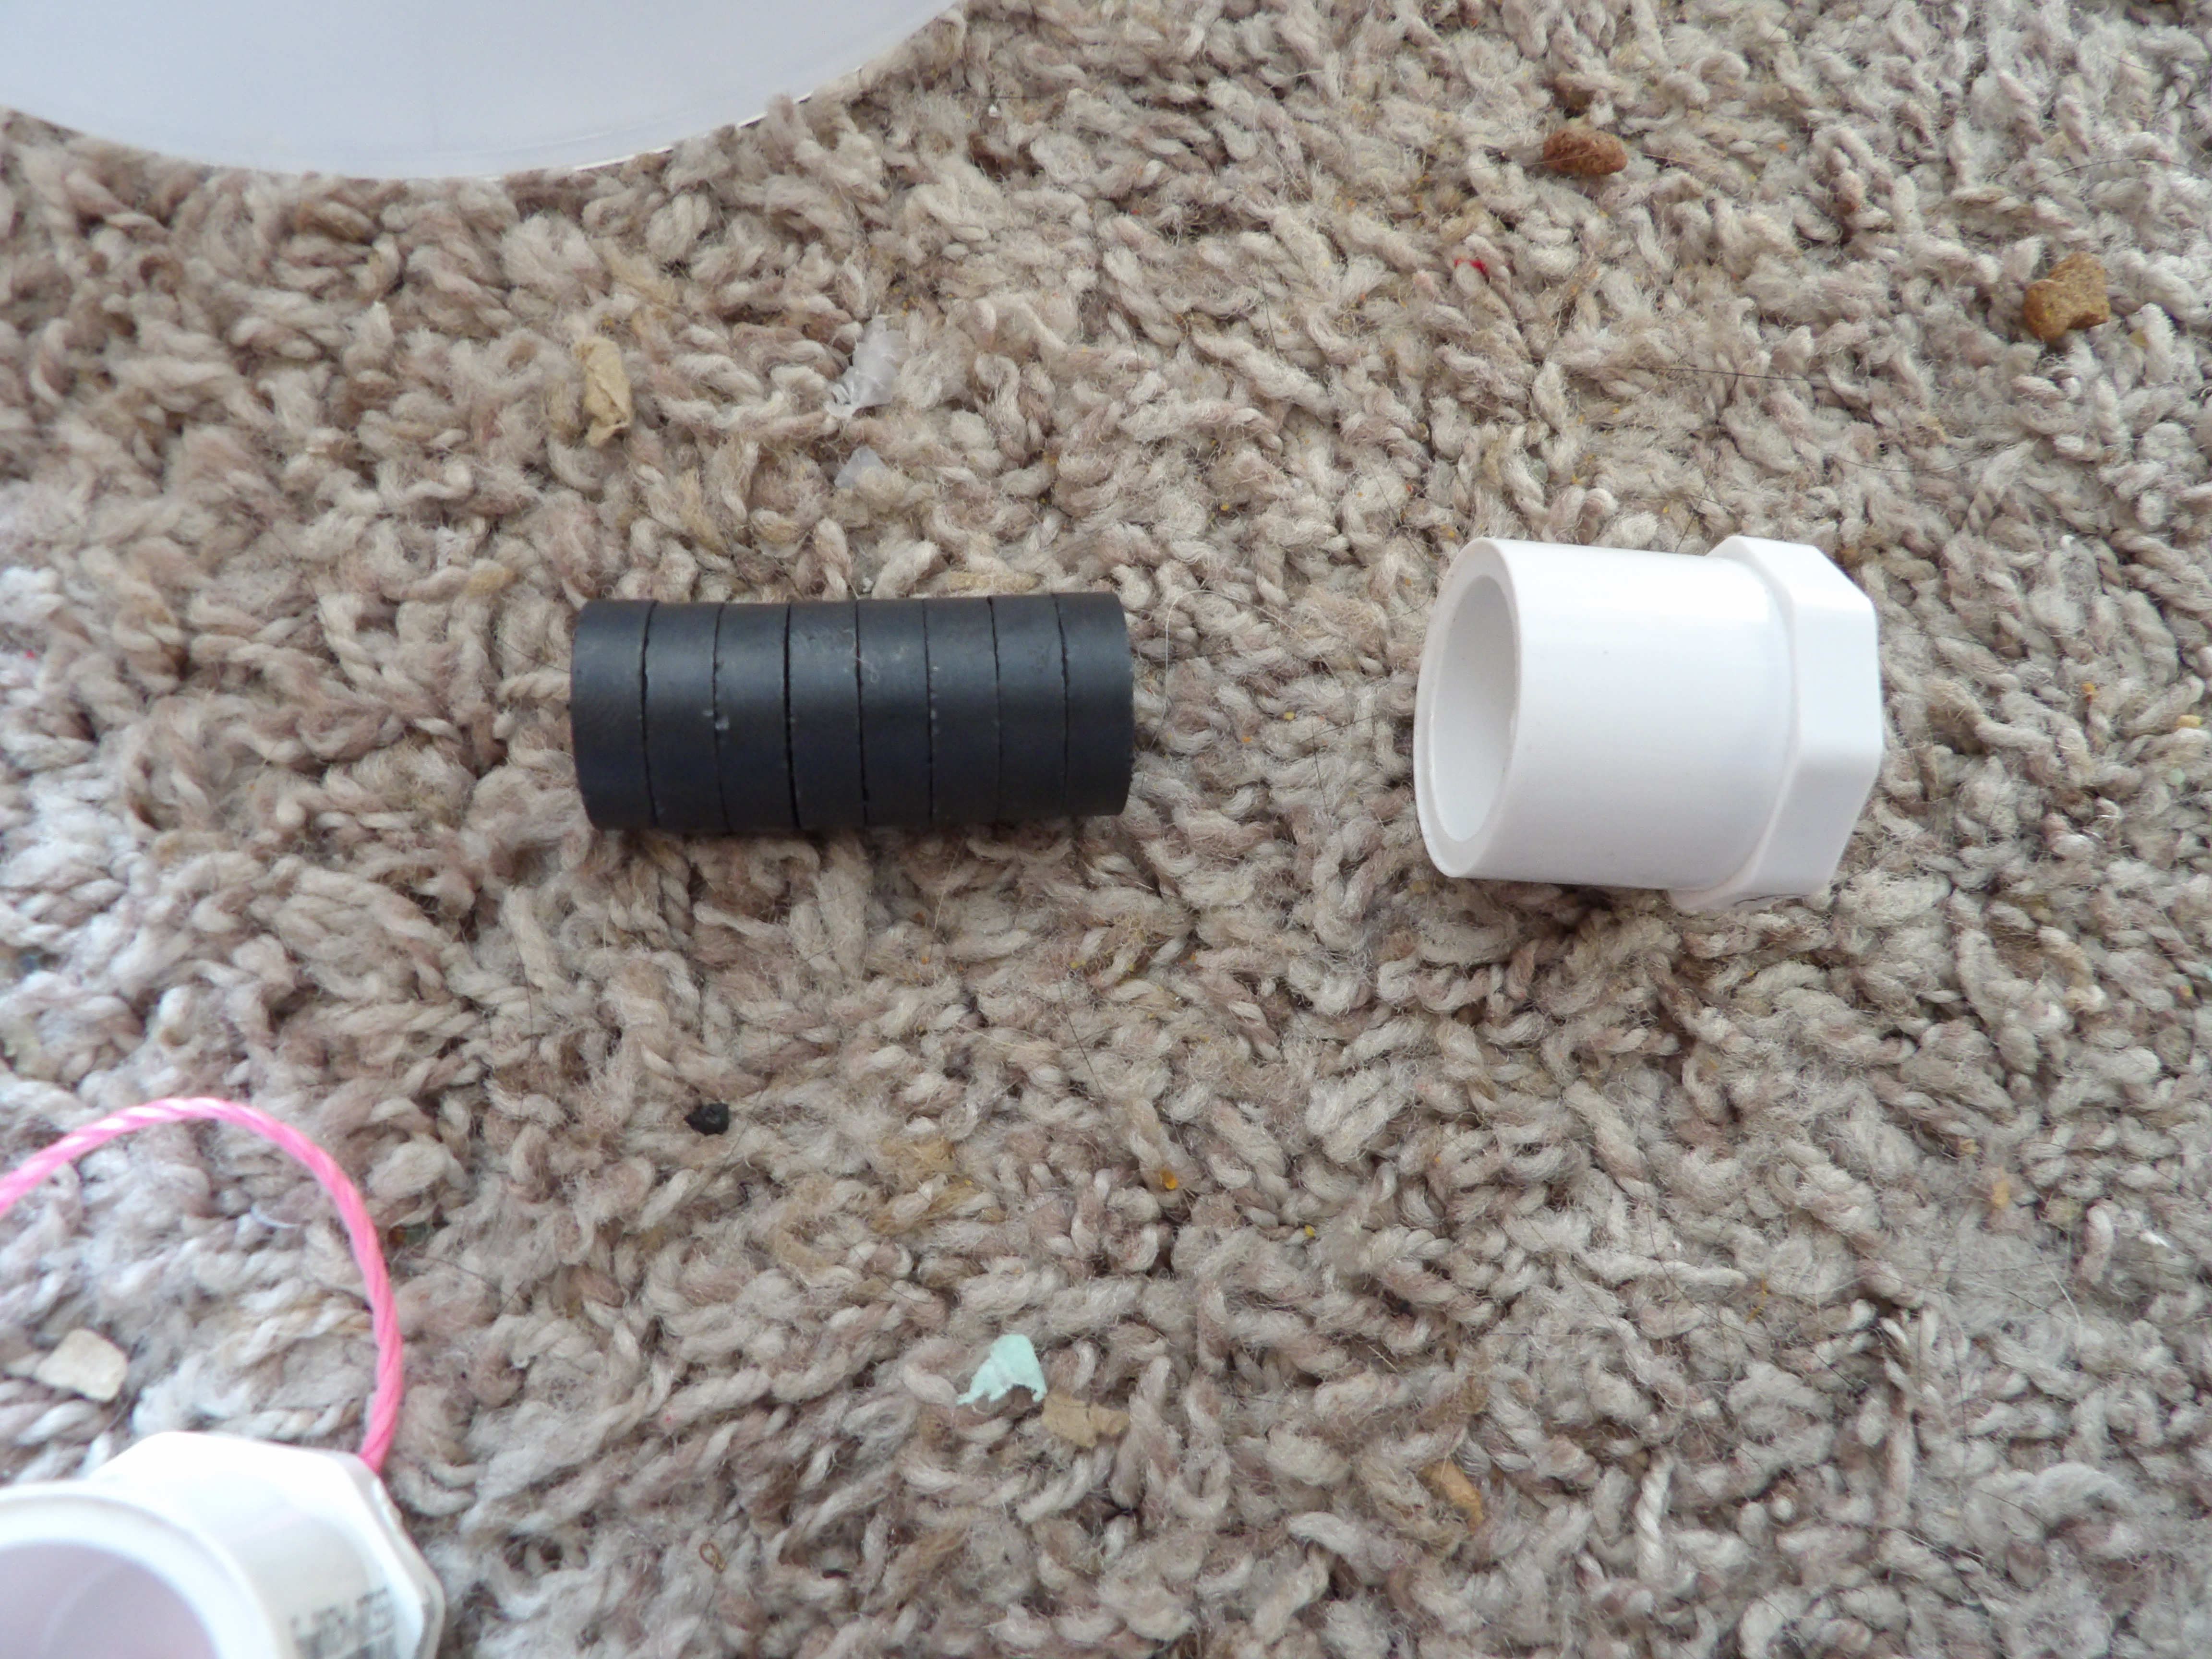
A stack of 3/4ths inch diameter ceramic magnets from LOWE'S Hardware Store can be used in the seismograph. Make sure the magnets are strong and have good pull. These are not 'fridge magnets' having weak poles.

Some PVC plugs and a PVC coupling of the 3/4 inch size can be used to hold the magnets and any extra ballast weight.

An inexpensive drink pitcher makes the perfect container for your seismograph sensor. It can be closed to prevent air drafts from affecting the sensor.
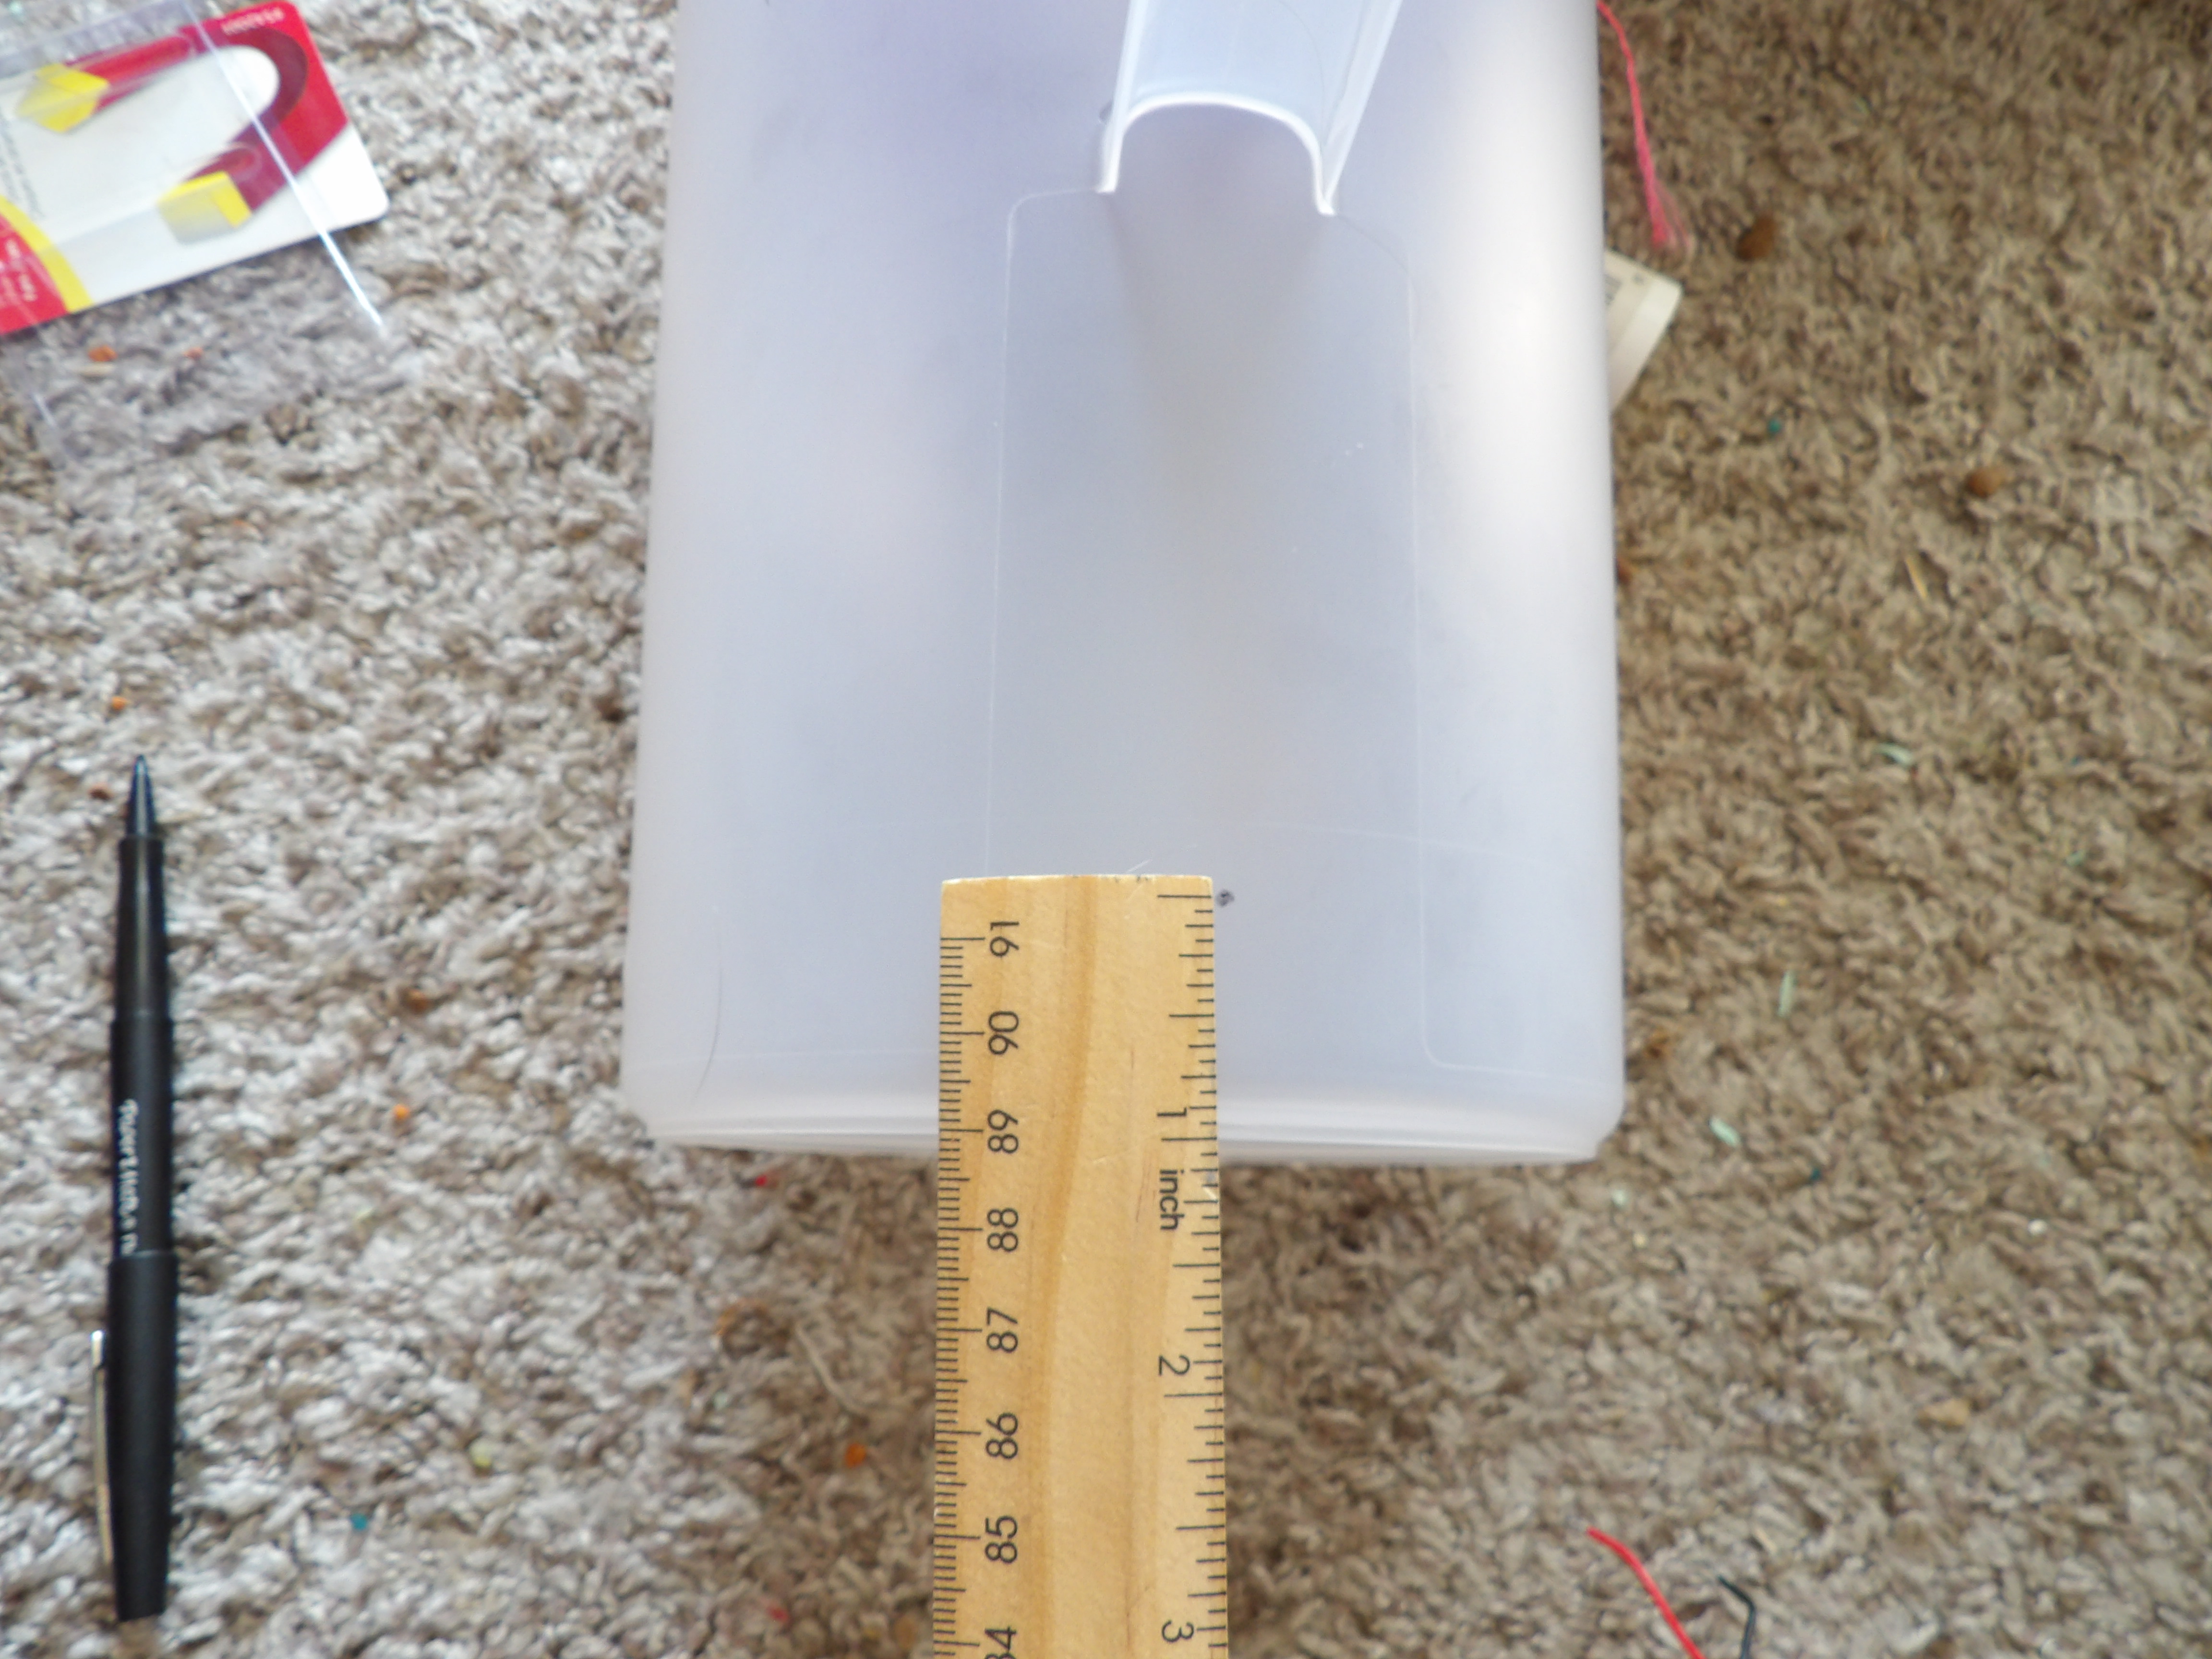
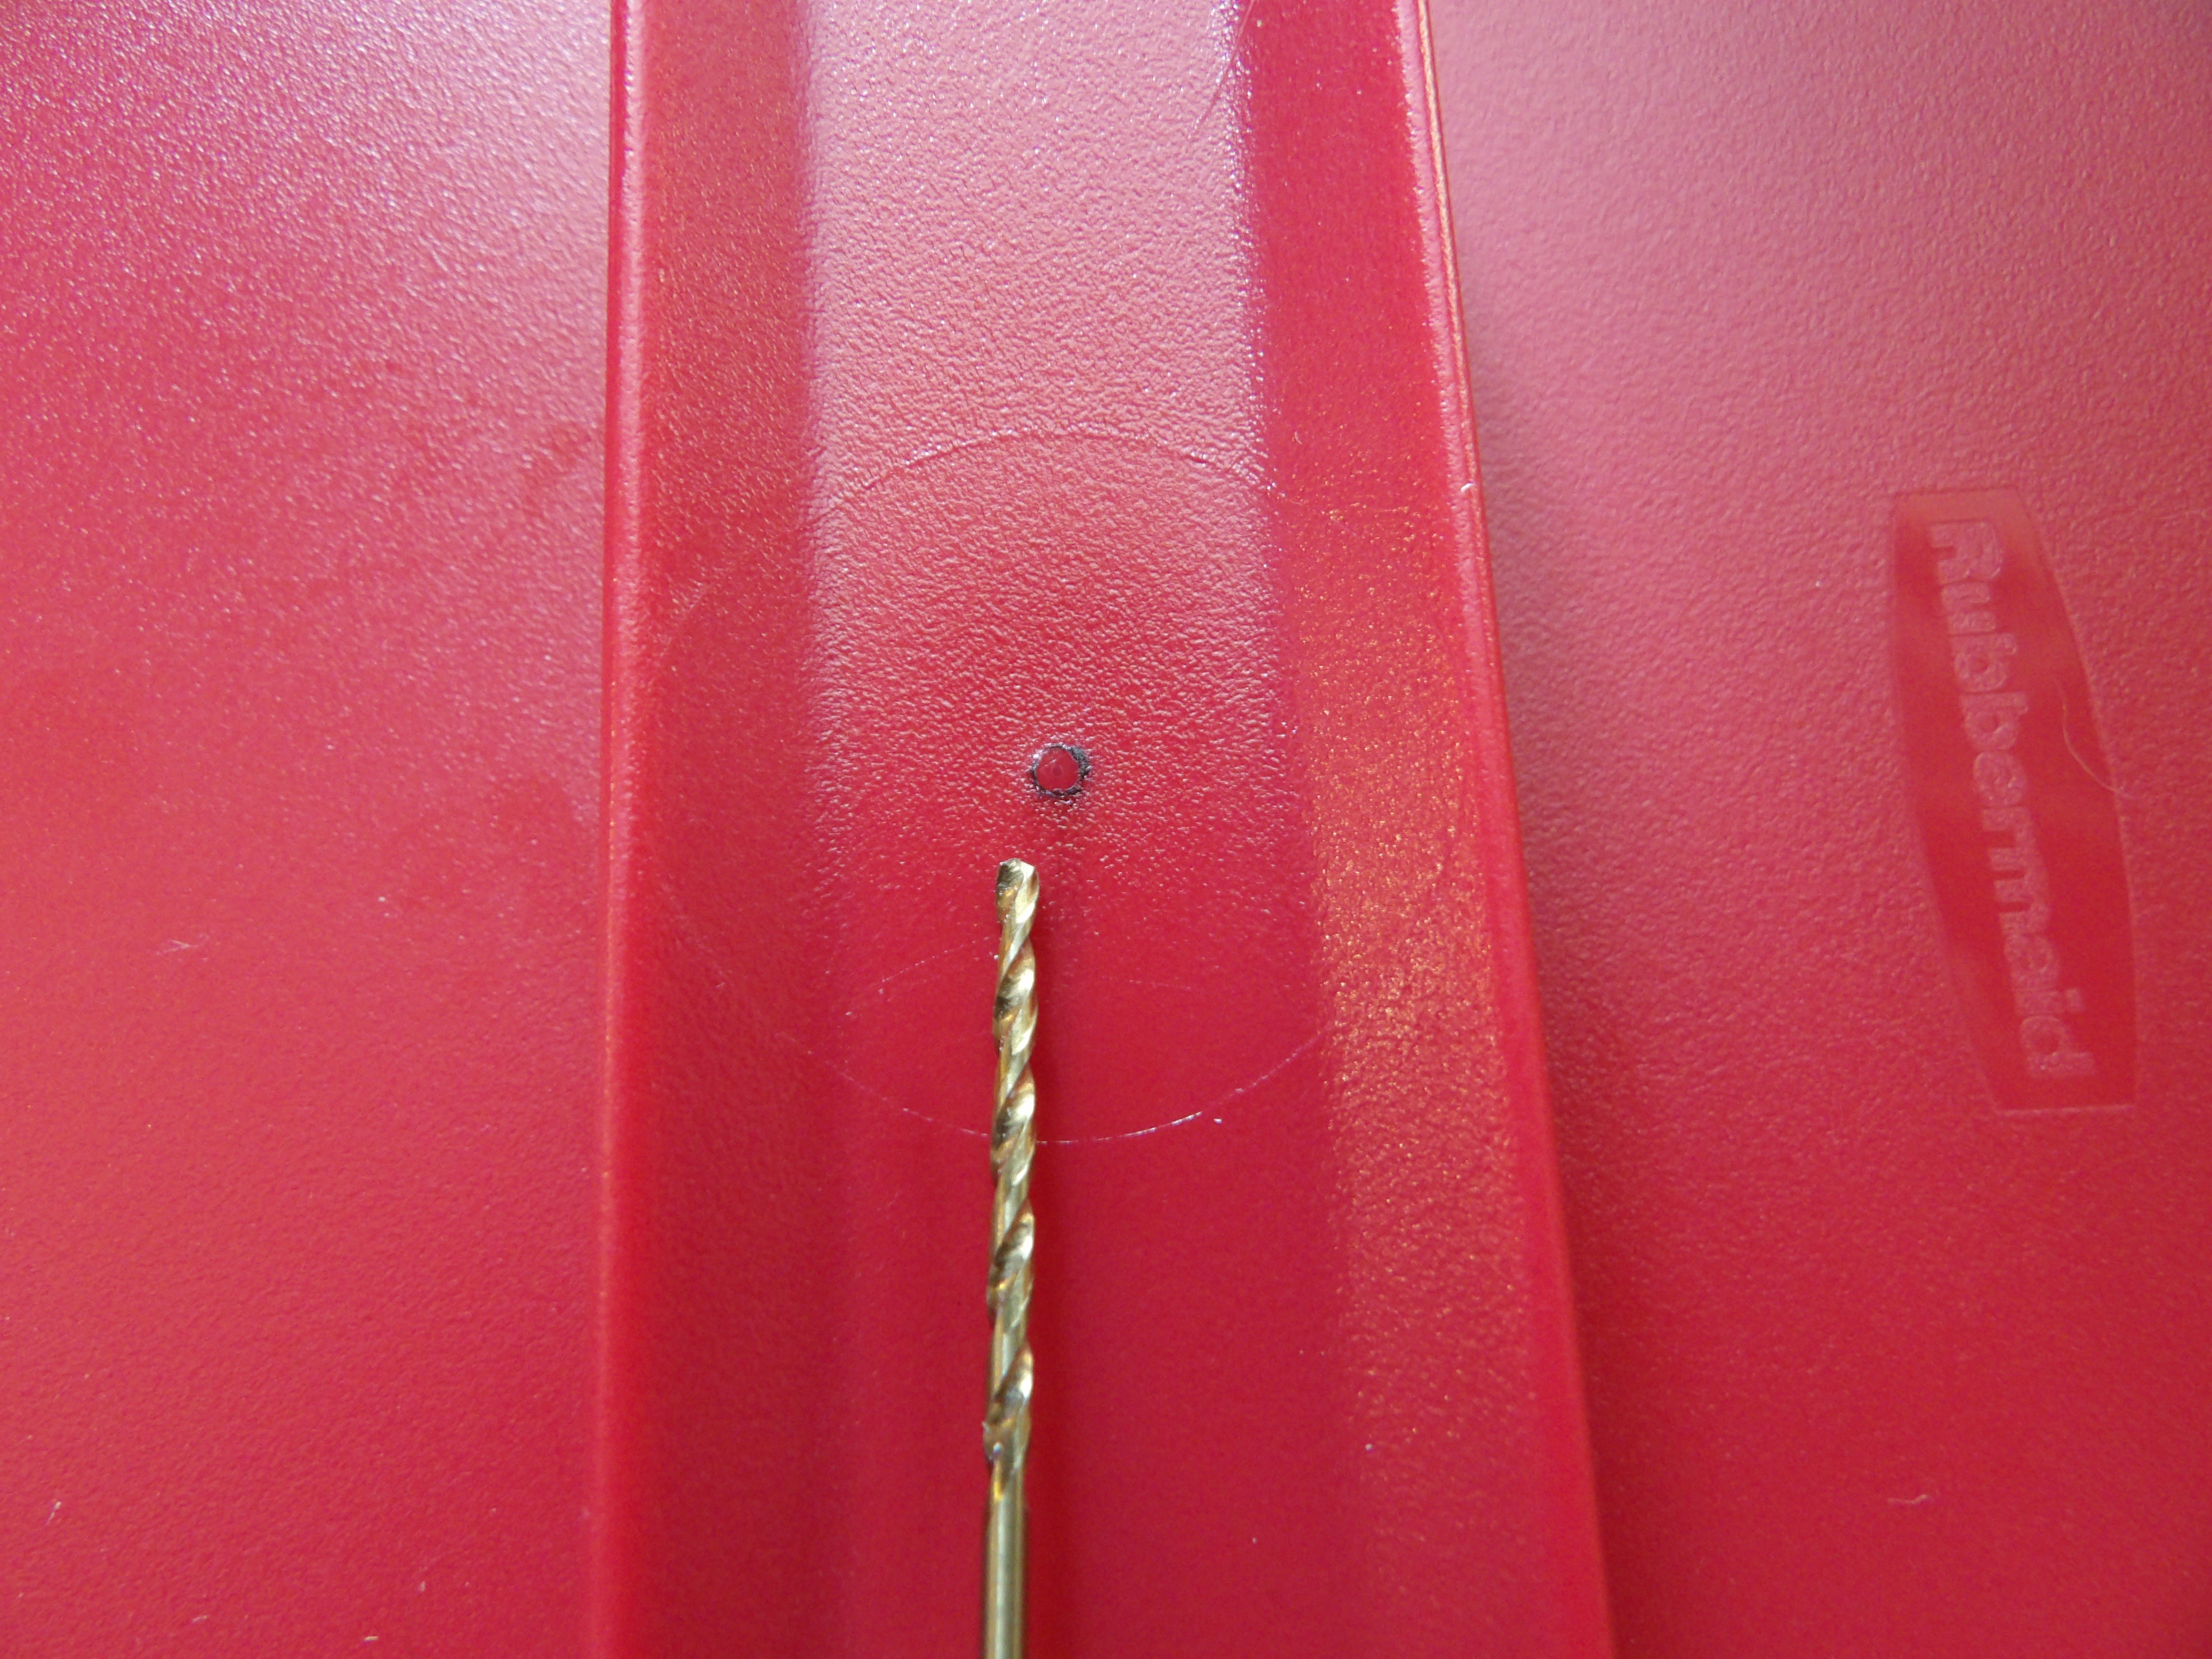
Mark a drill point 1 inch up from the bottom. This will be used to mount the sensor unit into with its nut and bolt.
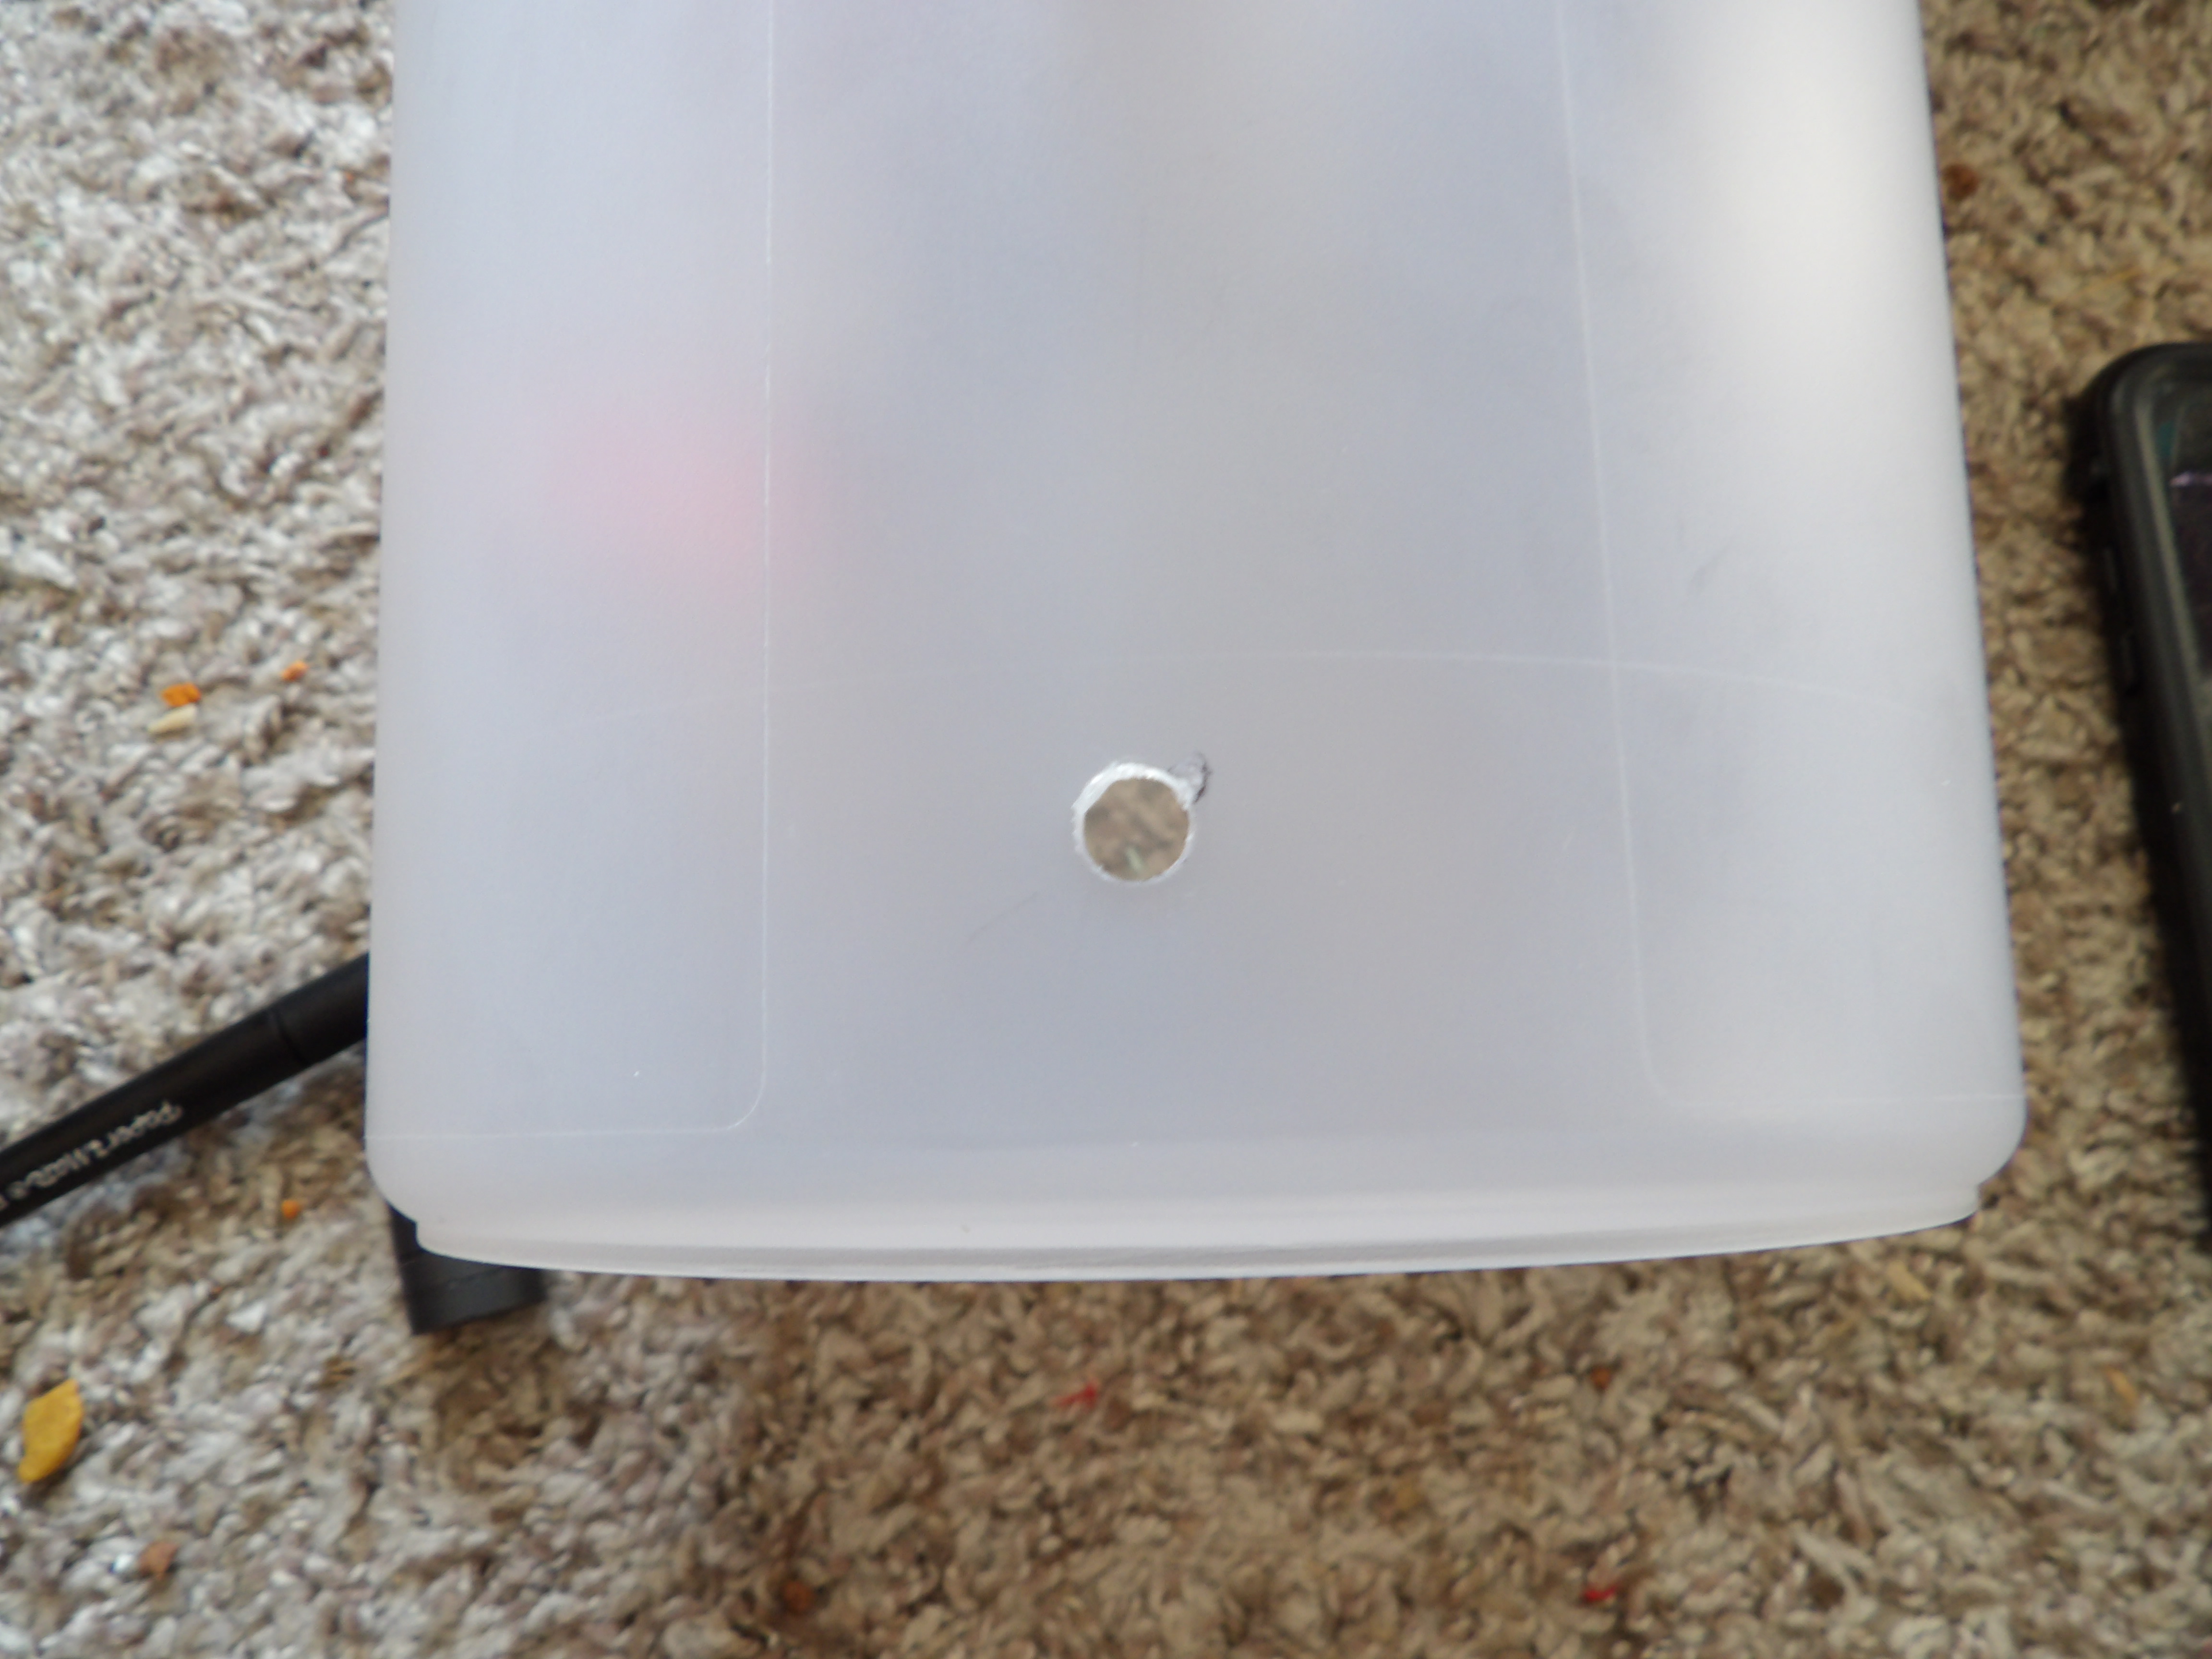
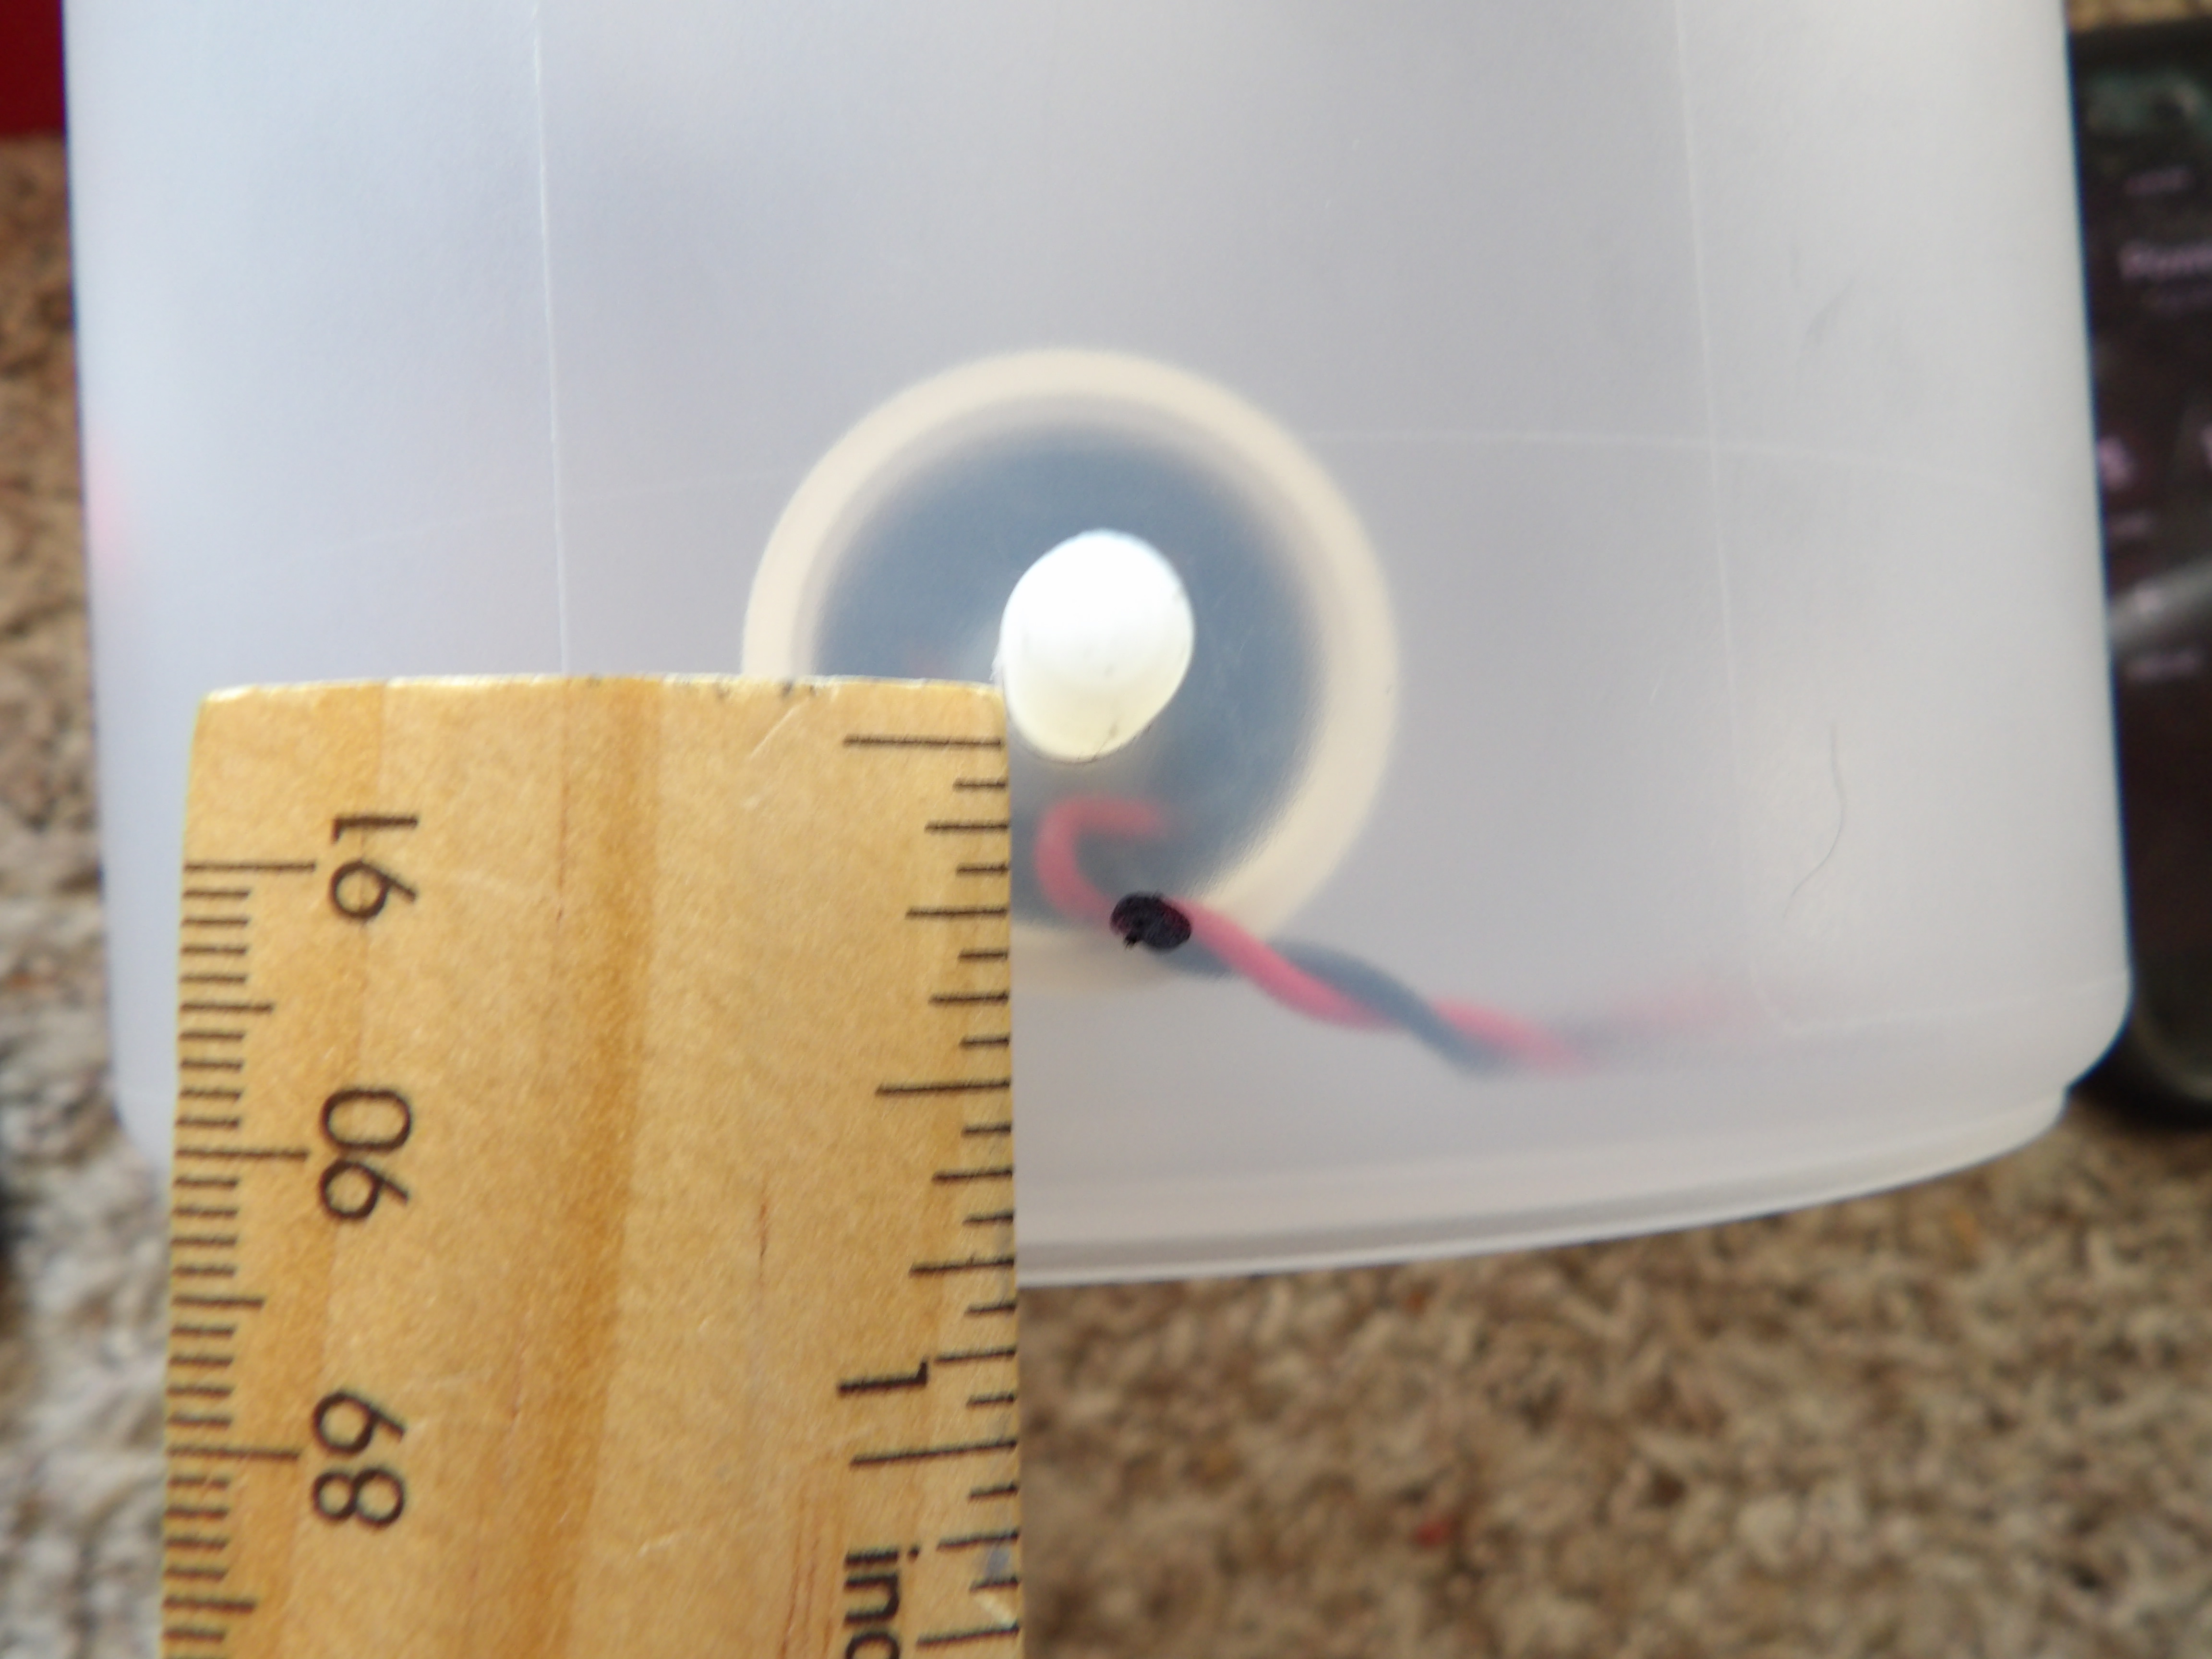
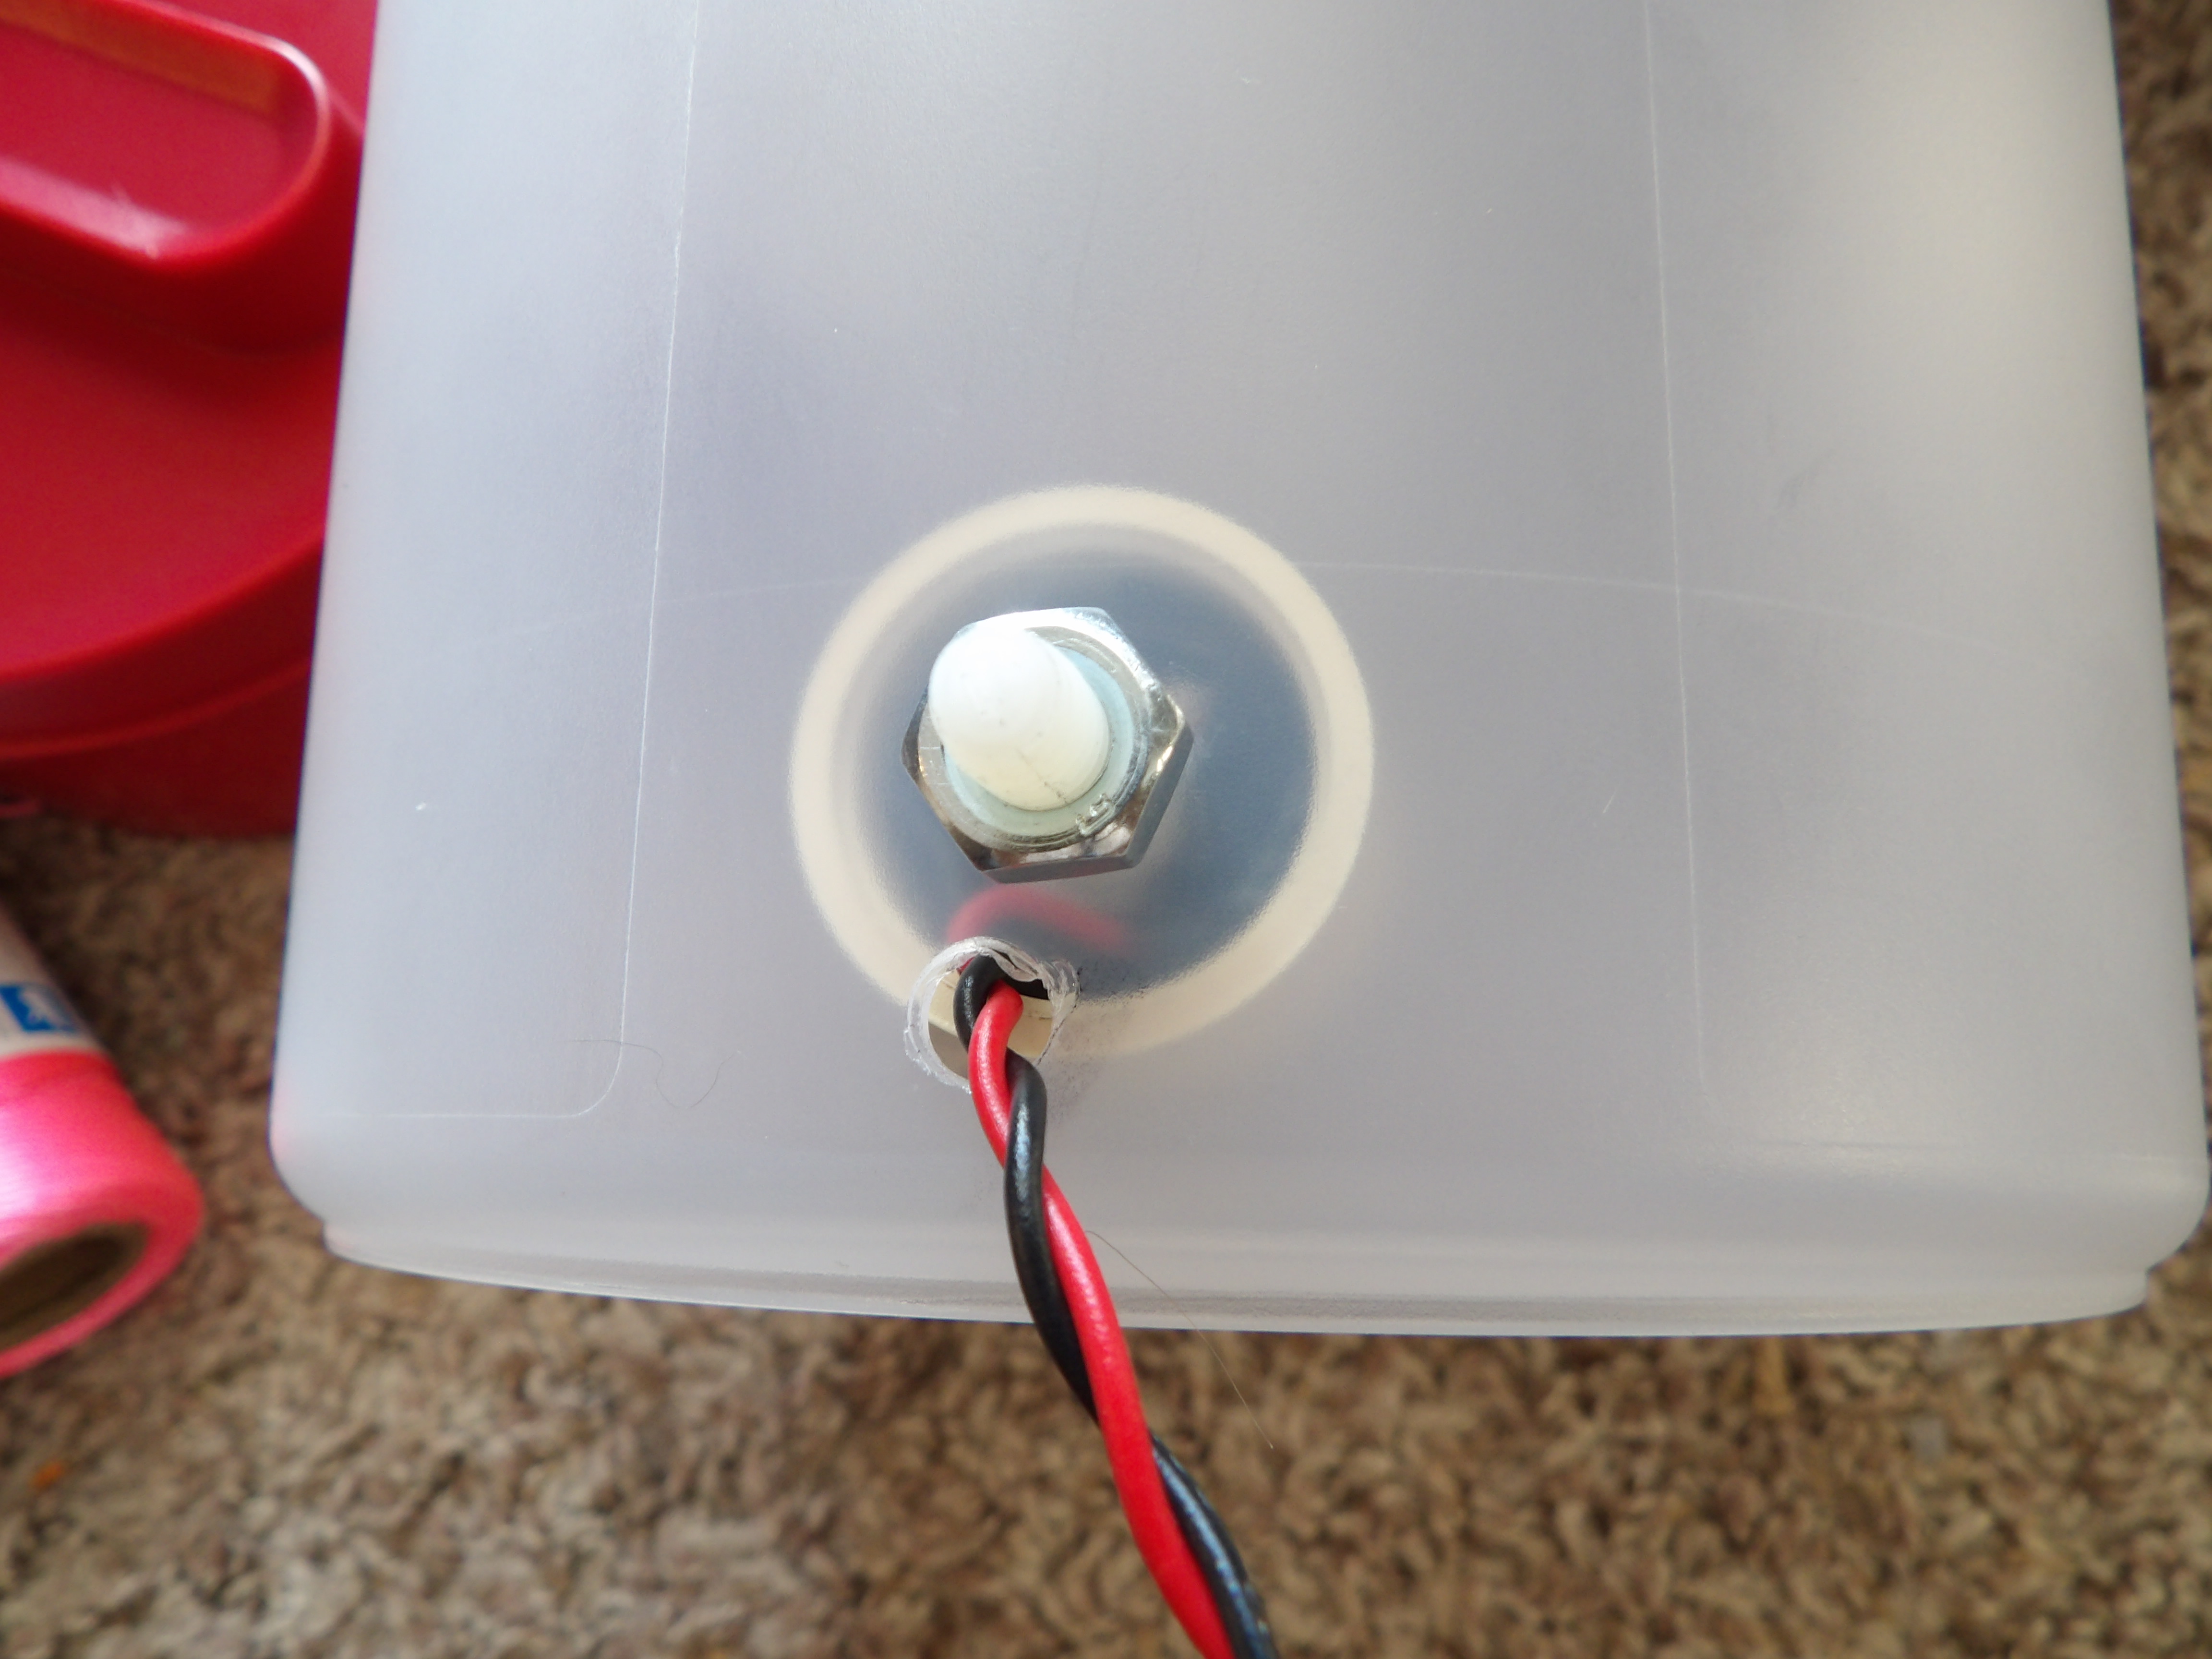
You need to drill a 2nd small hole to feed the sensor wires out of the pitcher.
Alternate higher sensitivity design with our part # MMAG-1 Sensor, instead. Just tape the sensor to the inside and feed the wires out the hole drilled near the bottom.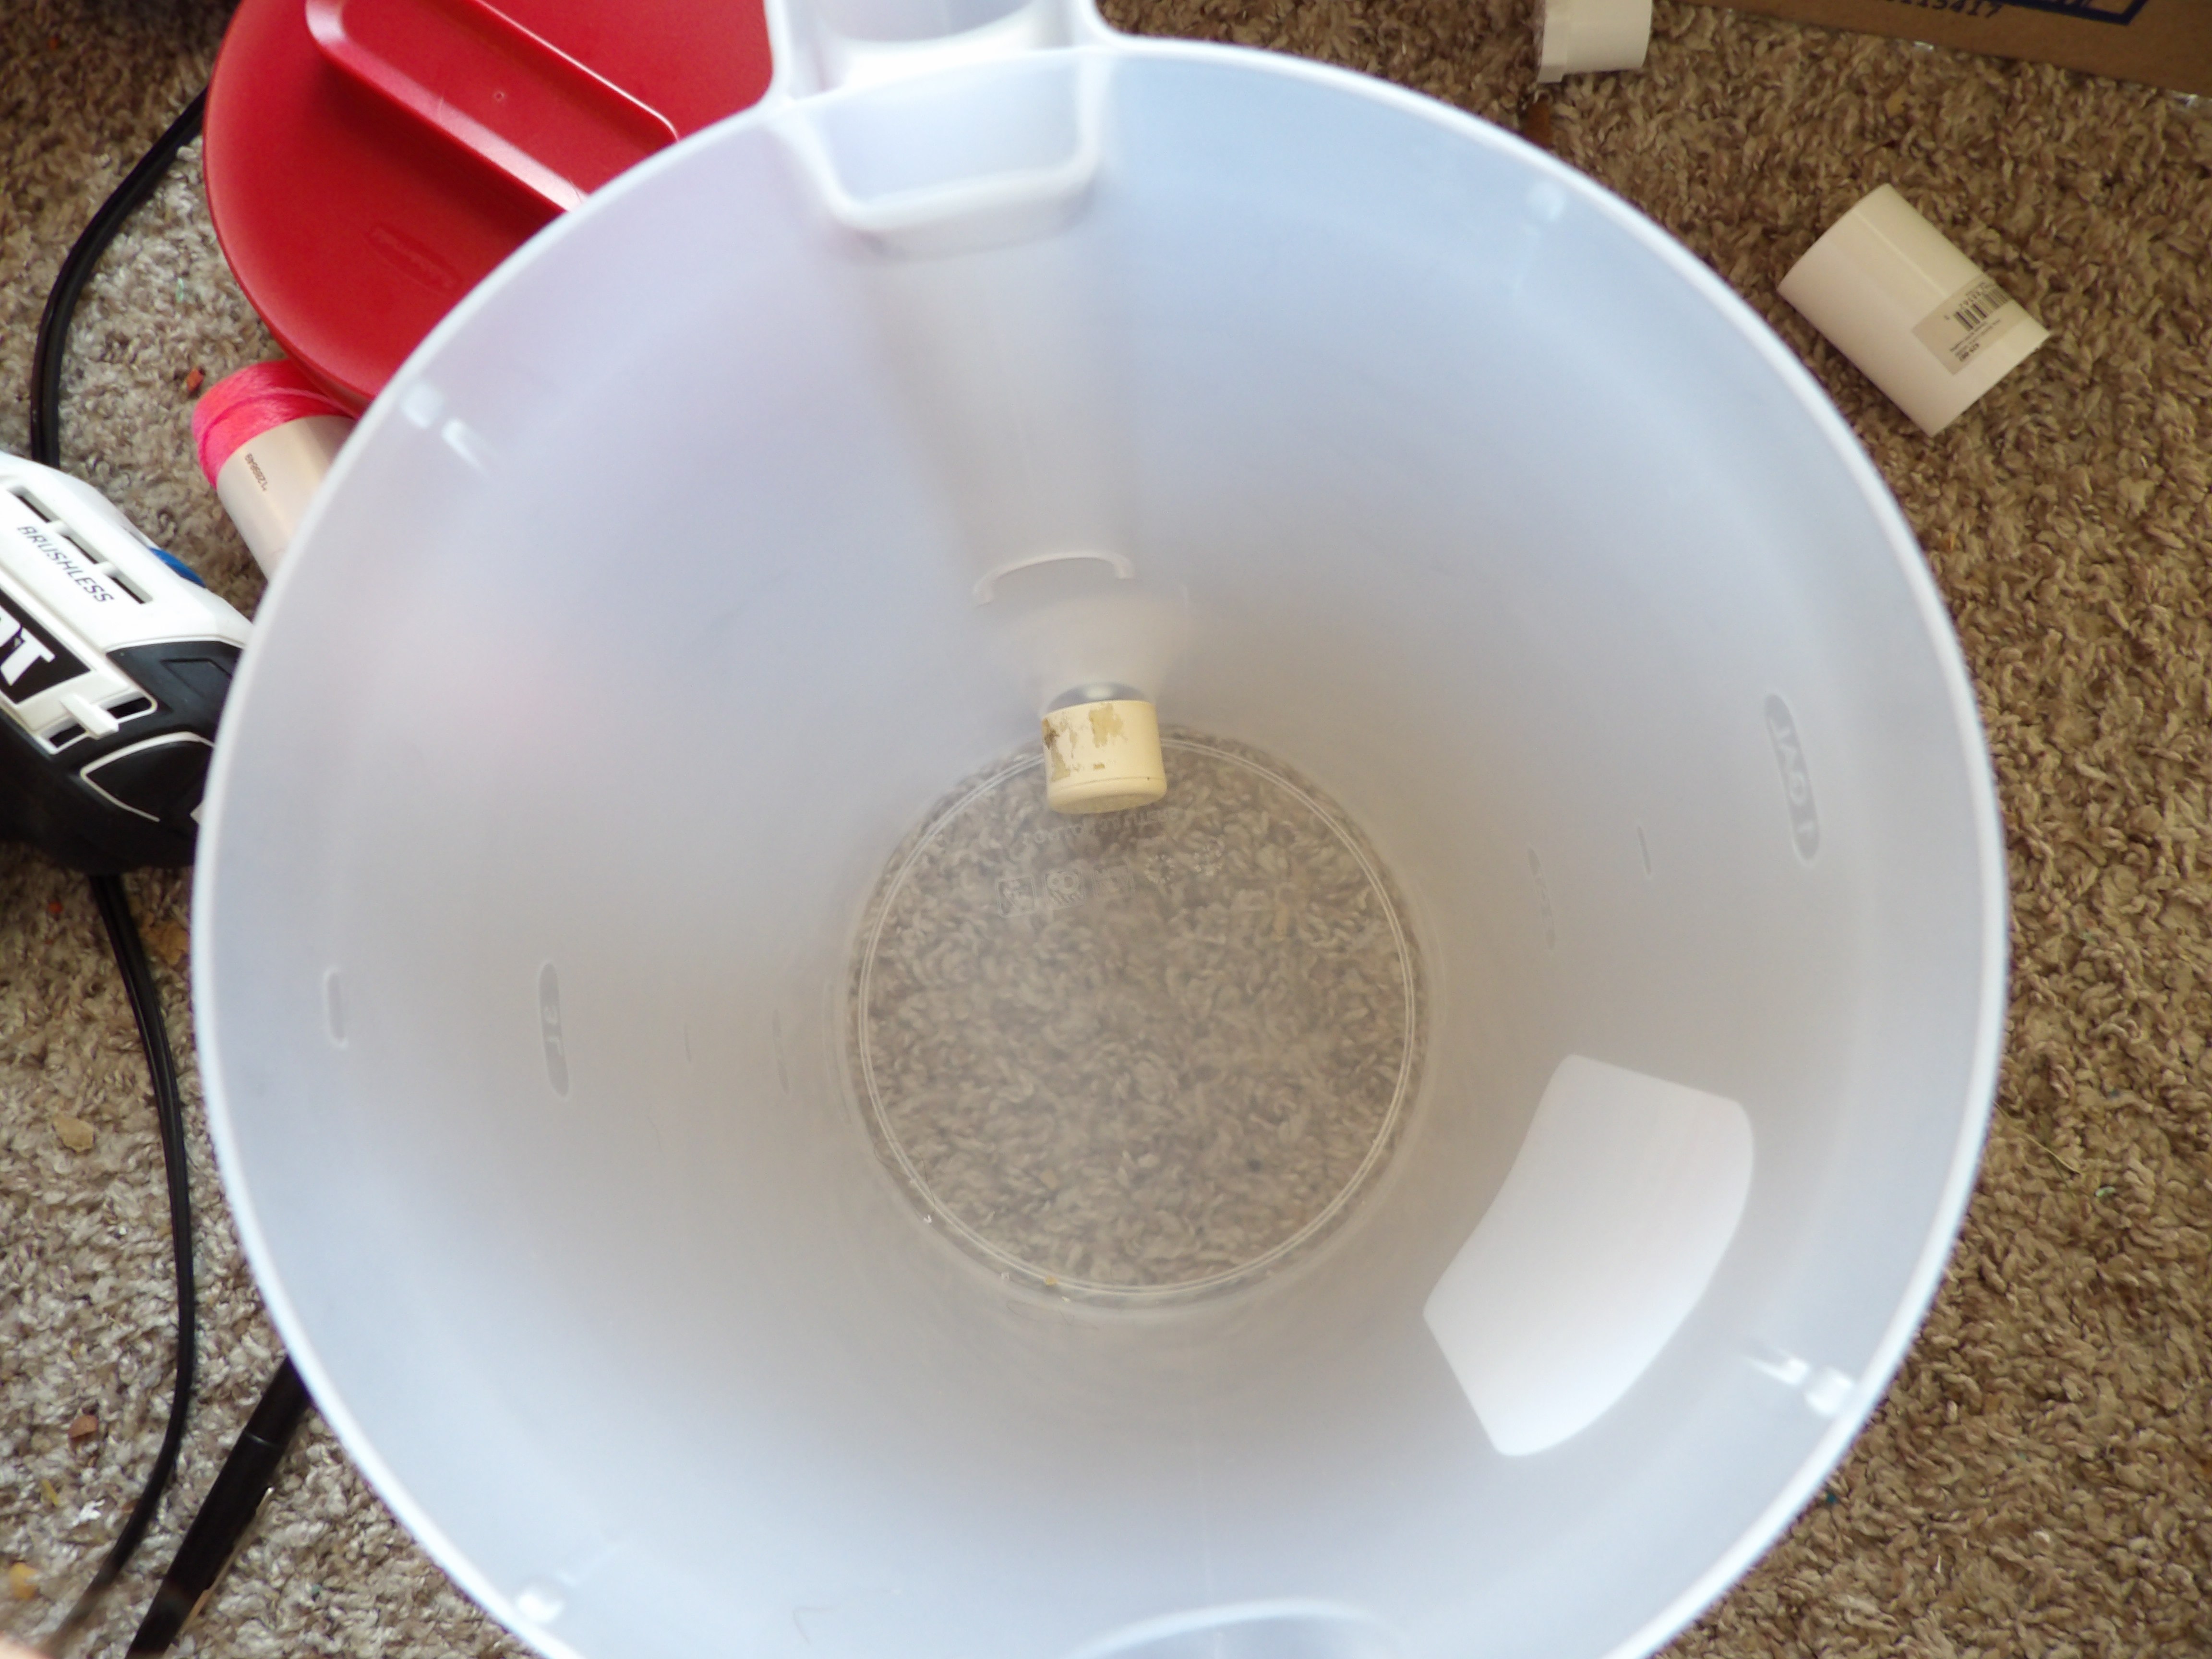
Drill a small hole in one of the PVC plugs. This will be the top part of the mass weight assembly that holds the magnets.
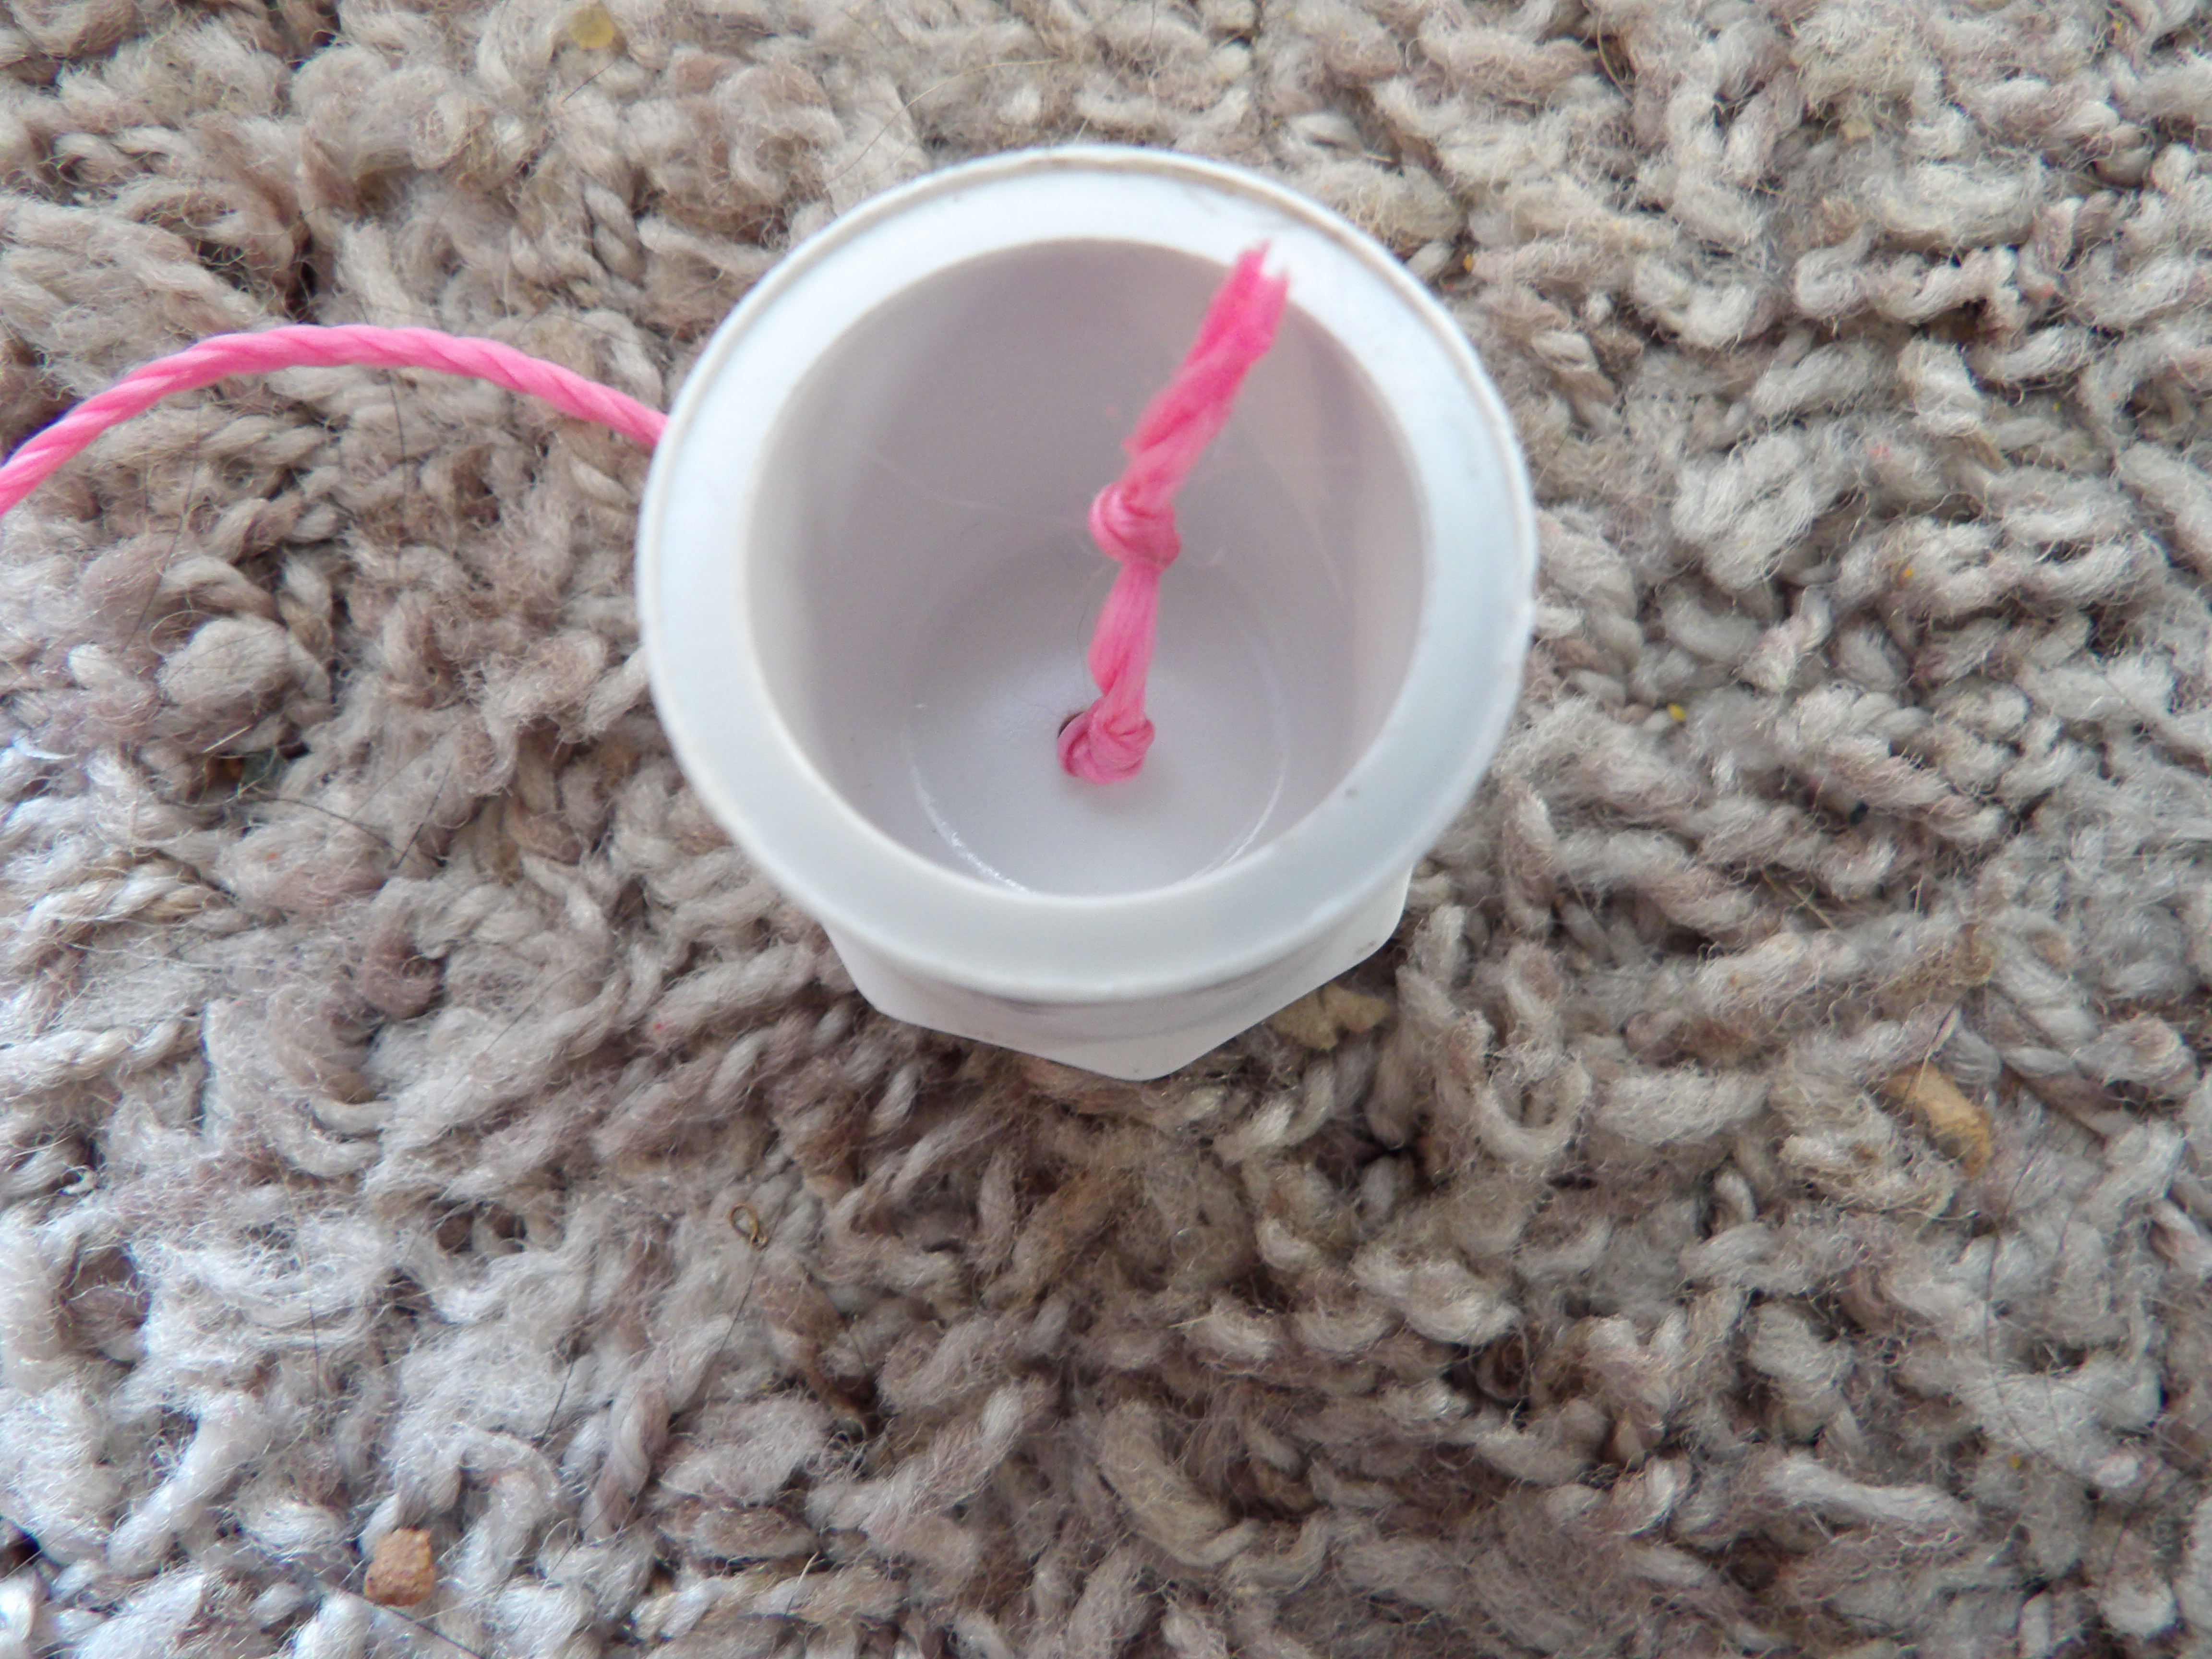
Cut about 15 inches of the twine and feed it thru the hole and tie a good knot to keep it from pulling out.
Stack up the magnets and place them into the PVC plug.
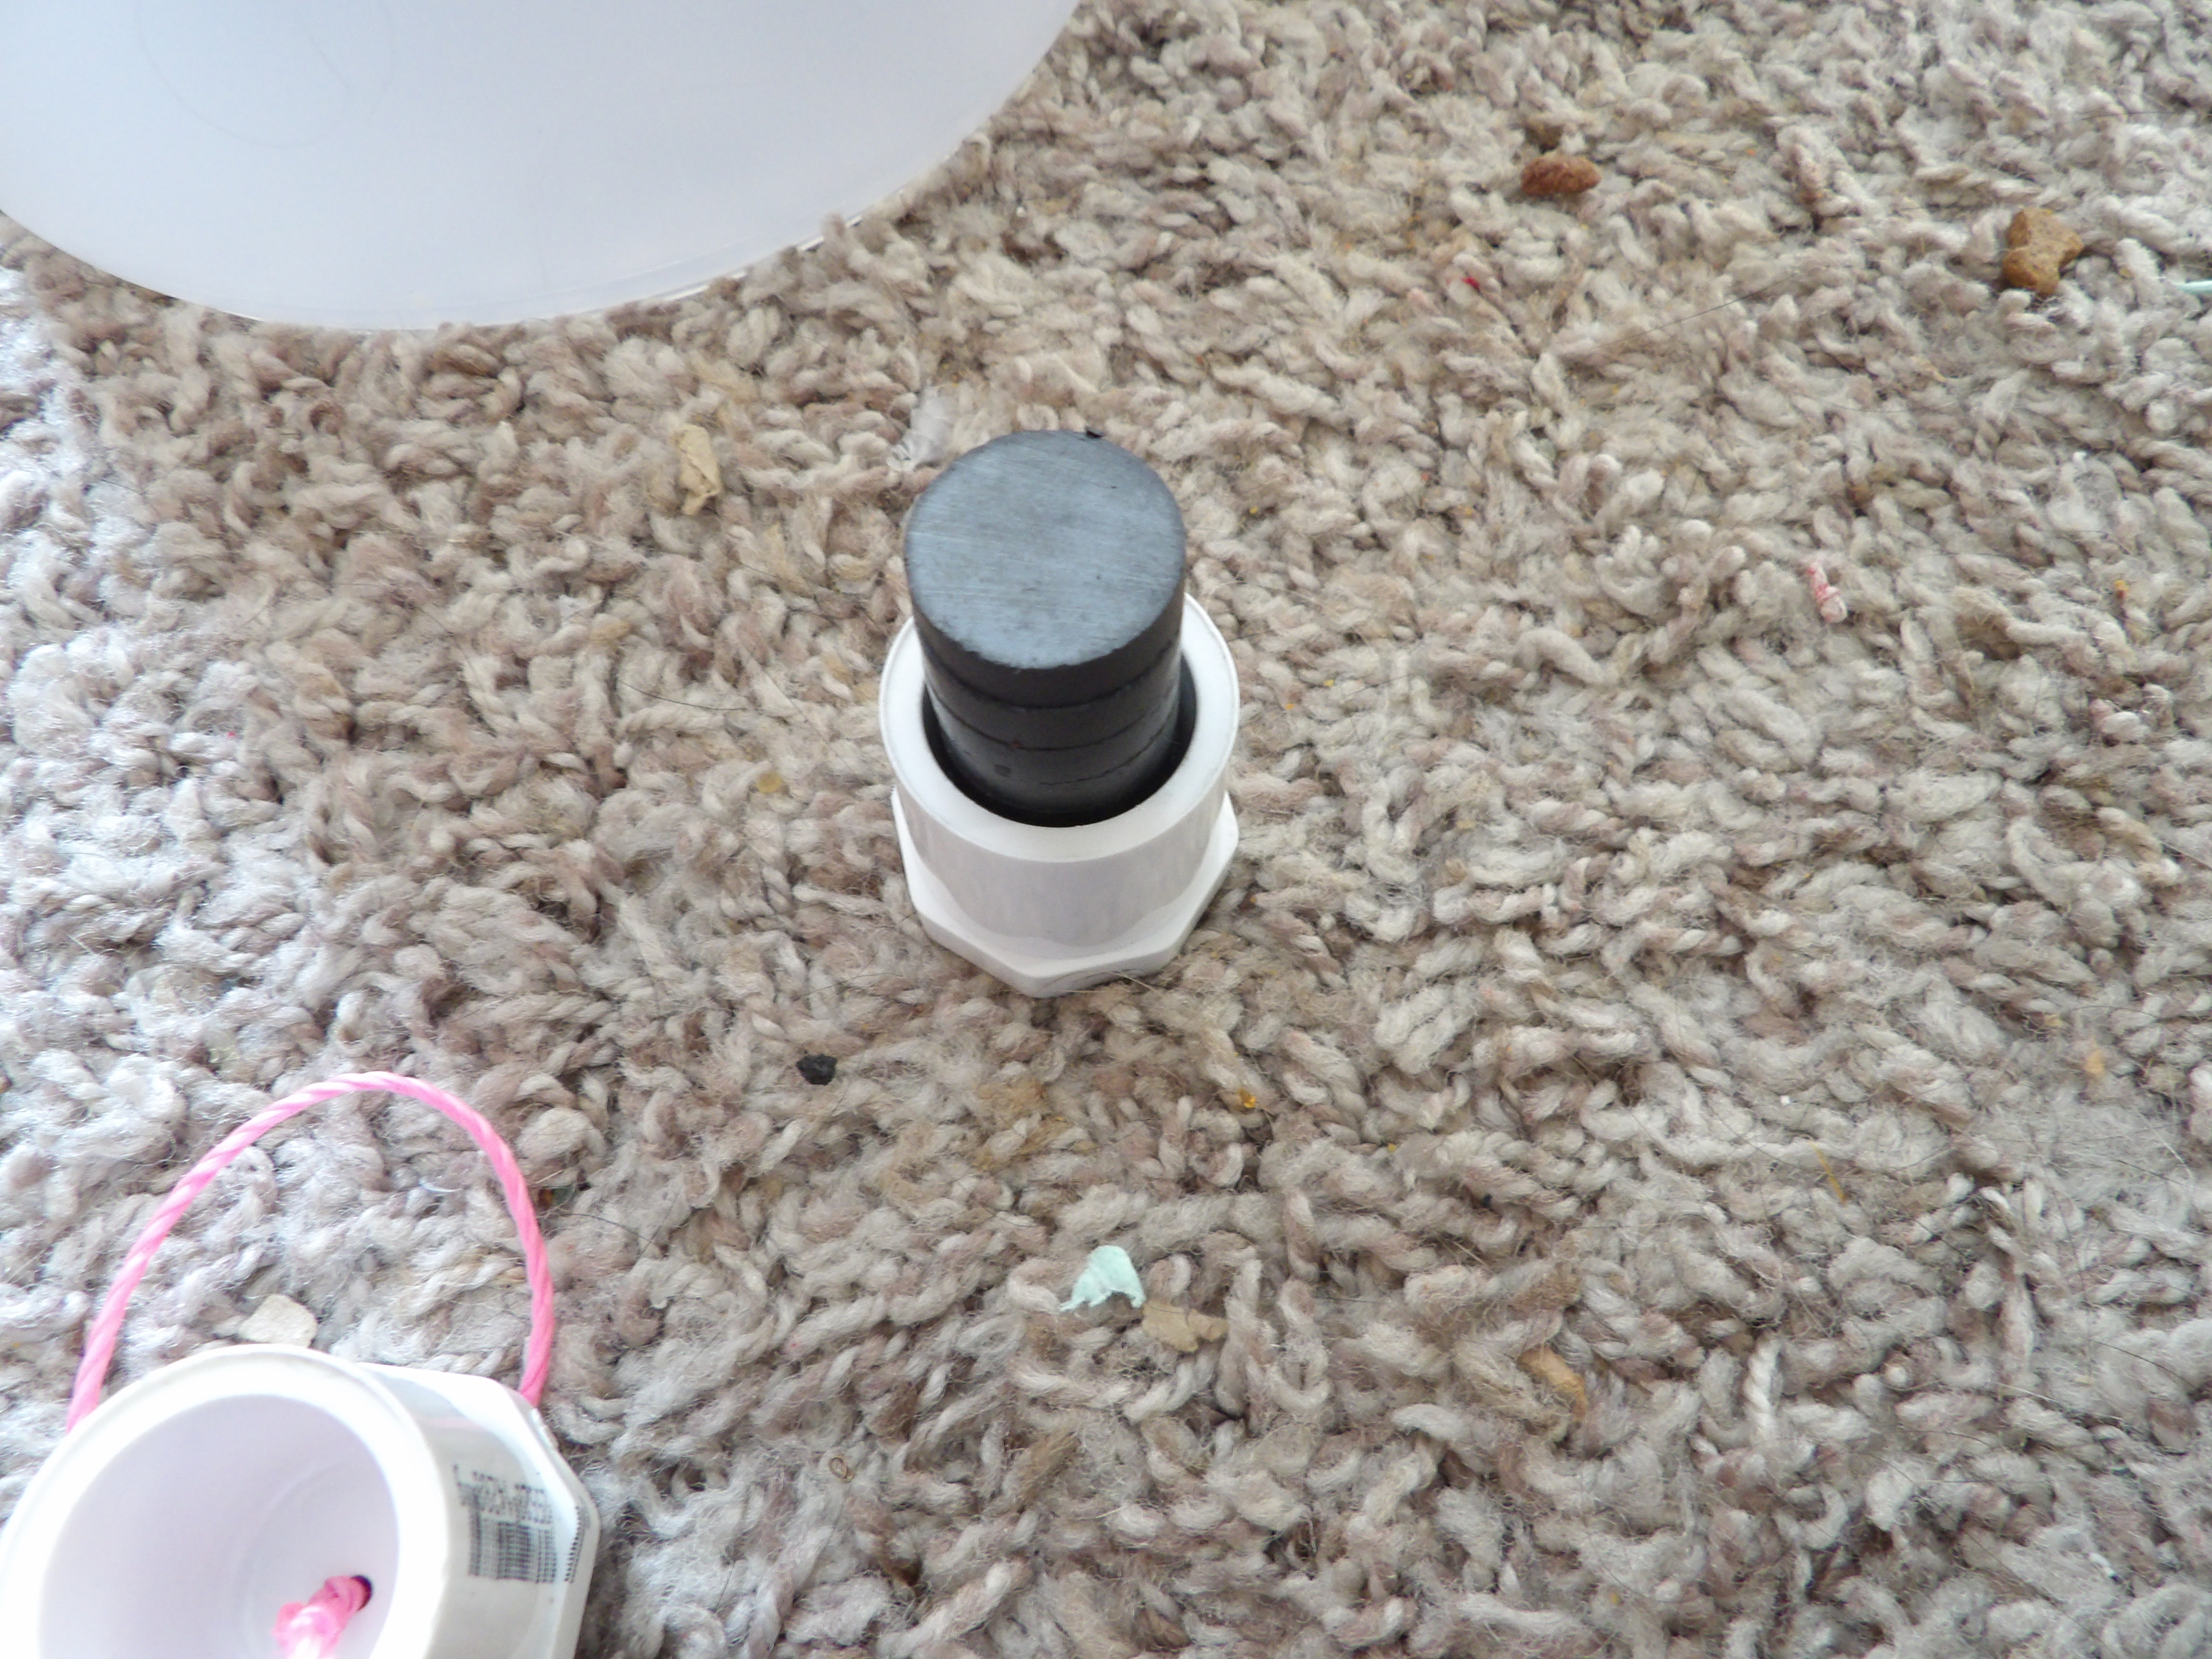
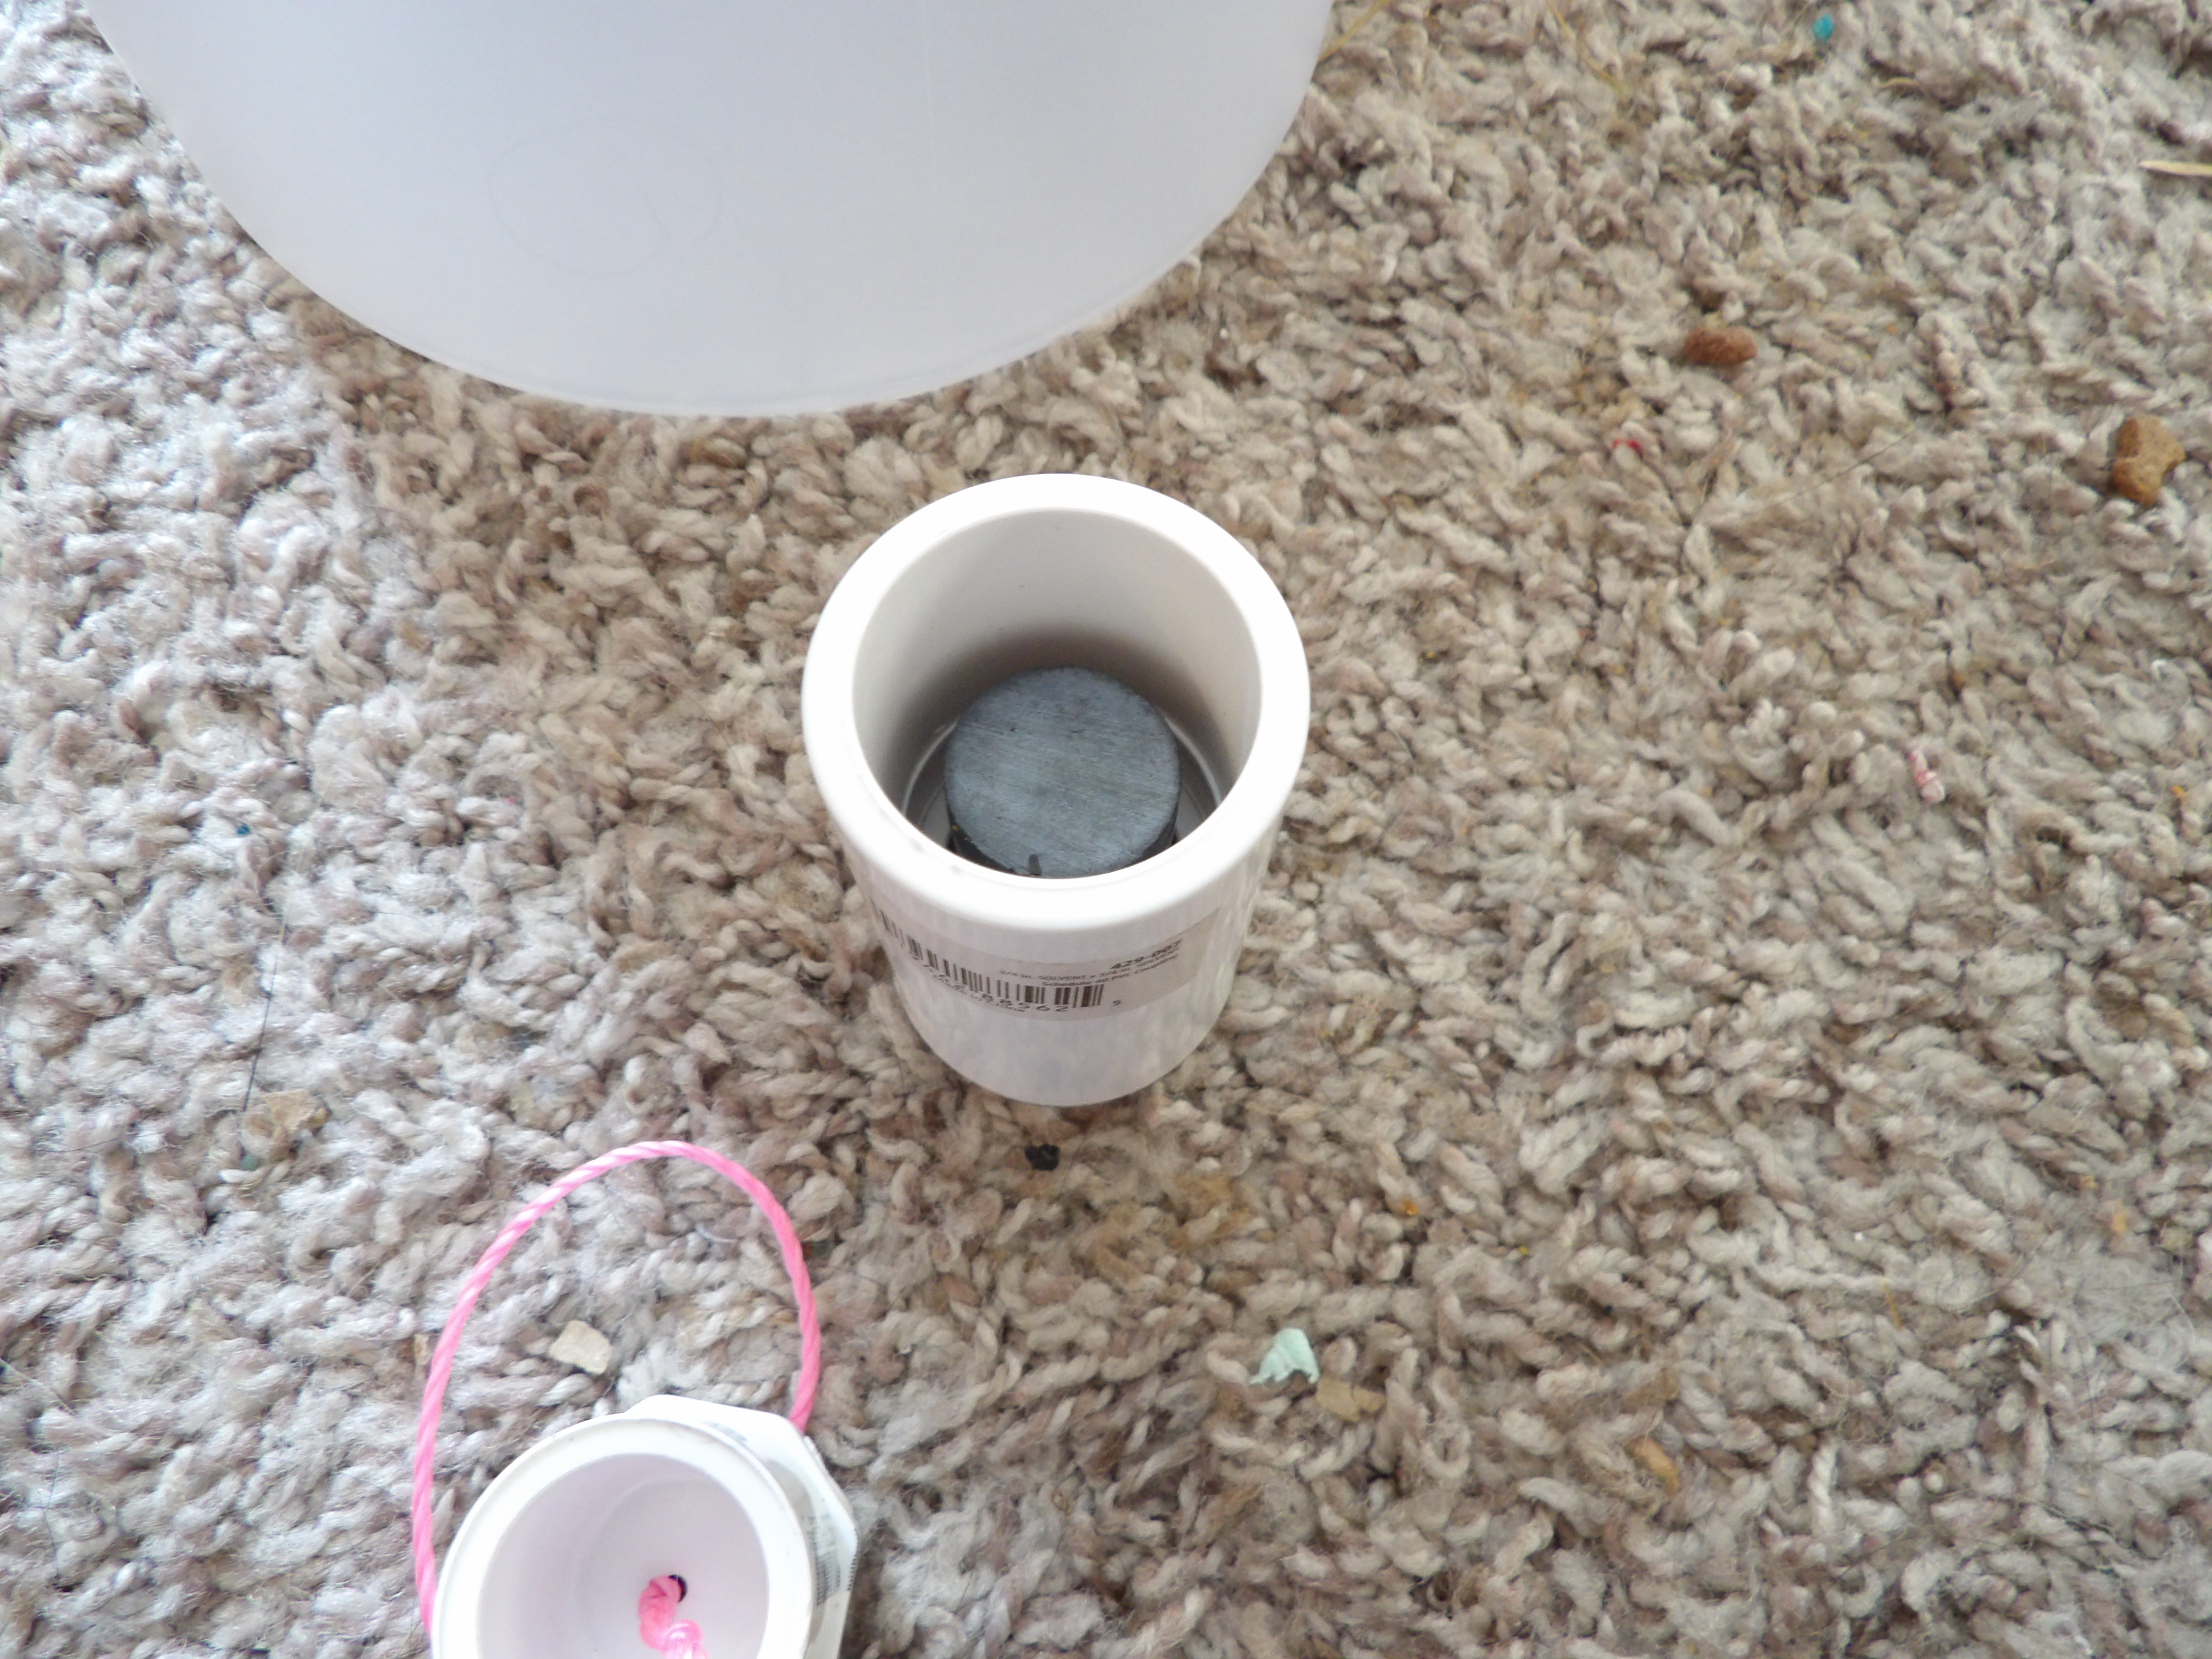
Put the PVC coupling on the PVC plug with the magnet stack. Add any extra weight if desired, but it will work fine with the weight of the magnets.
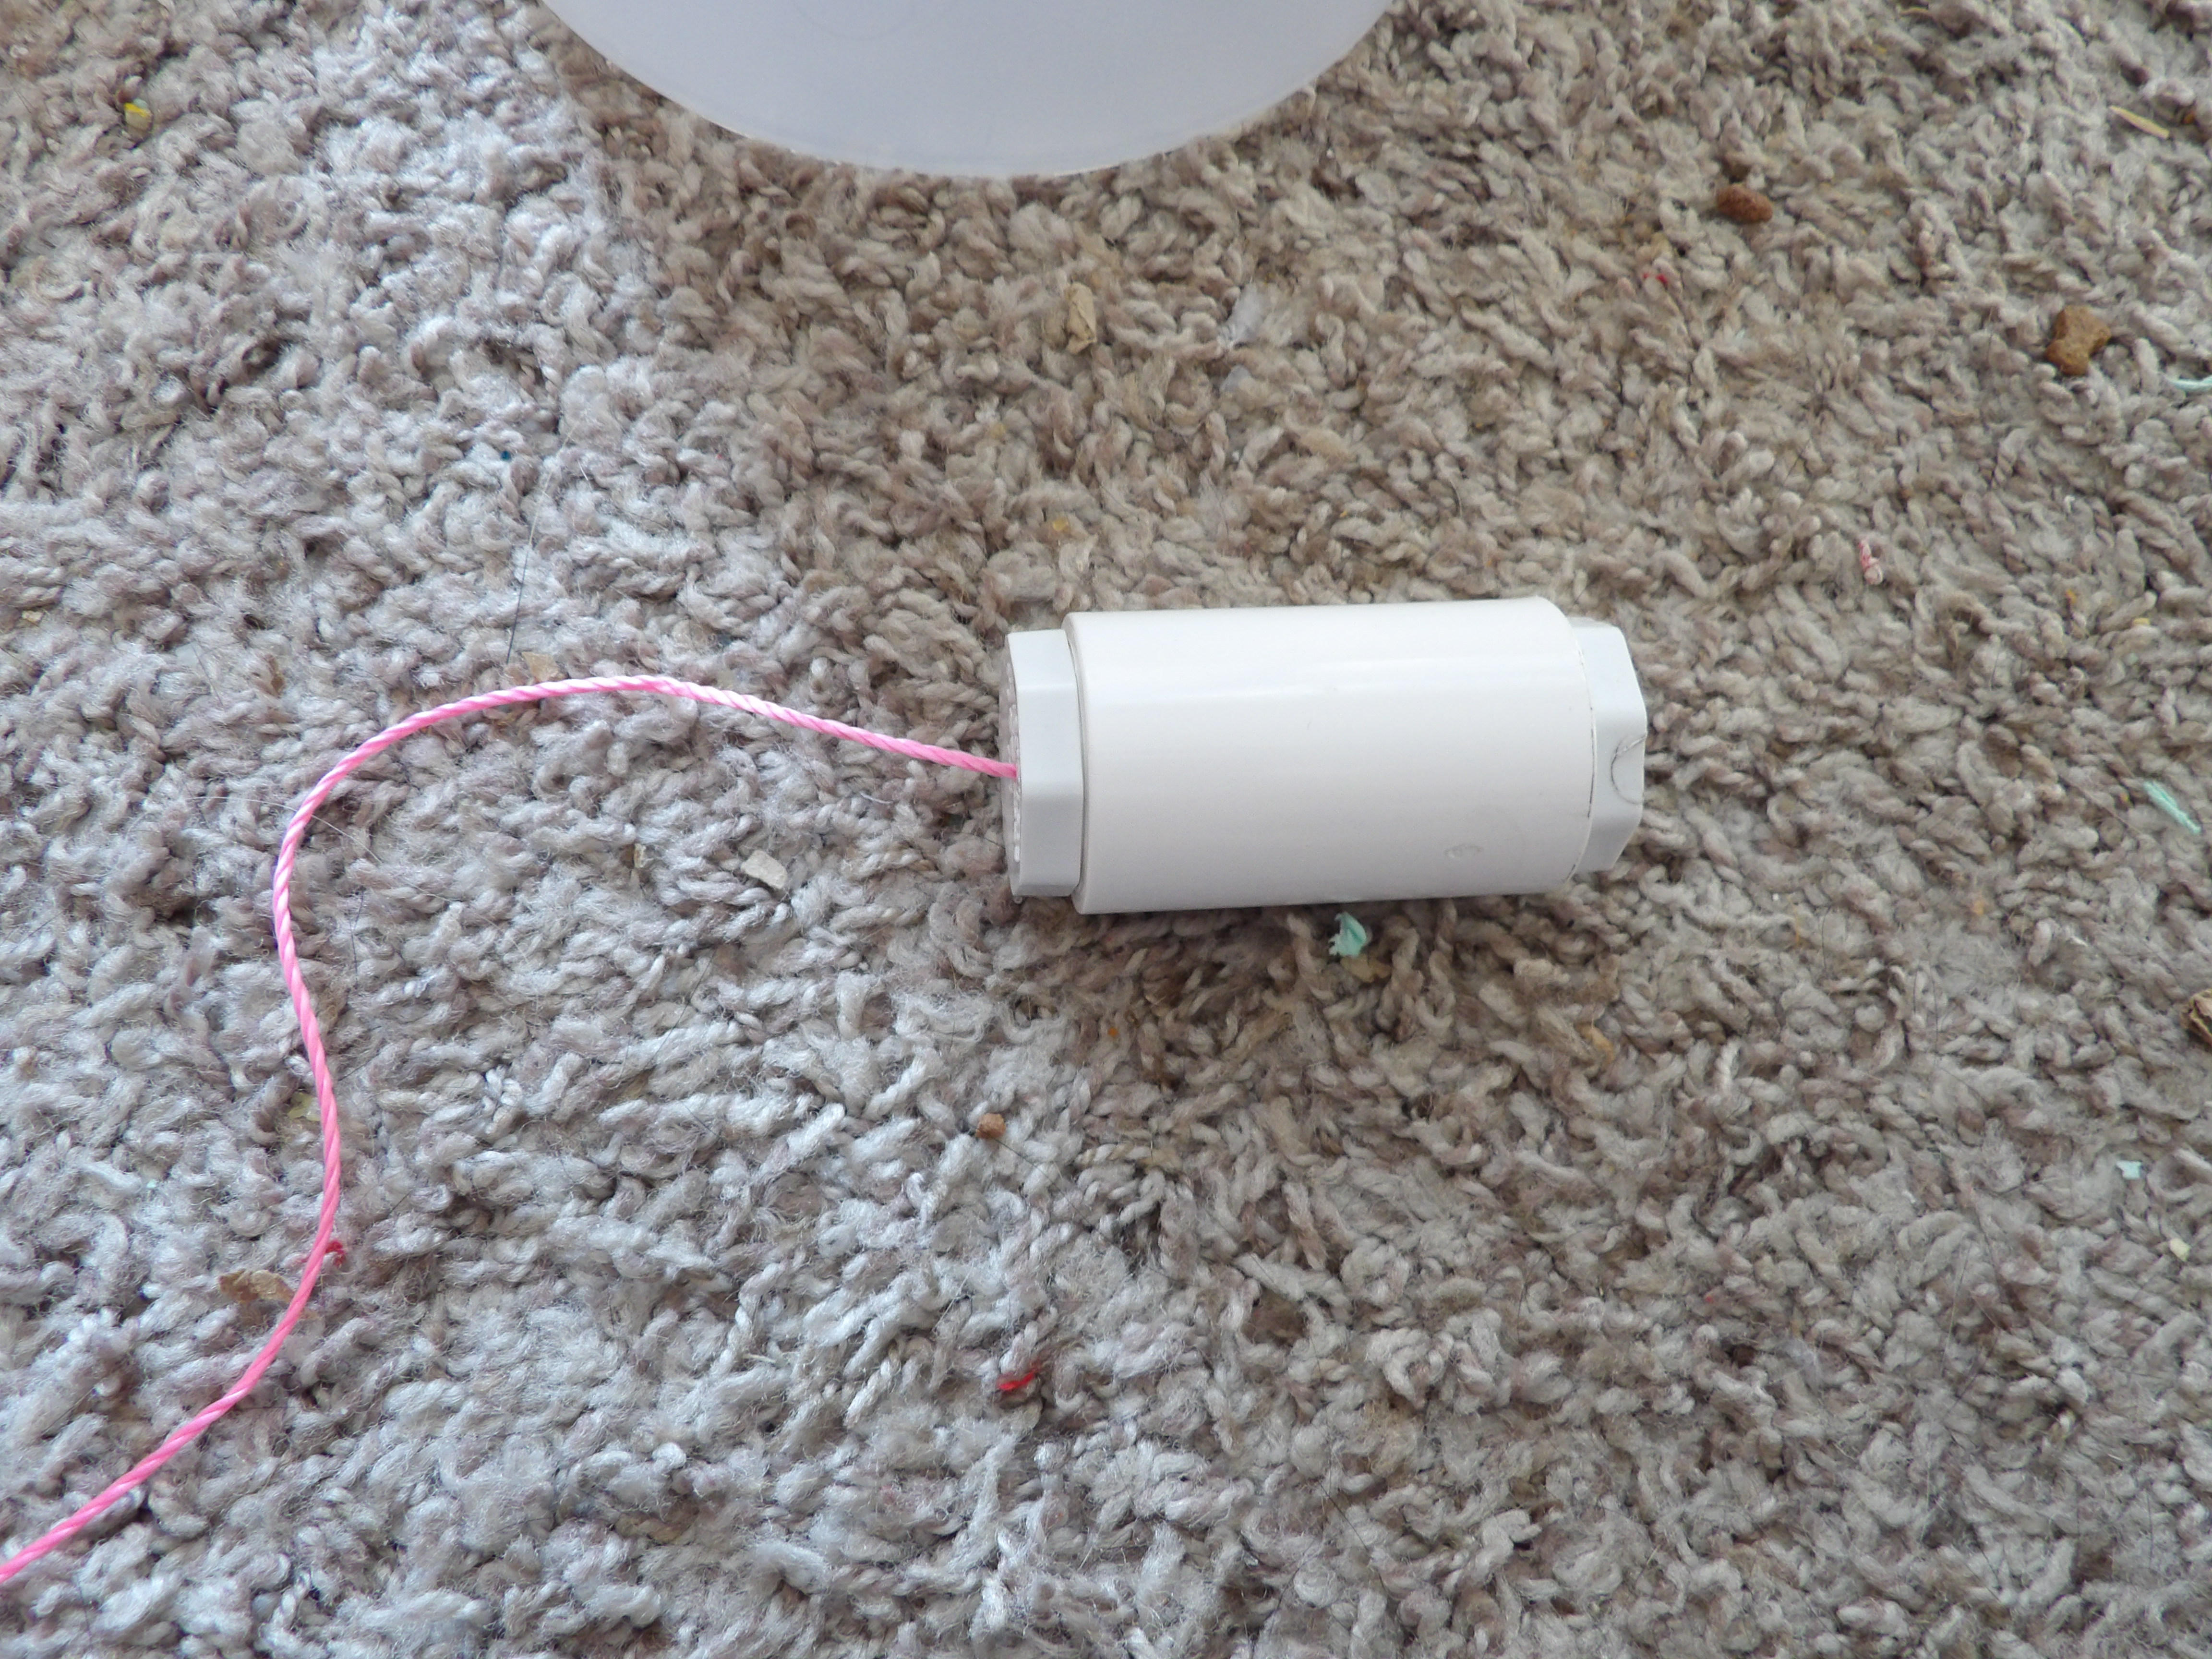
Assemble the PVC plugs like shown. No need to use cement. Just push them together tightly.
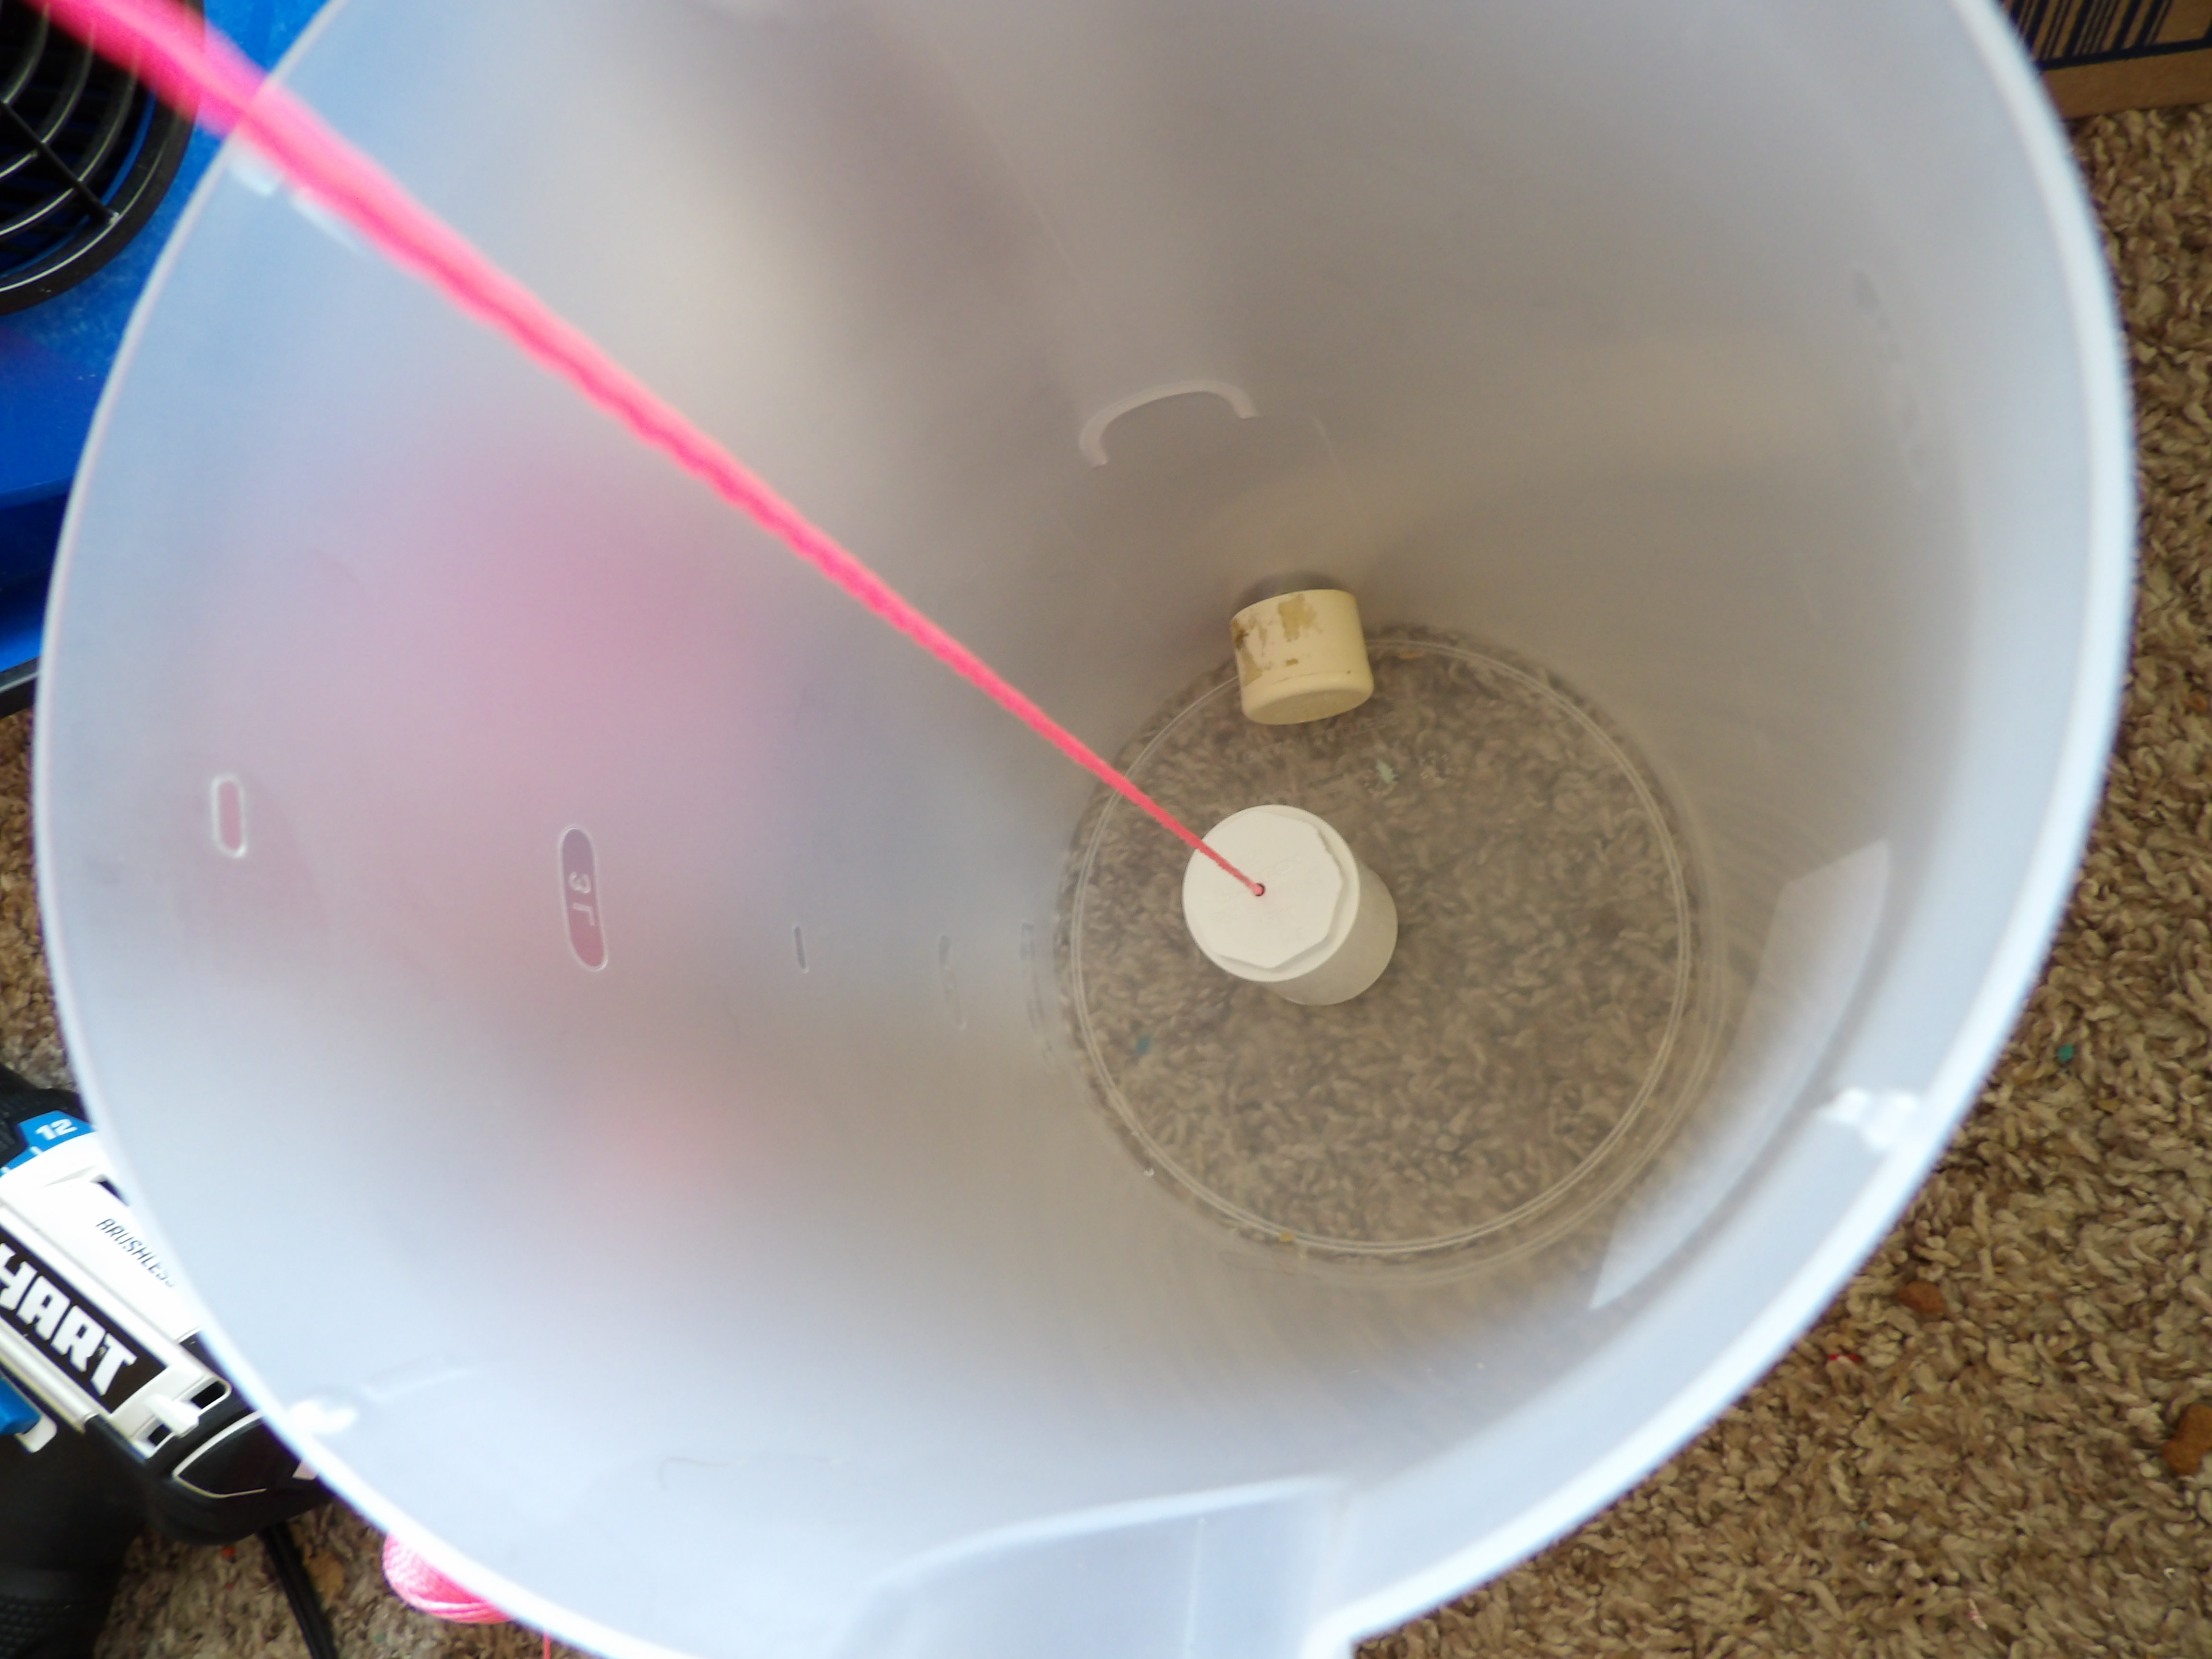
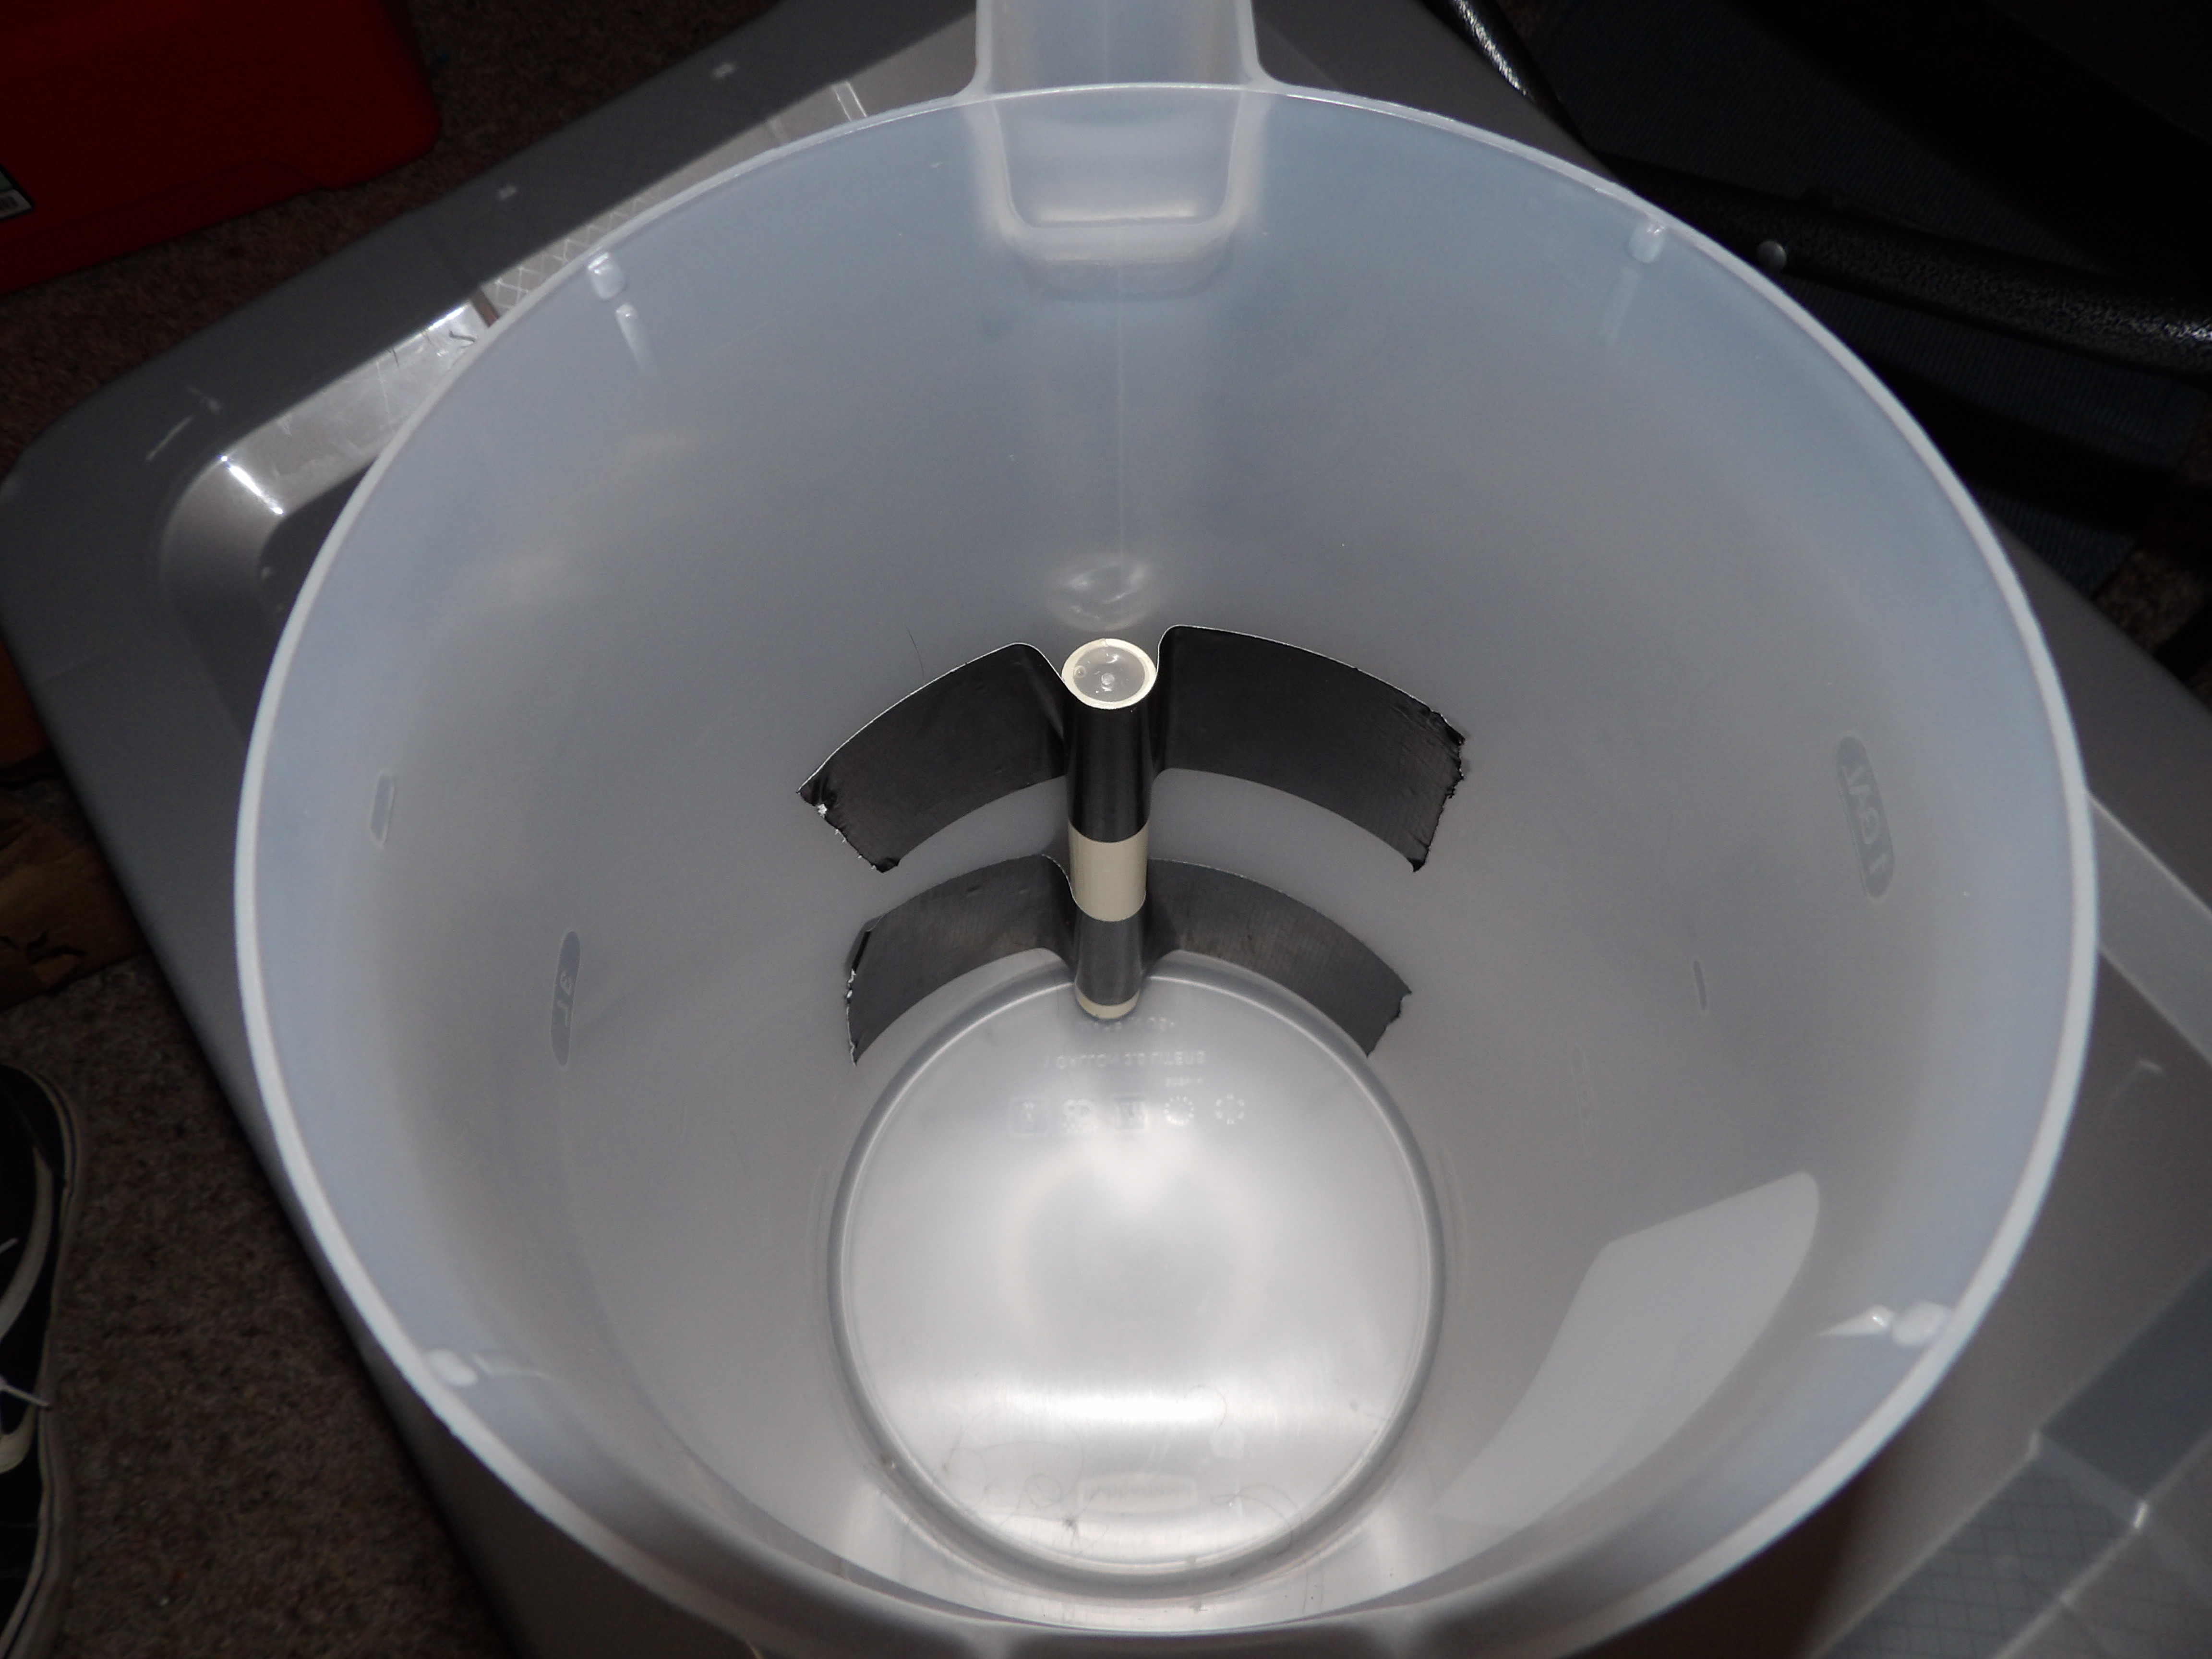
The magnet mass will be suspended like this, right over the center in the pitcher. For more sensitivity you can suspend the mass an inch closer to the sensor.
Drill a small hole in the center of the lid, pull the twine through. You will tie a knot in it after pulling it tight later on.
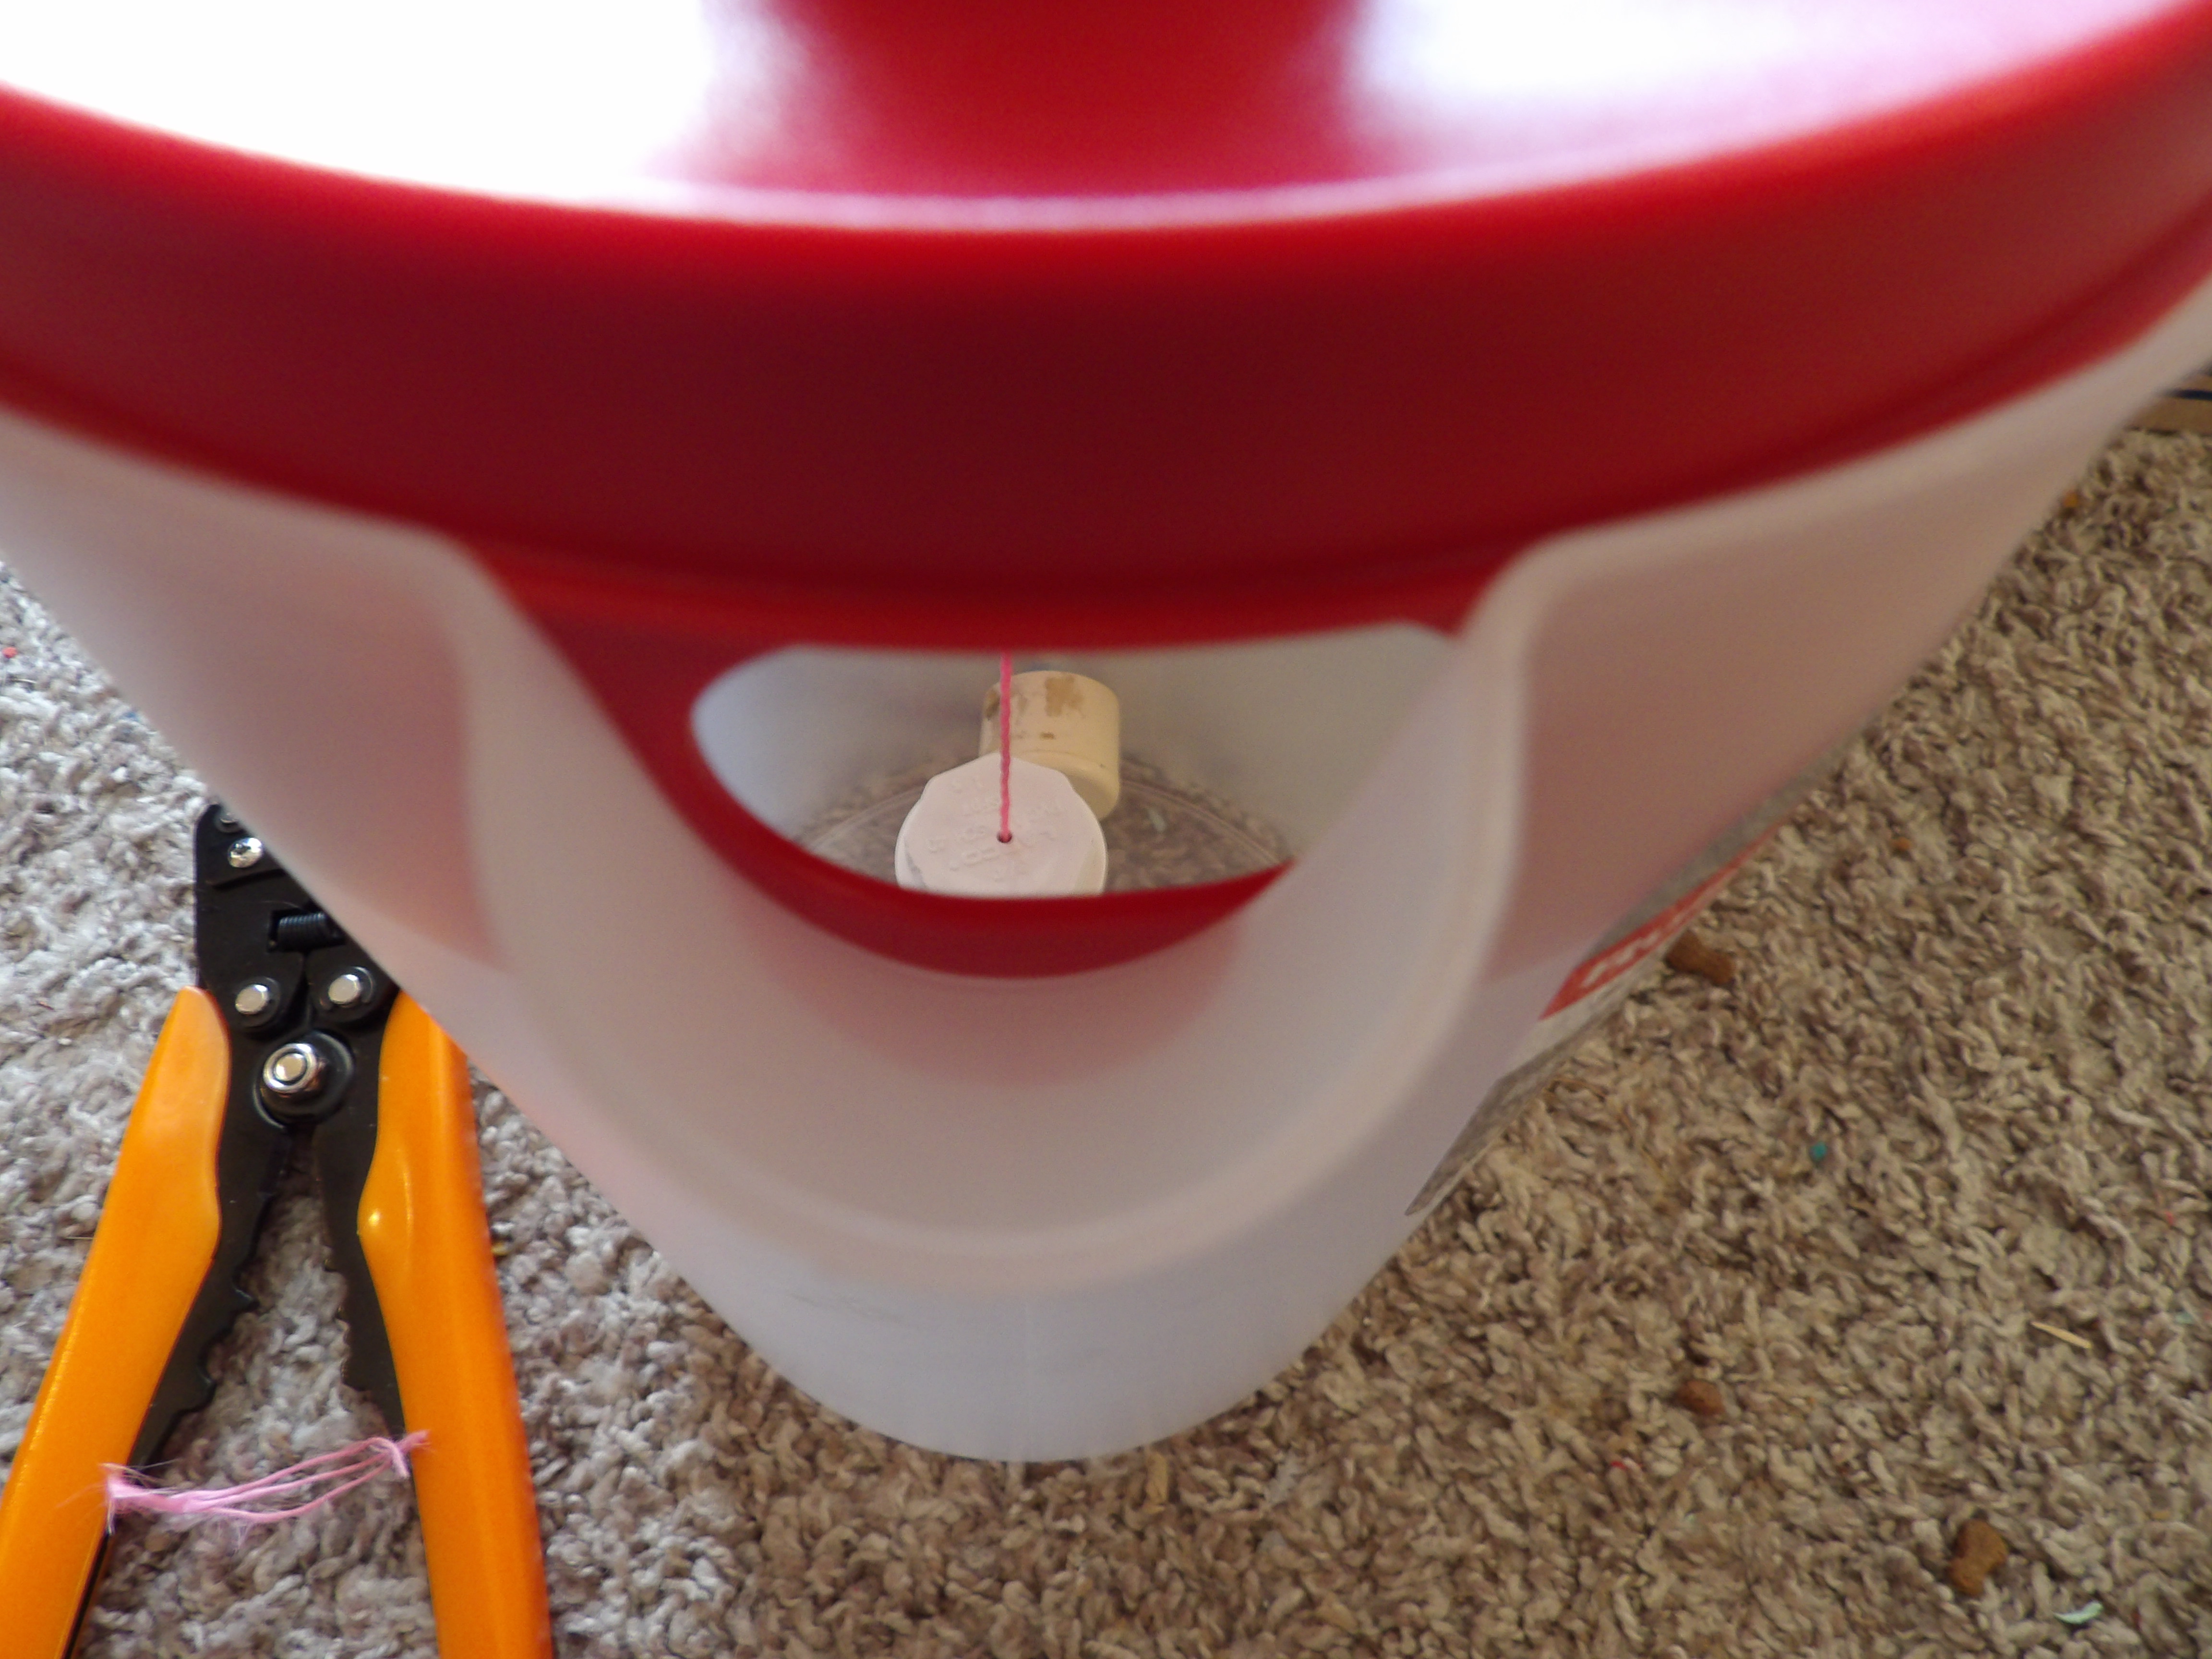
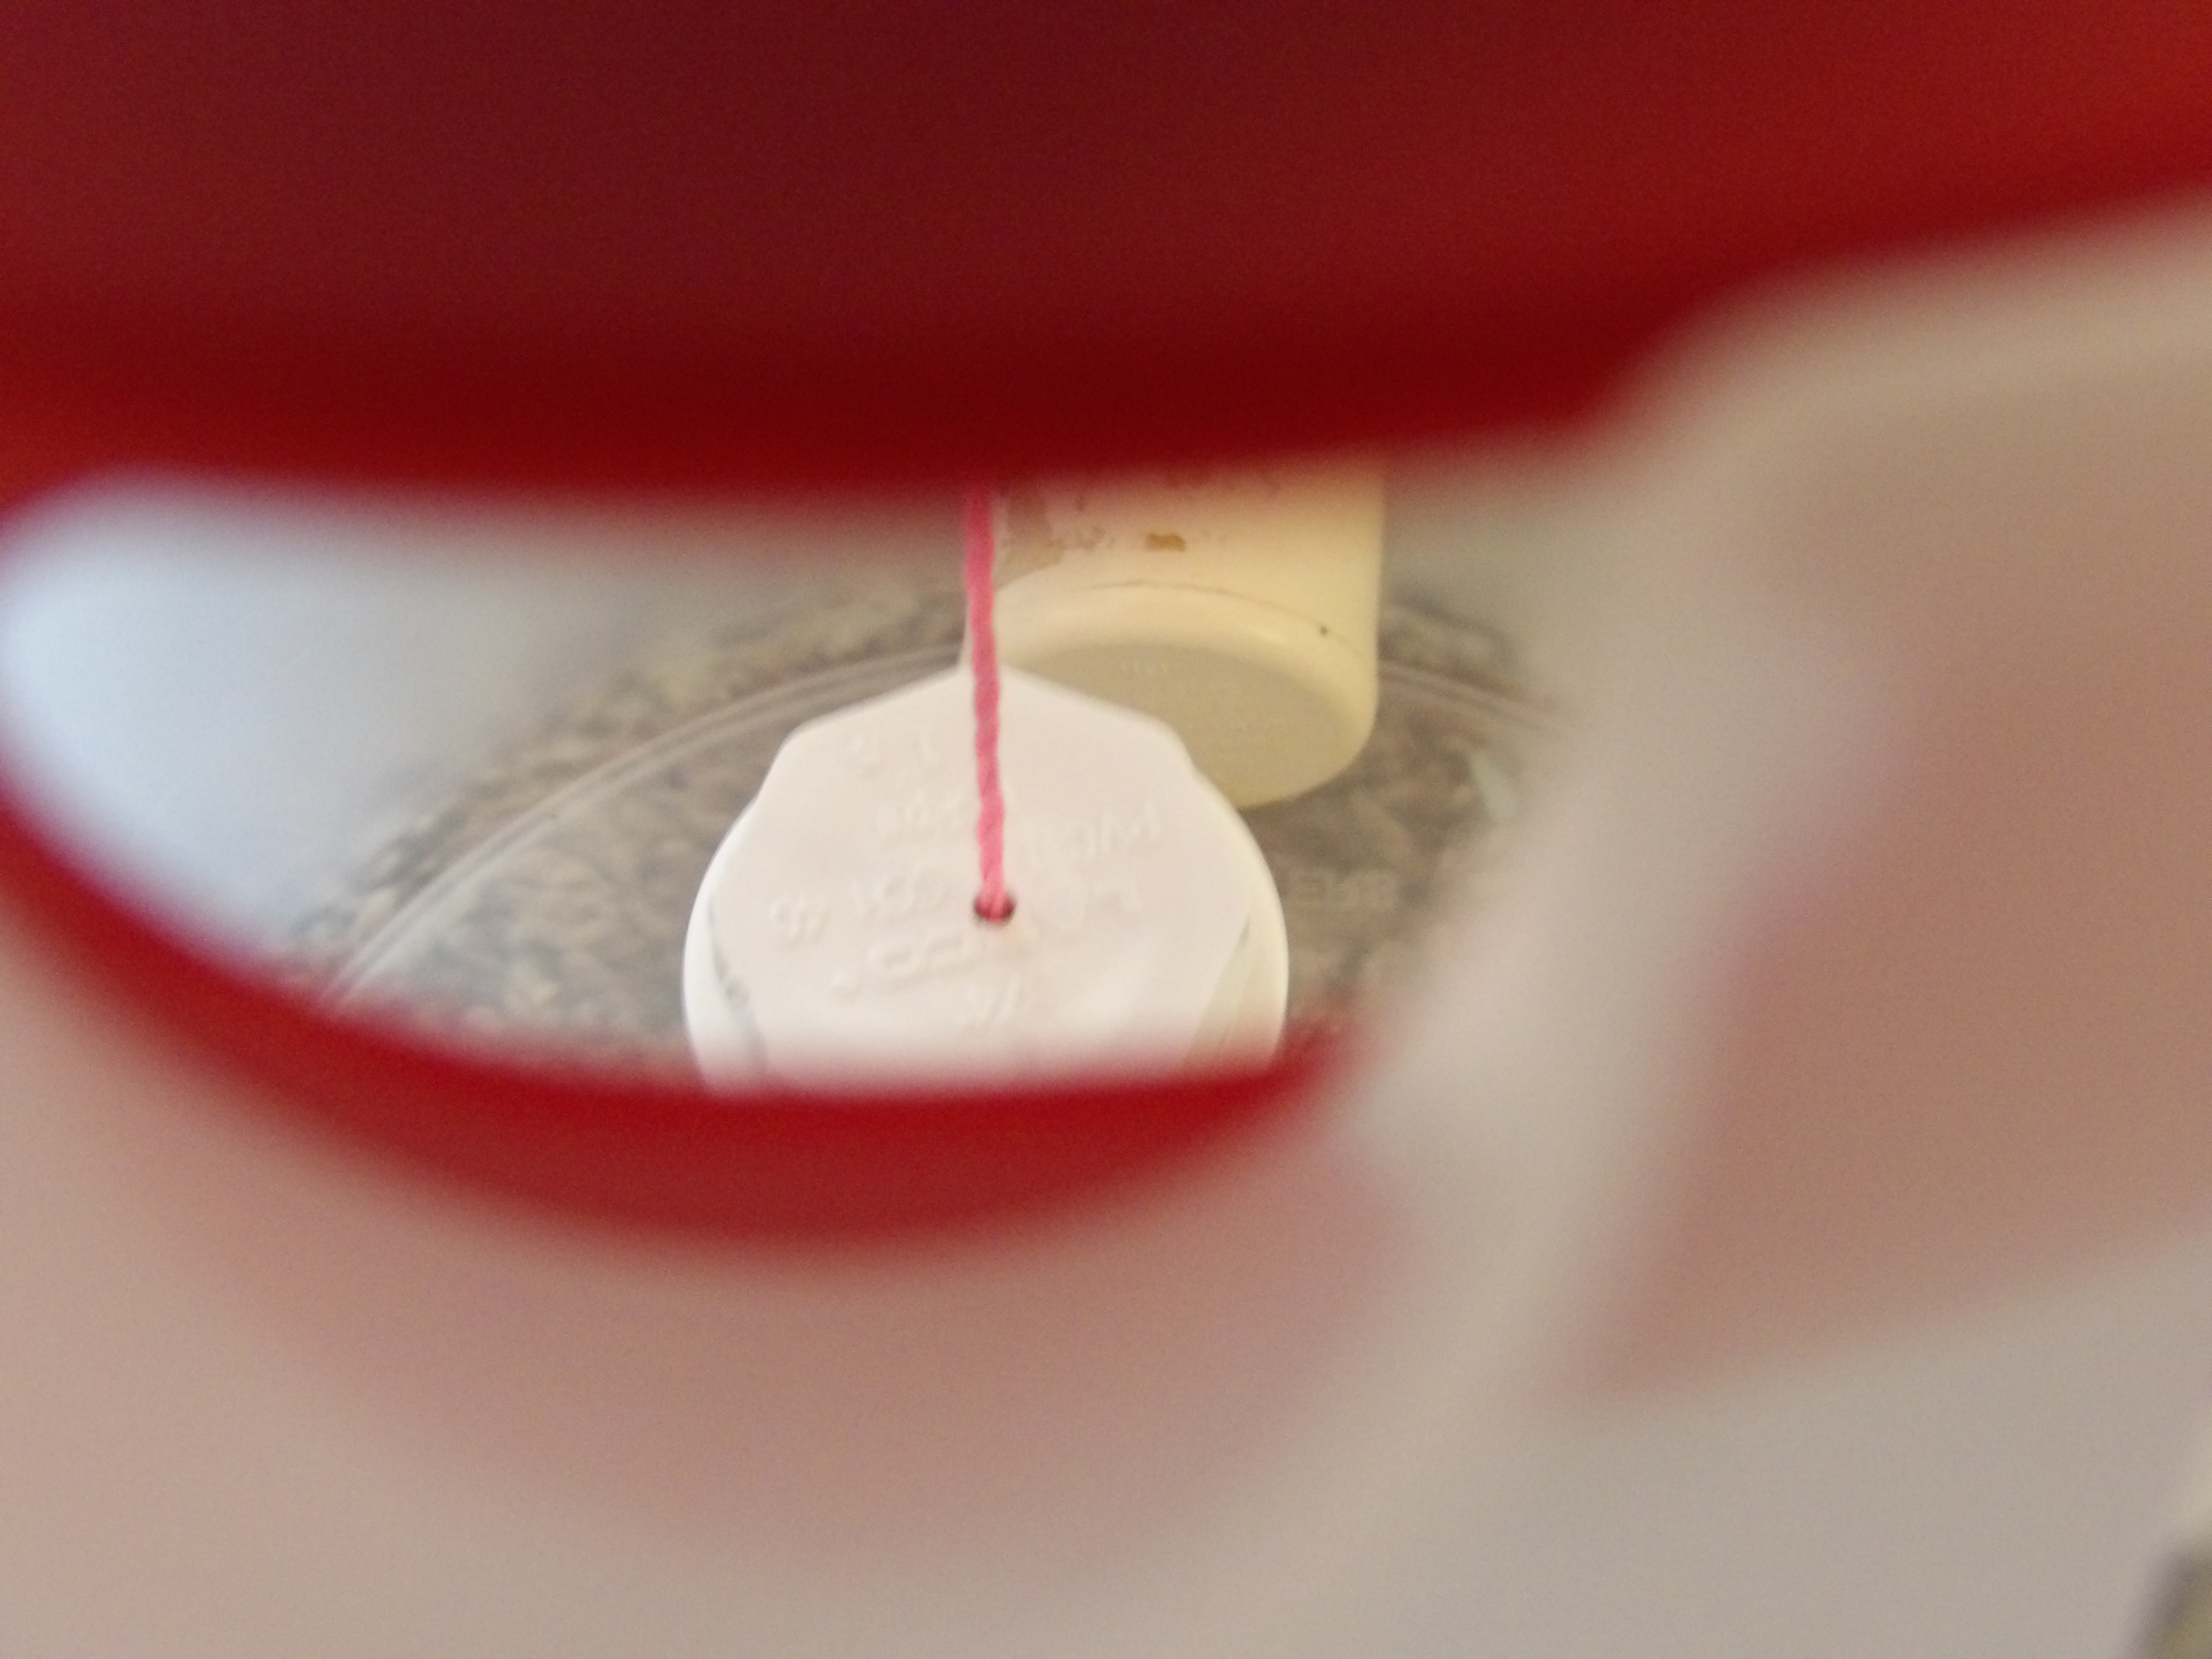
The magnet mass should be suspended with the twine, and it should be about 1/2 to 1 inch above the bottom of the pitcher. Pull the twine tight and tie a knot in it.
You can see through the pitcher to make sure the alignment is correct.
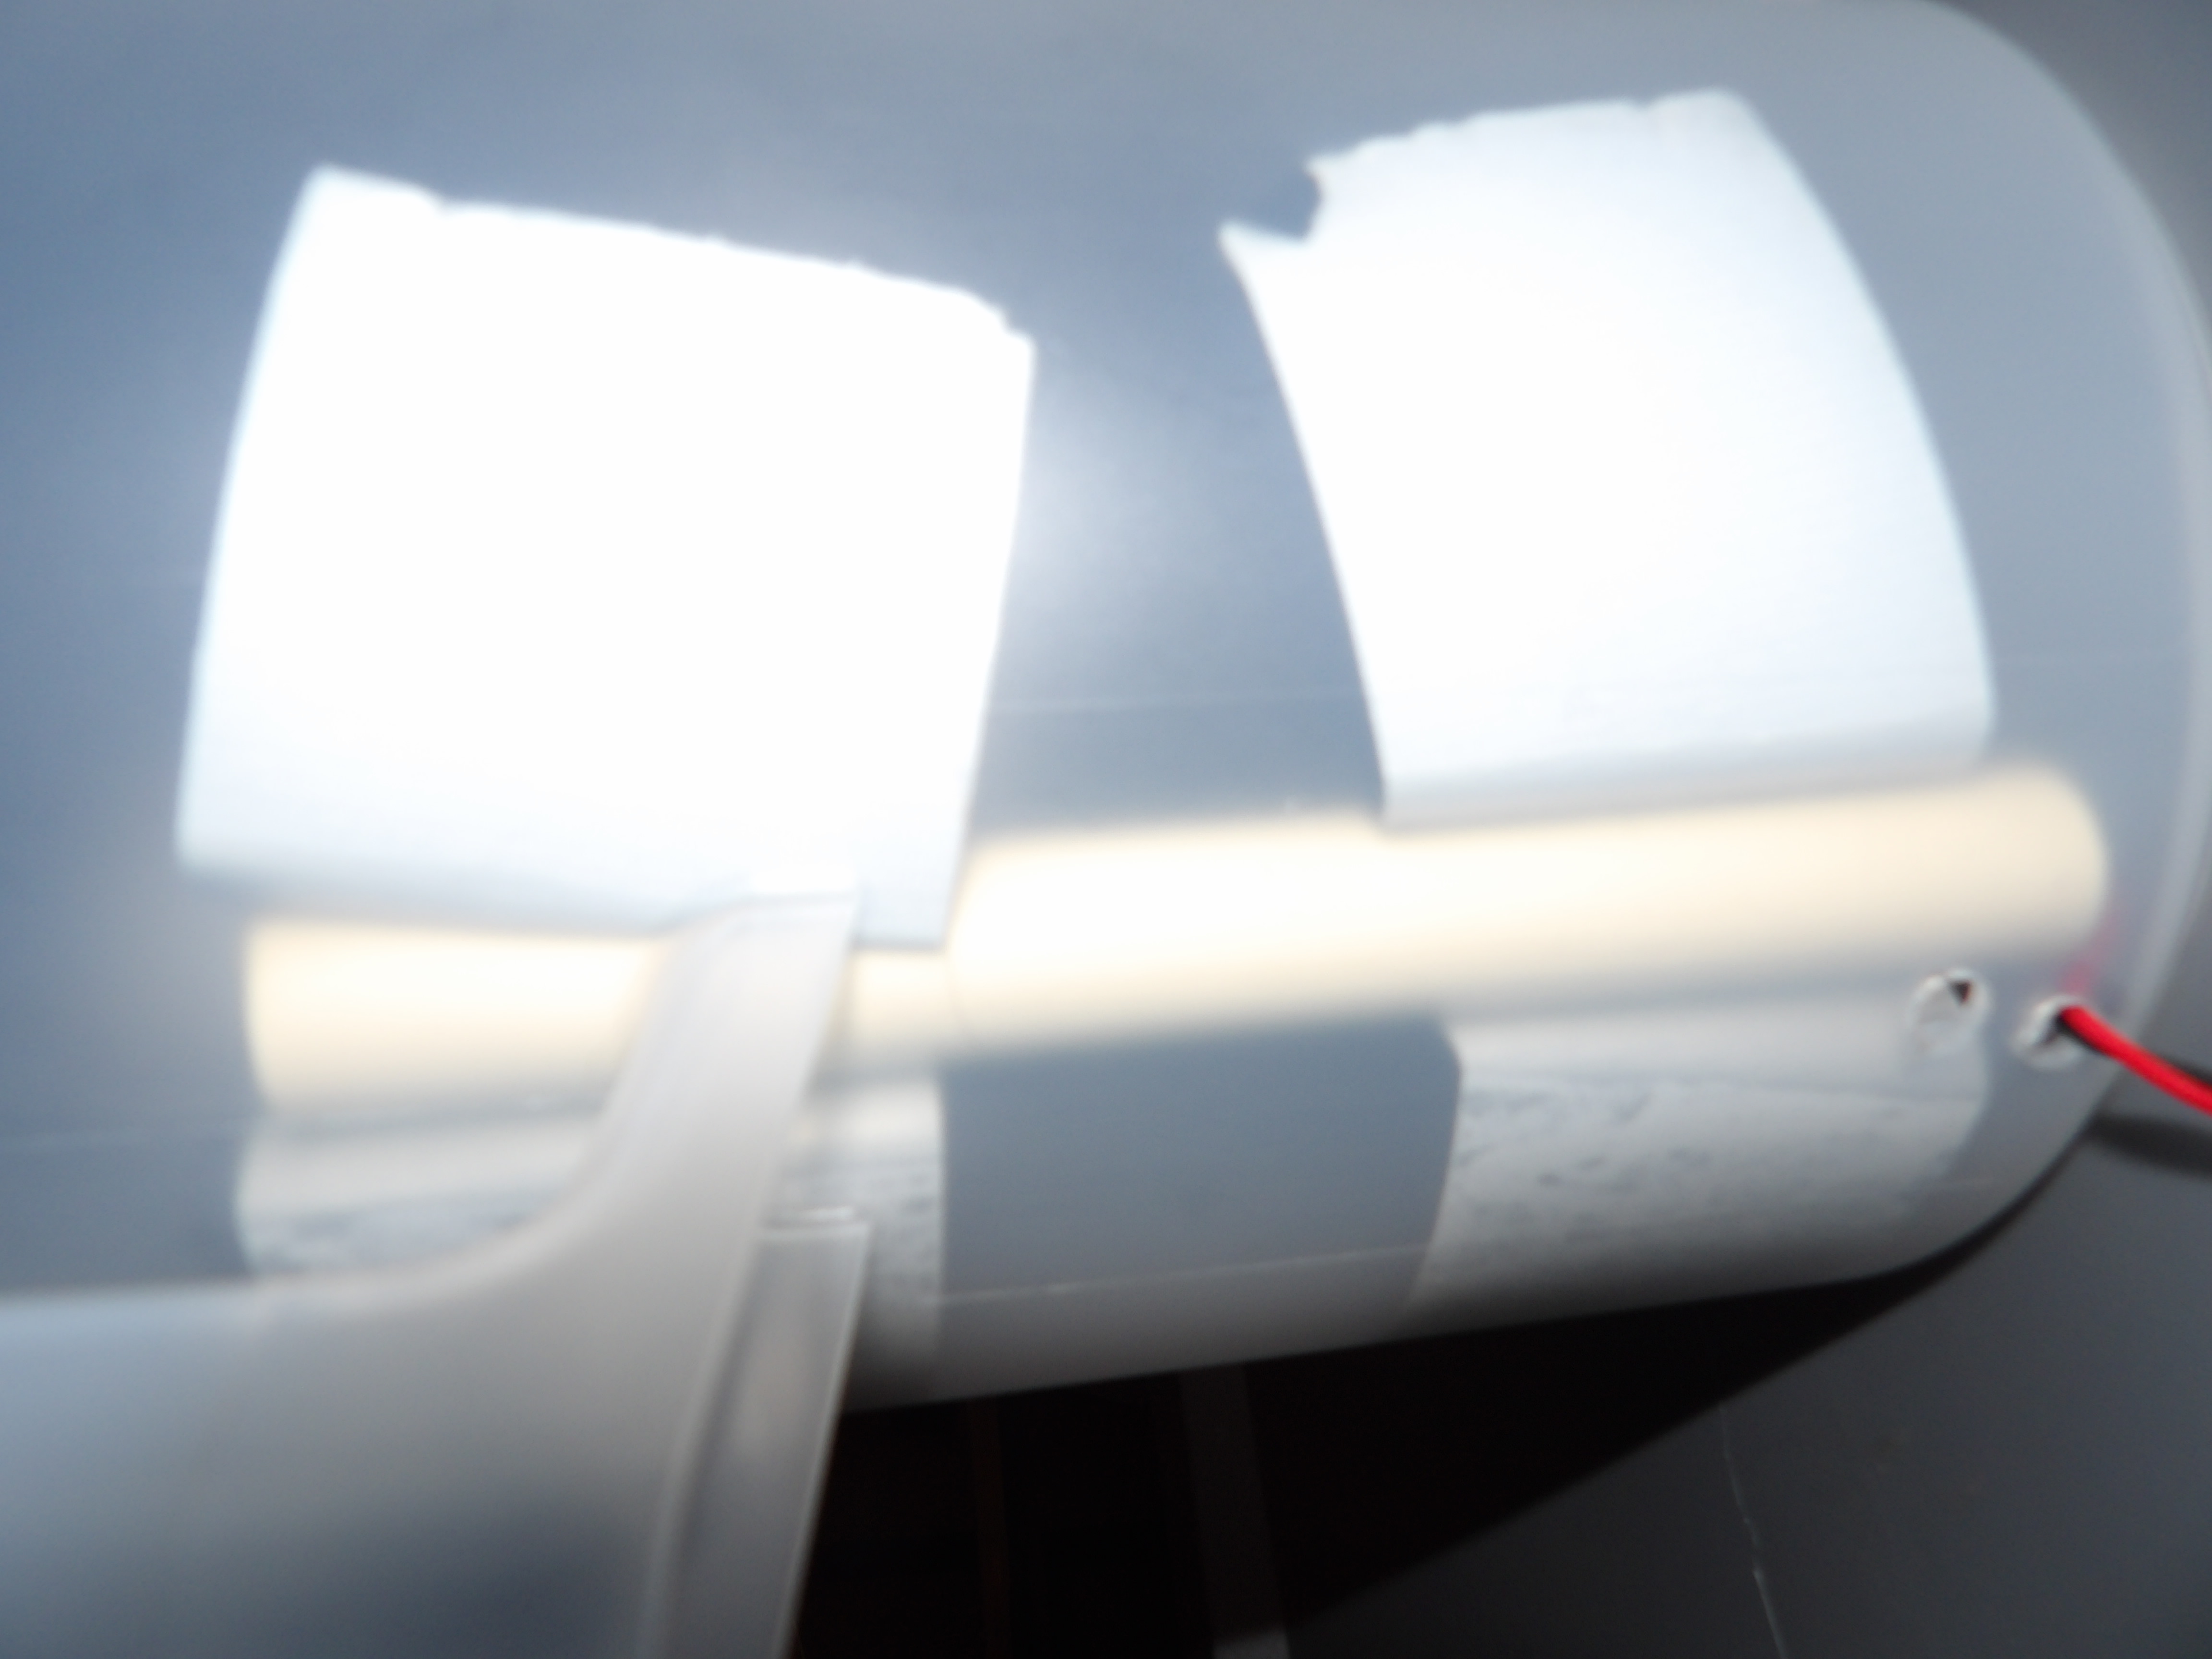
Place the unit on a concrete slab, and place a bucket over it, with a brick on top, to protect from wind and rain.
The transistor seismograph electronic circuit should be built into a case, seal it from air drafts, and should be located indoors.
Alternate design with our part # MMAG1 sensor, instead.
RECORDING SOFTWARE AND HARDWARE from www.dataq.com.
DATAQ SOFTWARE AND HARDWARE (13 bit data resolution. Best unit, higher signal gain.)
DATAQ SOFTWARE AND HARDWARE (8 bit data resolution. Inexpensive PC data logger.)
This one does not need any external amplifiers.
Seismic waves have a frequency range between 0.3 Hz to 3 Hz. For best seismograph performance use the center of the band between 1 Hz to 1.5 Hz.
With the parts and sizes shown, the resonant frequency is just above 1 Hz for this one.