|
|
|
|
|
DETECT EARTHQUAKES!
0.1 Hz - 30 Hz
This 7 inch long ELF antenna is for use in seismographs.
The antenna has a response of 0.1 Hz to 30 Hz. Solid Mu Metal Core for highest magnetic sensitivity.
Weather-proof.
Part number (mu metal core) 6MU-1H-30H is $ 199.95 + $ 8.00 s/h US Mail Priority.
Part number (Iron core) 6SR-1H-30H is $ 99.95 + $ 8.00 s/h US Mail Priority.
Data Sheet for this ELF antenna
To build this project you will need the following parts shown below on this page, including a 5-gallon plastic bucket, available at LOWES, WAL-MART, or HOME DEPOT, or other hardware store. Don't forget the lid for the bucket.
The following photos show how to build the seismograph from common parts:
PARTS:
Stormwise ELF Antenna Part # 6MU-1H-30H.
5 Gallon plastic bucket with lid. ( LOWES ).
Glass jar with lid. (Grocery Store Item )
1 inch diameter ceramic magnets. Enough to make a stack 4.5 inches tall. ( LOWES ).
16.5 inch long X 0.5 inch CPVC pipe. ( LOWES )
12 oz of clean beach sand from any craft store or ( LOWES )
1/8th inch x 18 inch nylon cord rope. ( LOWES )
TOOLS:
Battery powered drill
5/8 inch drill bit (for drilling holes for CPVC pipe to fit thru).
1/8th inch drill bit ( for drilling hole in CPVC pipe).
Ruler or tape measure.
Hacksaw or PVC pipe cutter.
ASSEMBLY:
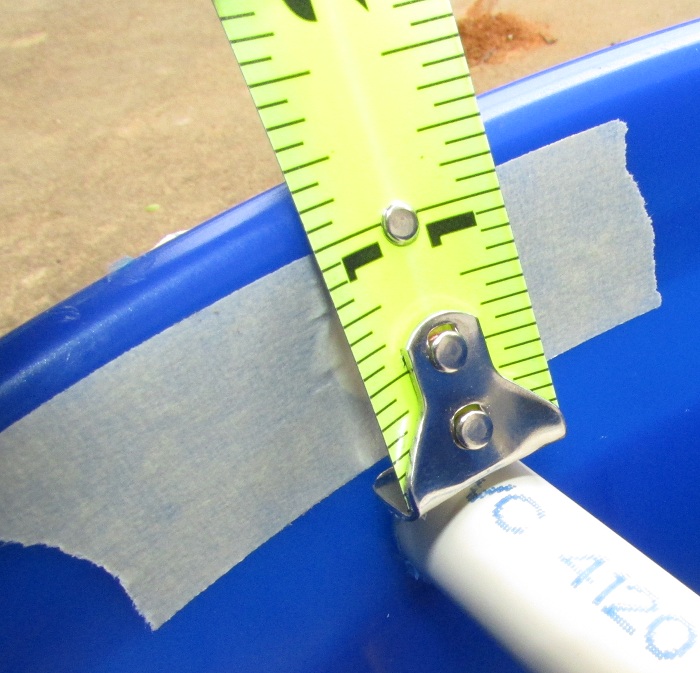
Using the 5/8 inch drill bit, drill hole 1.25 inch down from top of bucket. Make sure the lid can fit without coming down over where this hole is. You can use the handle location for center reference. If you find it easier you can just remove the handle and drill out the holes where the handle was in.

Cut the CPVC pipe to 16.5 inches long.
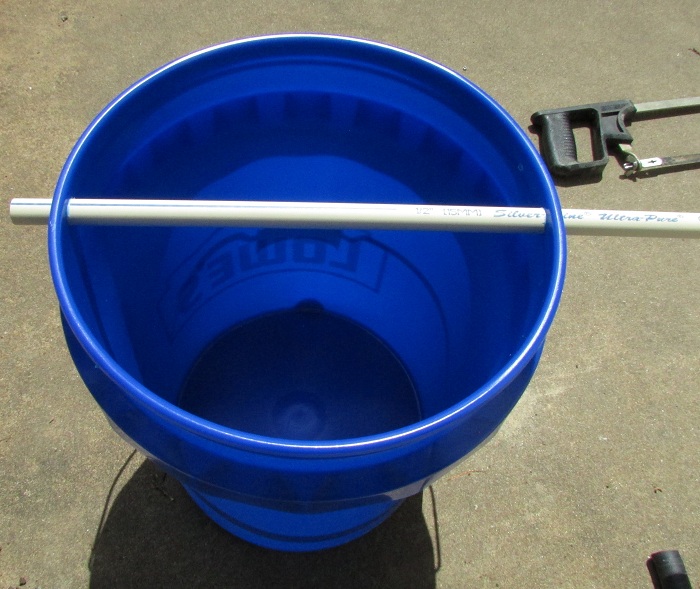
Slide the CPVC pipe through the 5/8ths inch holes you drilled in the bucket. Notice how there is more pipe on one side than the other in the photo. This is so you can slide the pipe back and forth to adjust the spacing in the seismograph.
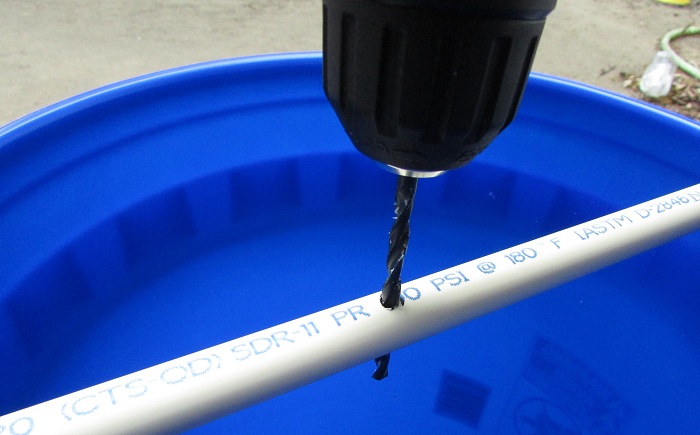
Drill thru the CPVC pipe using the 1/8th inch drill bit. The hole should be located 7 inches from one end of the pipe. In the photo the left side was used for the starting point of the measurement.
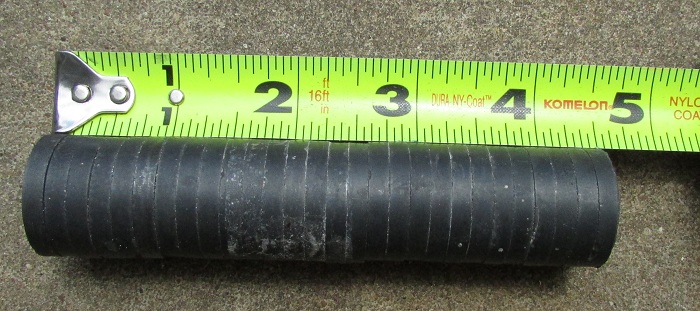
Stack of ceramic magnets. These are available from LOWES, and have a rating of about 300 gauss, and are 1 inch diameter. Larger or more powerful magnets can be used also.
Place the magnets centered in the glass jar.
Pour dry sand over the magnets, enough to fill the jar up completely.
Drill a 1/8 inch hole in the center of the lid. Place the nylon cord thru the hole and tie a small knot so it can't be pulled out. When drilling be careful and clamp down the lid while drilling so if the drill bit 'bites' into it, it won't slide up the spinning drill bit.
The magnet mass jar is complete.
Cut a small length of nylon rope. 5 or 6 inches.
Tape the nylon rope to the bottom side of the jar. This helps to reduce the length of time the jar will swing after an earthquake is detected. The shorter the swing time, the better the resolution will be.
Mark the center of the ELF antenna, and the center point of where the magnet stack is in the jar. These two points should be level with each other when the jar is suspended by the nylon rope.
Tape or hot-glue the ELF antenna to the side of the bucket, in line with the CPVC pipe, so that the jar when suspended will be directly next to it.
Suspend the jar with the sand and magnets by using the hole in the CPVC pipe. Align the mark you made on the jar with the mark you made on the antenna. Once done, slide the CPVC pipe so the jar is less than half an inch from the ELF antenna.
NOTE: The swing period of the jar should be between 1.0 Hz to 1.2 Hz. This is controlled by the length of the rope suspending the jar. Our seismograph turned out to have a swing period of 1.126 Hz, measured by the FFT function of the data logger ( available from www.dataq.com ) that we are using.

Make sure the nylon rope on the bottom of the jar is laying on the bottom of the bucket. This small rope piece limits how long the jar will swing after an earthquake is detected. You may want to experiment with this piece.
Other methods of dampening are possible if you want to experiment: One way is to place a 1/8th inch thick aluminum plate directly 1/4th inch below the jar, then adding a 2-inch diameter ring magnet to the bottom of the jar, so the magnet will create an opposing field in the aluminum upon jar movement.
The seismograph assembly is complete.
The seismograph placed outdoors on a concrete porch. Ready to be connected to the ELF Receiver circuit, shown below.
You can build this simple 1 chip ELF Receiver for use in this seismograph.
Parts values shown for tuning to 1 Hz with 6MU-1H-30H for use as a seismograph.
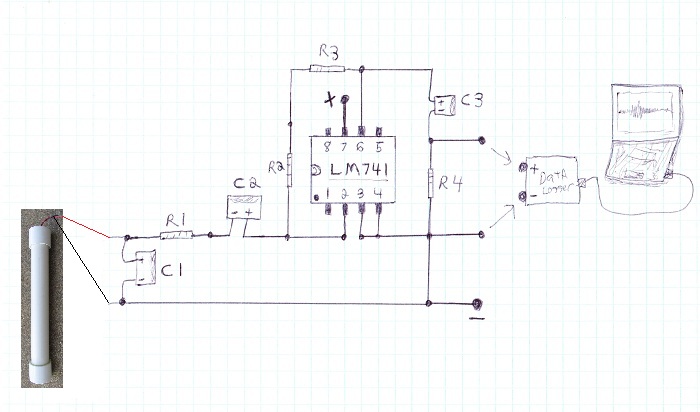
This sensitive receiver uses one IC chip, the LM-741. Output is an AC voltage that can be sent to an analog volt meter or data logging volt meter. Makes an excellent seismograph when used with our 6MU-1H-30 Hz ELF antenna.
PARTS:
IC1 = LM 741 OP Amplifier IC.
R1 = 22 K-ohms
R2 = 10 Meg ohms
R3 = 10 Meg ohms
R4 = 22 K-ohms
C1 = Tuning value needed for antenna: 100 uF for 1 Hz with 6MU-1H-30H.
C2 = 1 uF
C3 = 100 uF
D1, D2 = 1N914 silicon diodes for static protection (we added them later, see photo below).
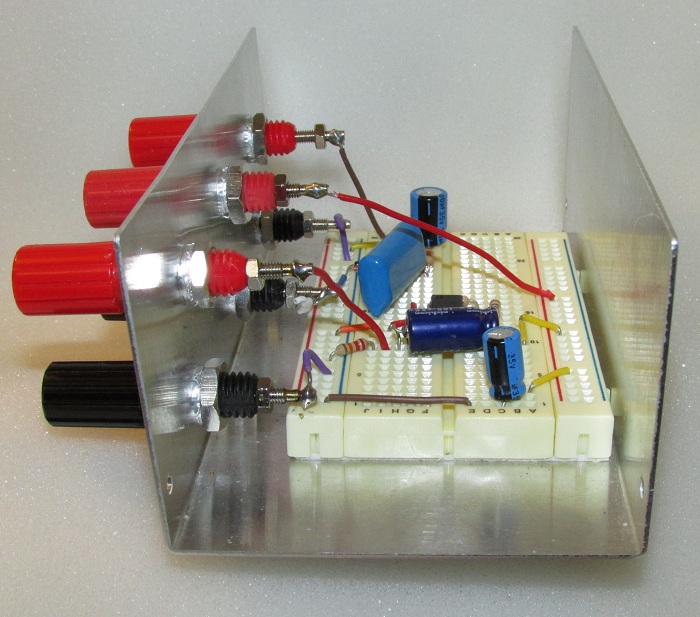
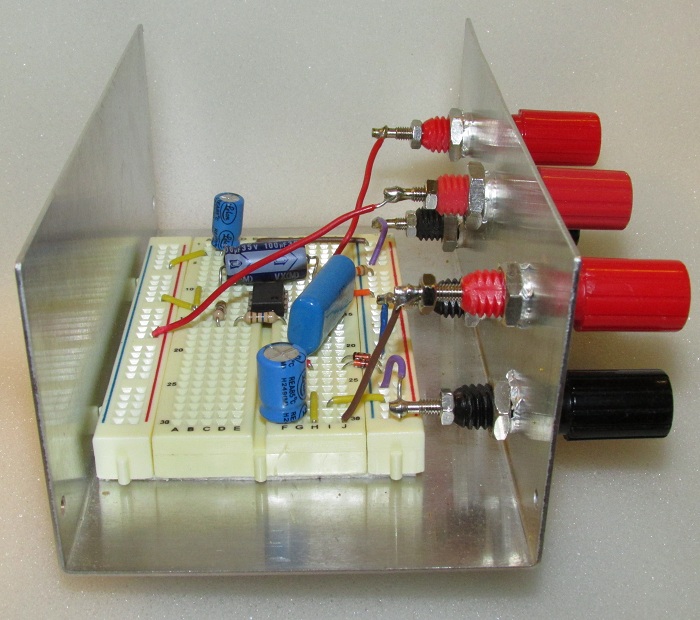
Assembly: The circuit can be assembled in less than 30 minutes, cleanly, on an experimenter's breadboard socket. Changes can be quickly made if needed: No soldering, unless you add the binding post connections like shown.
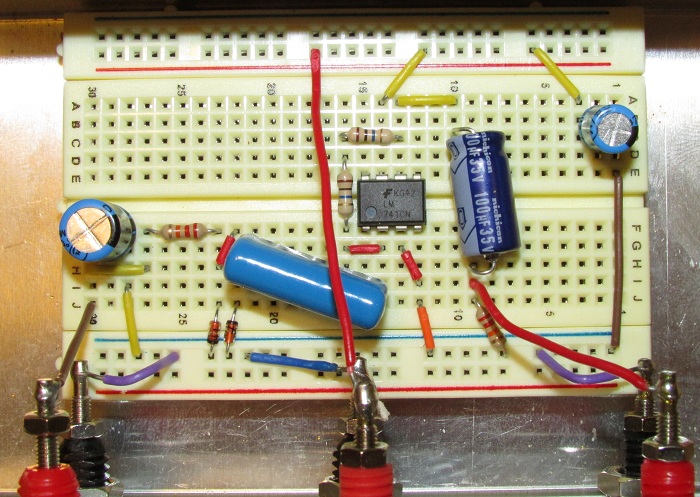
Power the circuit with a 9 volt rechargable battery. The circuit will also work on a 6-volt or 12 volt lantern rechargable battery. Current draw is less than 2 mA for long battery life.
When the power is first turned ON, allow @ 30 seconds for all the capacitors to charge up before the receiver starts working.
The circuit can drive analog volt meters back and forth when an earthquake is detected when used as a seismograph (see the link above on this page for plans).
Connect the output to a data logging volt meter or oscilloscope to allow making graphs of received ELF waveforms. See www.dataq.com for excellent PC data logger hardware and software.
Circuit modifications:If receiving well below 1 Hz, then change C2 to a higher value, such as 10 uF or 47 uF. This may cause circuit to need more time when first turned ON to begin working, up to 3 minutes or more.
C3 can be changed to as high as 4700 uF to pass extremely slow waveforms. Again changing this value will require more start up time when first turned ON, up to 3 minutes or more.
R1 should not be made less than 10 K-ohms.
FIRST EARTHQUAKE RECORDED:

Magnitude 3.9 earthquake was 9 km NNE of Stillwater, Oklahoma at time of 01:47:32 (UTC) on April 09, 2017.
Depth: 5.1 km
RECORDING SOFTWARE AND HARDWARE from www.dataq.com.
DATAQ SOFTWARE AND HARDWARE (13 bit data resolution. Best unit, higher signal gain.)
DATAQ SOFTWARE AND HARDWARE (8 bit data resolution. Inexpensive PC data logger.)
Seismic waves have a frequency range between 0.3 Hz to 3 Hz. For best seismograph performance use the center of the band between 1 Hz to 1.5 Hz.